Setting Up an Extract Group
In HEC-RTS, an extract refers to transferring data from a source (e.g., Oracle database, Cumulus, CDA, or HEC-DSS file) into the forecast.dss file. Extract Groups organize and manage these data transfers efficiently.
This guide walks you through setting up an Extract Group.
Prerequisites
Before you begin, ensure you have access to the data source(s) and the necessary credentials to access the data.
Step 1: Open the Extract Editor
- Launch HEC-RTS and open your watershed.
- Go to the Setup tab.
- In the Models menu, select Edit Extract.
- The Extract Editor dialog will appear.

Step 2: Create a New Extract Group
- Click New Extract Group.

- The New Extract Group dialog will appear.

- Enter a Name for your new Extract Group.
- Choose a data type:
- Time Series
- Gridded Data
- Choose a source:
- For Time Series: DSS, Remote DSS, Oracle, CWMS Data API (CDA), or KIWIS
- For Gridded Data: Cumulus, DSS, or Remote DSS
Step 3: Configure Data Store Options and Time Window Settings
The options within the New Extract Group dialog will change based on the data type and source selected.
Time Series from HEC-DSS
- Choose Time Series as the Type.
- Choose DSS or Remote DSS as the Source.
- Select the source file:
- Click the ellipsis (…) next to the File box.
- Browse and select the HEC-DSS file, then click Open.
- Set Override Protections and Storage Options.
- Click OK to create the group.
Time Series from Oracle
Before proceeding with this step, ensure you are logged into the appropriate CWMS database.
- Choose Time Series as the Type.
- Choose Oracle as the Source.
- The source will default to the current database you are logged into.
- Set Override Protections and Storage Options.
- Click OK to create the group.
Time Series from CWMS DATA API
Refer to this guide for step-by-step instructions.
Gridded Data from HEC-DSS
- Choose Gridded as the Type.
- Choose DSS or Remote DSS as the Source.
- Select the source file:
- Click the ellipsis (…) next to the File box.
- Browse and select the HEC-DSS file, then click Open.
- Set Override Protections and Storage Options.
- Click OK to create the group.
Gridded Data from Cumulus
Refer to this guide for step-by-step instructions.
Cumulus is a USACE only resource. Access requires a CorpsNet or VPN connection and CAC authentication.
Override Protections and Storage Options
If Enable Override Protection is checked, only missing values will be replaced (no data will be overridden). If not checked, then data will be replaced if there is overlap.
For more information on the options available, refer to Override Protections.
Run by Default Option
Check Run by Default to have the Extract Group run automatically during the creation of a new forecast,
Time Window Settings
Set the time window for extracting:
- Start Options:
- Extract Start (default)
- Start of Simulation
- Forecast Time
- End of Simulation
- End Options:
- Extract Start
- Start of Simulation
- Forecast Time (default)
- End of Simulation
You can also specify offsets in the Offset field. You may want to include an offset to ensure that there is no missing data preventing you from running your models (important for irregular time series).
Step 4: Add Input Data
It's now time to select the input data to map to the selected source data.
Option 1: Required Inputs Method
- Select your Extract Group in the Extract Groups panel.
- Under Required Input, choose the records to add (hold CTRL to select multiple).

- Click Add to Group.
- The selected records appear in the Extract Linking table.
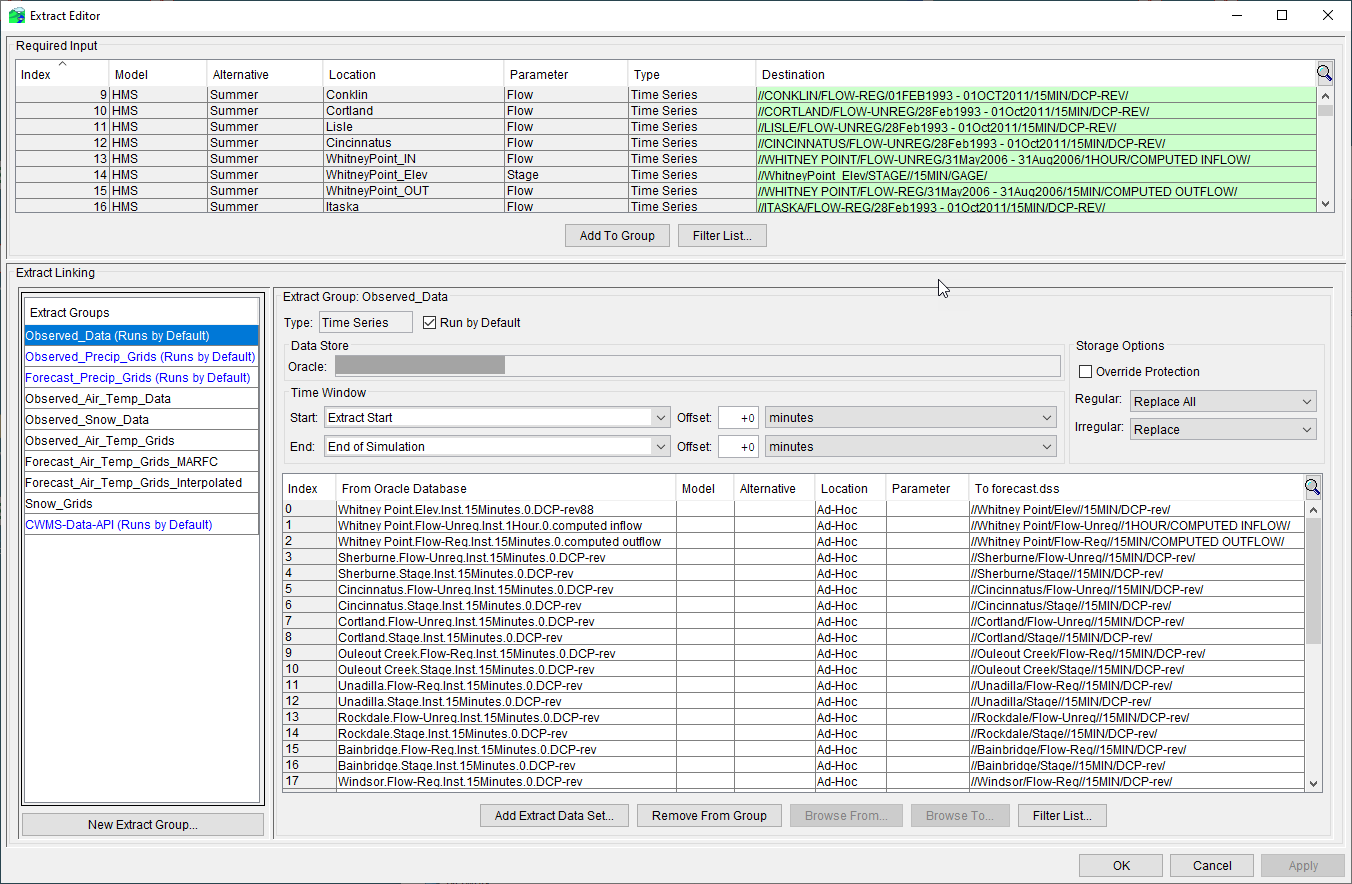
Option 2: Ad-Hoc Method
In some cases, the input data needed for a forecast isn't listed in the Required Input section. To handle this, HEC-RTS allows you to manually add these datasets as Ad-Hoc Records.
To add an Ad-Hoc Record:
- Click Add Extract Data Set.
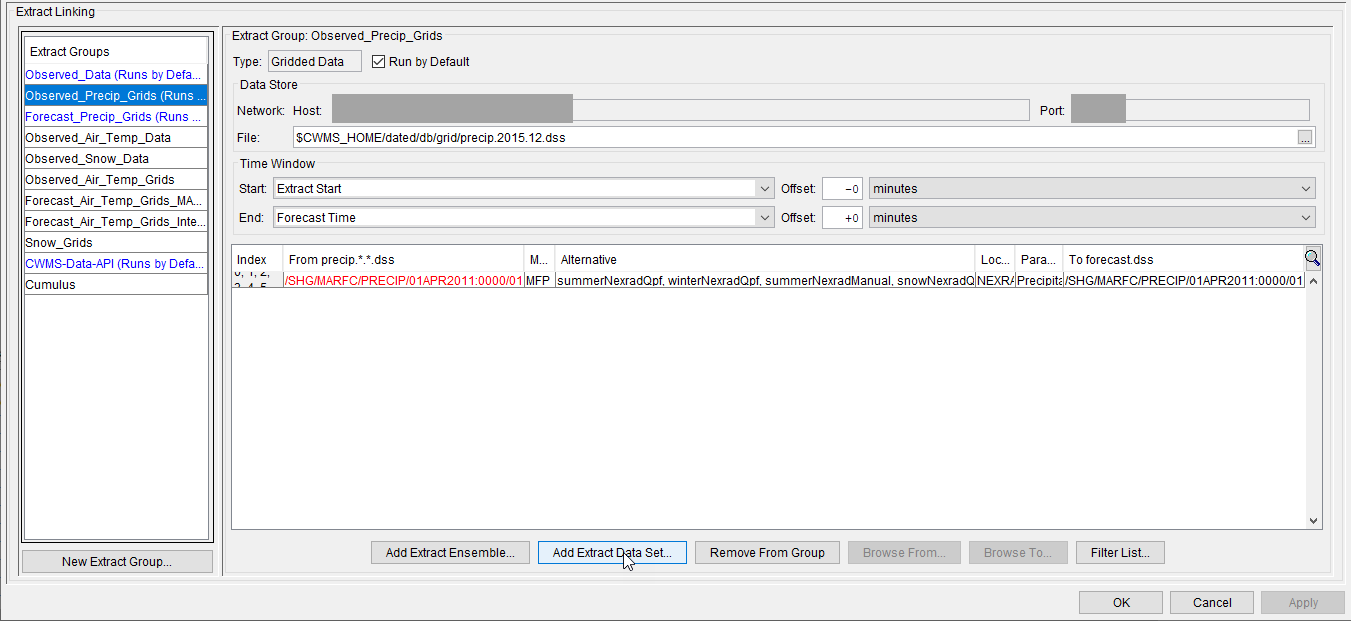
- The Adhoc Record Chooser dialog will appear. The layout and options in the dialog vary depending on the data type and source.
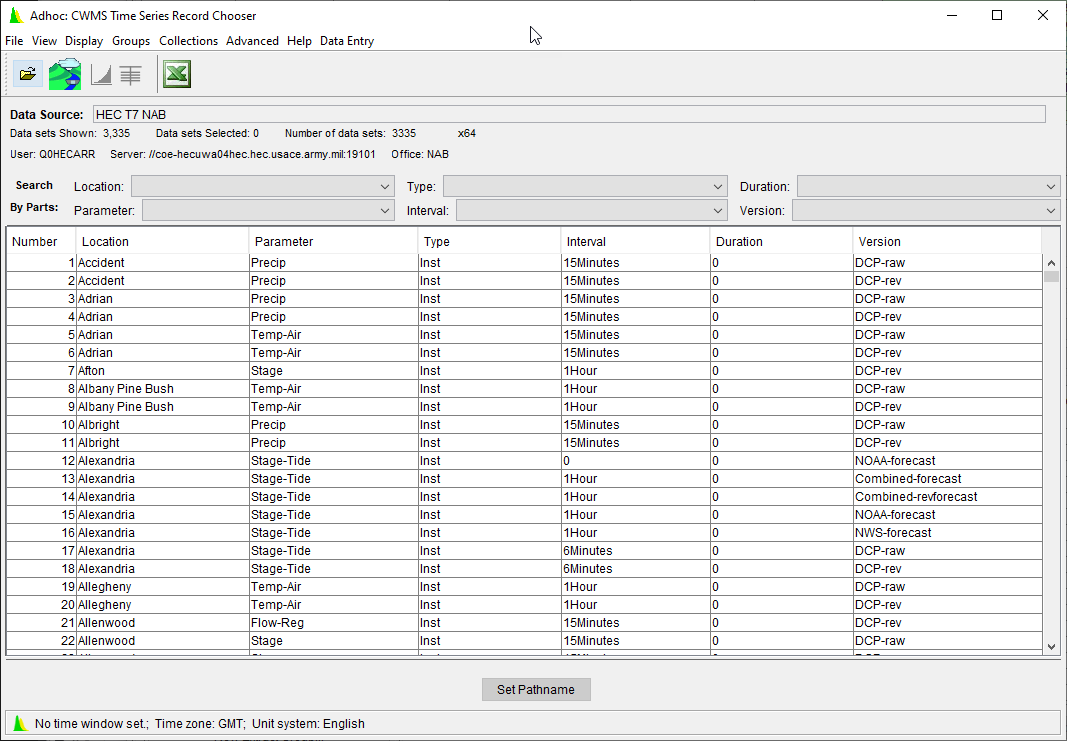
- In the Search By Parts area, use filters to refine your search and locate the correct record.
- Select the desired row and click Set Pathname.
- The selected record will appear in the Extract Linking table.
- Close the Adhoc Record Chooser dialog to return to the Extract Editor.
- Repeat for all needed records.
Editing Destination Pathnames for Ad-Hoc Records
Ad-Hoc records are often mapped automatically to match their original pathname. However, in most cases, you’ll want to edit the pathname of the file in the To forecast.dss column.
To modify the record manually:
Select the appropriate row in the Extract Linking table.
Double-click in the To forecast.dss cell.
- Modify the pathname as needed.
- Click outside of the cell or press Enter to finalize your edits.
To modify the record using the Record Chooser:
- Select the appropriate row in the Extract Linking table.
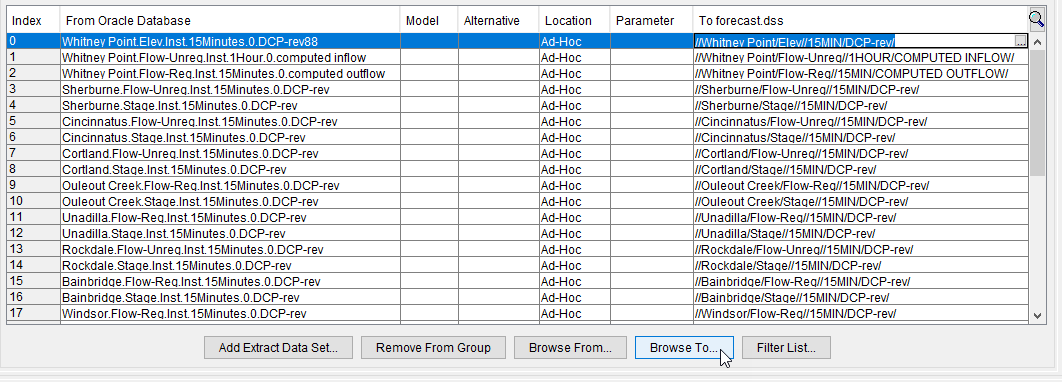
Click Browse To.
The DSS Time Series Record Chooser dialog opens.
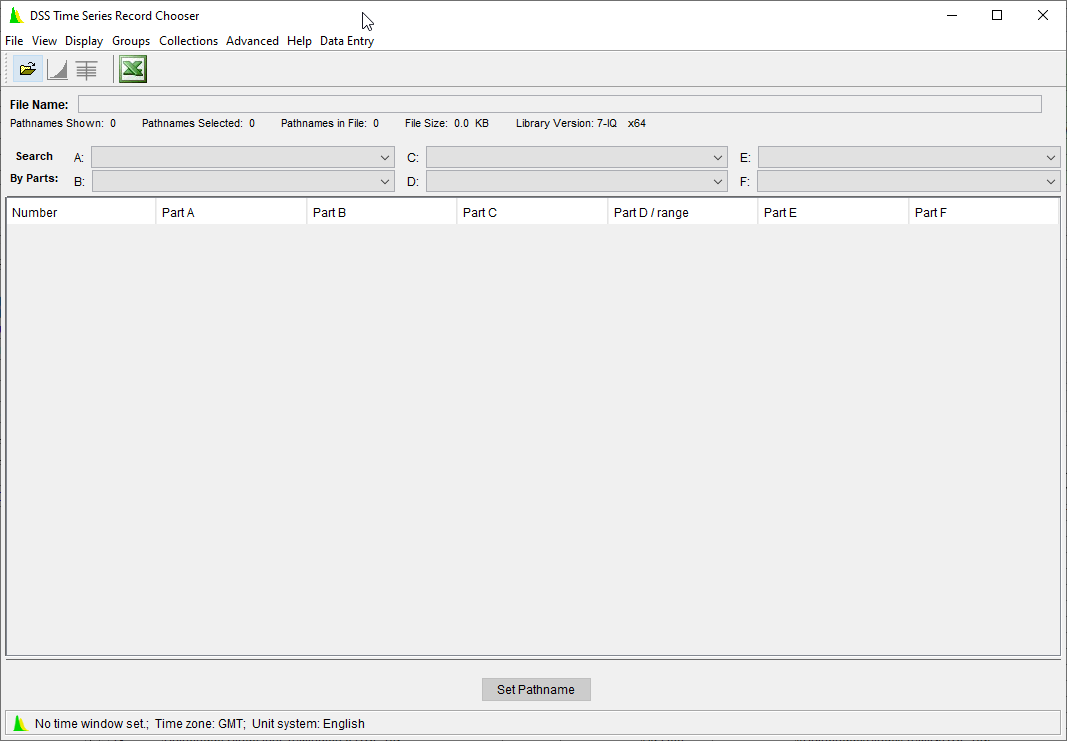
- From the File menu, click Open.
- In the Open HEC-DSS File browser, navigate to the location of a HEC-DSS file with the pathname you want to use and click Open.
- Select the appropriate record from the list and click Set Pathname.
- The new HEC-DSS pathname will appear in the To forecast.dss column.
- Close the DSS Time Series Record Chooser dialog.
Step 5: Select Source Records
After records are added, you'll need to map them from the source to the forecast.dss file.
To assign a source record:
- In the From <data_source> column, double-click the desired row.
- Click the ellipsis (...) to open the appropriate data chooser (e.g., CWMS Time Series Record Chooser).
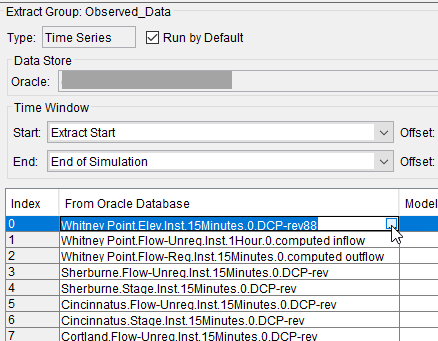
- Use filters to find the correct record, select it, then click Set Pathname.
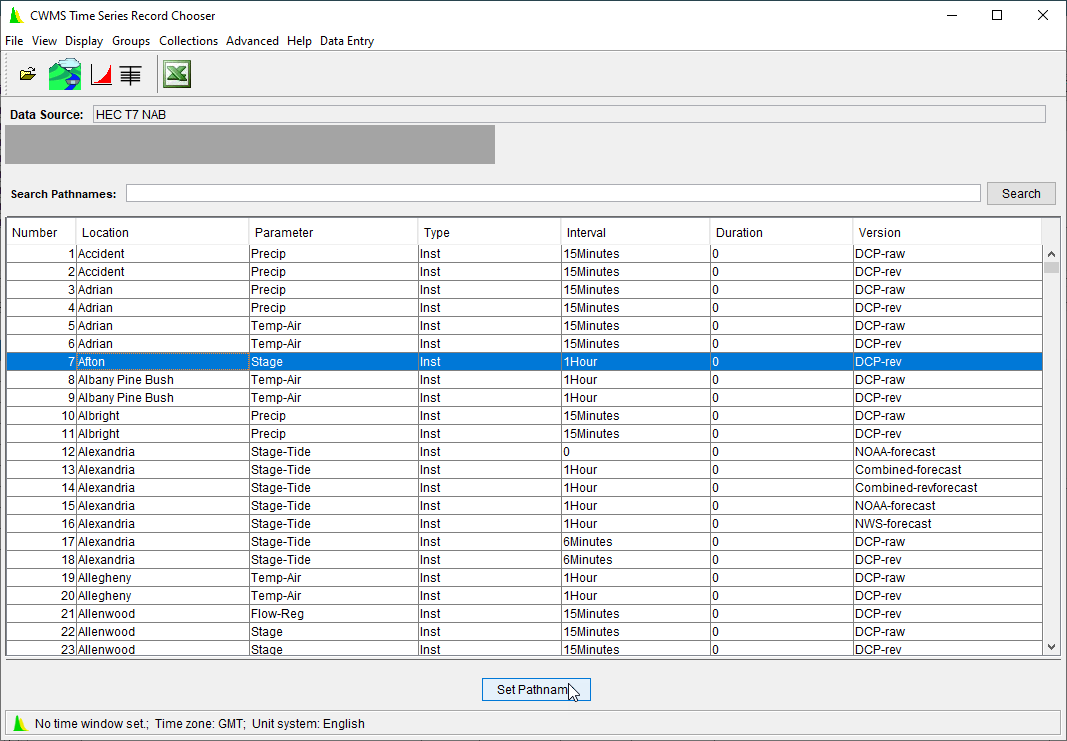
- The time series record you selected will display in the Extract Linking table in the selected row.
- Close the Record Chooser to return to the Extract Editor.
- Repeat for all needed records.
Step 6: Save Your Work
Once you've created your new Extract Group and added data to it, you need to save the work. Make sure you click Apply before clicking OK to close the Extract Editor dialog.
Final Review
Create a new forecast and execute the extract process using your new Extract Group. Verify that data transfers to the forecast.dss file as expected.