Improving Terrain File Management for Forecasts
Software Version
CWMS 3.4.0 was used to create this guide.
Terrain files for HEC-RAS and HEC-FIA are often the largest files in a watershed. With the right setup, these files can stay in the base directory while still being accessible to models when a forecast is created.
This guide explains how to configure your models to avoid copying terrain files each time a new forecast is created.
Step 1: Properly Store the Terrain Files
To properly store HEC-RAS terrain files in your watershed:
- In the ras directory of your watershed, create a new folder to hold the terrain files.
- In this example, the folder is named _Data\03_Terrain.
- Copy the HEC-RAS terrain files (.hdf, .vrt, and .tif) into this new folder.

- If the terrain files were previously saved in other locations of the watershed directory, delete them to avoid accidentally including them in forecasts.
Step 2: Link the Terrain File in HEC-RAS
Now that the terrain files are correctly saved in the HEC-RAS model folder, you need to update the HEC-RAS model accordingly.
To link the new terrain files in HEC-RAS:
- In the Setup tab, open the base HEC-RAS model for your watershed by clicking the HEC-RAS icon in the toolbar.
- Open RAS Mapper.
- Remove the existing terrain by right-clicking on it and selecting Remove.
- Right-click on Terrains, select Add Existing RAS Terrain, and navigate to the folder created in Step 1.

- Select the appropriate .hdf file for your terrain and click Open. This will add the terrain to RAS Mapper and close the dialog.
- Right-click the Geometries node and select Manage Associations to link the new terrain to all geometries.
- If you use stored maps, verify that they still compute correctly.
- If not, remove and re-add them so they are properly linked to the new terrain.
- Save the HEC-RAS model.
- Close HEC-RAS and return to HEC-RTS.
Step 3: Update the Terrain File in HEC-FIA
You also need to update the HEC-FIA model to use the HEC-RAS terrain.
To link the HEC-RAS terrain file in HEC-FIA:
- In the Setup tab, open the base HEC-FIA model for your watershed by clicking the HEC-FIA icon in the toolbar.
- Remove the existing terrain by right-clicking on it and choosing Remove from Study.
- Add the new HEC-RAS terrain:
- Right-click Terrain Grids under the Watershed folder, then select Add Terrain Model.

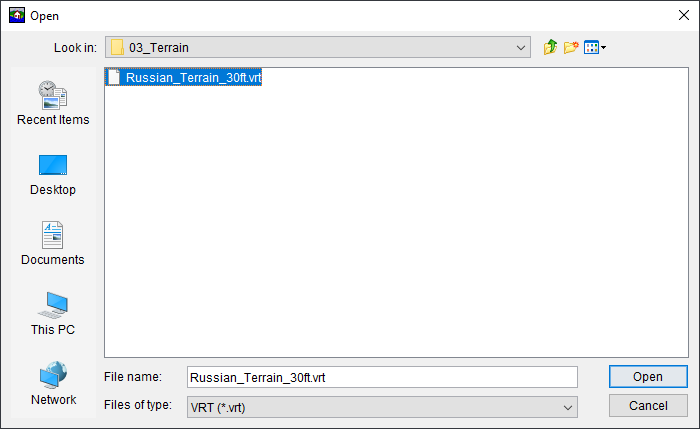
- In the file explorer, set the filter to .vrt files, navigate to the new terrain folder, select the appropriate .vrt file, and click Open.

- Right-click Terrain Grids under the Watershed folder, then select Add Terrain Model.
- If the terrain doesn't appear immediately in the map window, click the Display open Map Windows tiled in the Map Panel button in the menu bar to refresh the view.

- Using Windows Explorer, browse to the fia\watershed\terrain grids folder and delete any remaining terrain files (.tif).
Step 4: Set Up the Watershed Configuration in HEC-FIA
You will now update the watershed configuration in HEC-FIA so that it references the new terrain grid you set up in Step 3.
To finalize the terrain setup in HEC-FIA:
- Right-click the name of the watershed configuration and select Edit.
- In the Terrain Grid field, select the new terrain you added in Step 3.
- Click OK to close the dialog.
- Save your HEC-FIA model.
- Close HEC-FIA and return to HEC-RTS.

Final Review
Navigate to the 'watershed_name'/fia folder and check its size. If it's 500MB or more, it likely still contains terrain files. Open the folder and delete any remaining .tif terrain files to ensure they were fully removed.
To confirm everything is set up correctly, create a test forecast in HEC-RTS that includes both HEC-RAS and HEC-FIA model alternatives.
- In the Modeling tab, go to the Forecast menu and select New.
- Enter a suitable time window for the test forecast.
- Select a forecast alternative that includes both HEC-RAS and HEC-FIA model alternatives.
- Click OK to create the forecast.
- In the Modeling tab, right-click the Name of the forecast at the top of the tab and select Browse Forecast Folder.
- In Windows File Explorer, open the ras and fia subfolders to verify that the terrain files were not copied into the forecast folder.
This process ensures the terrain files are stored only in the correct location and are not unintentionally included in future forecasts.