Creating a New Watershed
This tutorial will provide step-by-step instructions on how to create a new CWMS watershed. It is important to understand the configuration of the watershed (name, units, coordinate system, and time zone) cannot be changed once the watershed is created.
Step-by-step guide
To create a new watershed:
- Click on the Setup tab within the main window of the CAVI.
- From the File menu, select New Watershed. The Create New Watershed dialog will open.
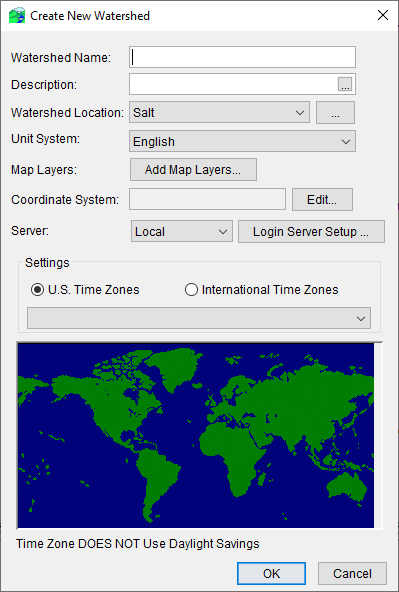
- Give your new watershed a name in the Watershed Name field. Remember, you cannot change the name of the watershed once you create it.
Watershed Name Restrictions
The watershed name must be less than thirty-two (32) characters and cannot contain any of the following special characters: , | / : * ? " < > - { } .
- Enter a descripting of your watershed in the Description field.
- From the Watershed Location drop-down list, select the location to save your new watershed.
- If you wish to create a new location to save the watershed to, click on the ellipses button to the right of the drop-down list. This will open the Create Watershed Locations dialog.
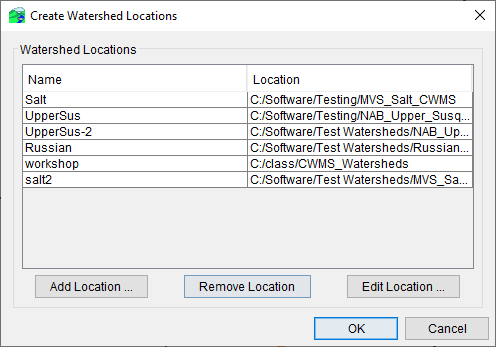
- Click Add Location to add a new location to the list of watershed locations.
- Enter the name of the location and browse to the location you wish to put the new watershed in the Add Watershed Location dialog.

- Click OK to close the dialog and return to the Create Watershed Locations dialog.
- Click OK to close the Create Watershed Locations dialog.
- Select the new location from the Watershed Location drop-down list.
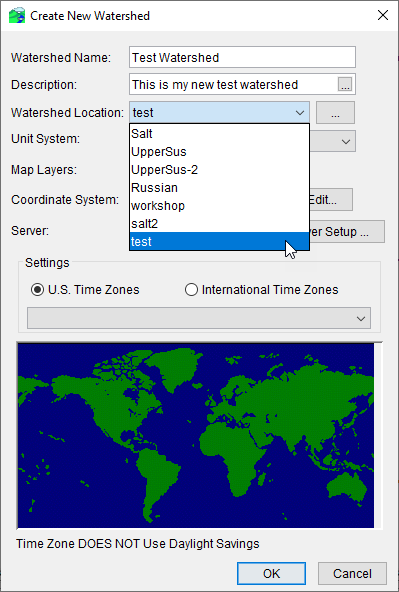
- If you wish to create a new location to save the watershed to, click on the ellipses button to the right of the drop-down list. This will open the Create Watershed Locations dialog.
- Select either English (U.S. customary units) or SI (System International) from the Unit System drop-down list. Remember, you cannot change the units once the watershed is created.
- If you wish to add map layers at this time, click on the Add Map Layers button. The Select Map to Add browser will open.
- Browse to the location of the file you wish to add to your new watershed and select the file.
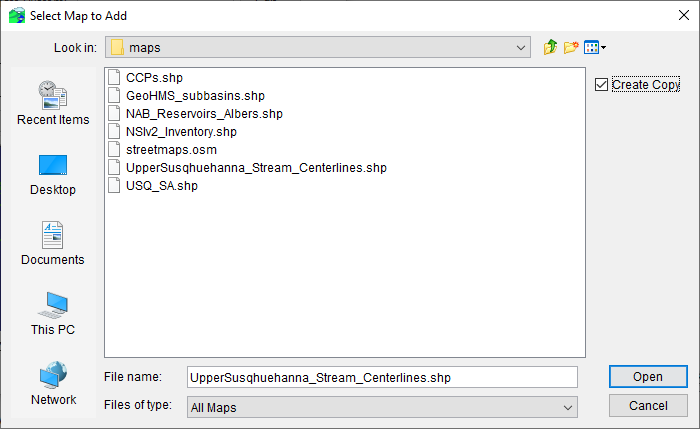
- Check the box next to Create Copy option in the upper right hand corner. This will copy the selected file(s) into the new watershed's maps folder.
- Click Open, and the Set Watershed Coordinate System window will open, asking you if you want to set the new watershed's coordinate system to the coordinate system of the file you selected to import.

- If you click Yes, the Set Watershed Coordinate System window will close, and the Select Map to Add browser will close. The coordinate system of the selected map layer file will display in the Coordinate System box on the Create New Watershed dialog. Skip Step 8, and proceed to Step 9.
- If you click No, the Set Watershed Coordinate System window will close, and the Select Map to Add browser will close. To manually set up the coordinate system, proceed to Step 8.
- Browse to the location of the file you wish to add to your new watershed and select the file.
- To manually set the coordinate system of your new watershed, click Edit next to the Coordinate System field. The Map Coordinate Information dialog will open.
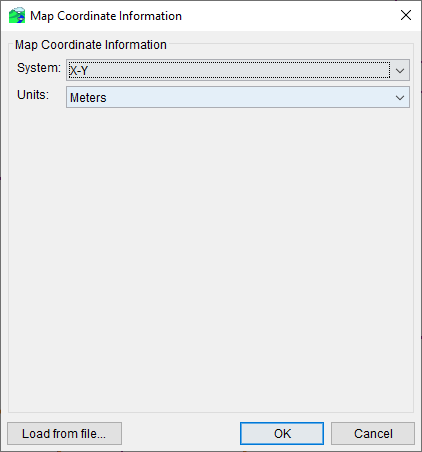
- There are several options to choose from in the Coordinate System drop-down list. From this list, you can choose which default coordinate system is most appropriate to use for your watershed.
- You can also import a coordinate system by clicking on the Load from file button in the lower left-hand corner of the dialog. Use the browser to locate the file you wish to import, select the file, and click Open.
- The coordinate system of the selected file will display in the Map Coordinate Information dialog.

- Click OK to close the dialog.
- The name of the coordinate system will display in the Coordinate System field.
- It is now time to set up the server information for this new watershed.
- The default server location is Local. From the Server drop-down list, you can choose other pre-defined locations as the location of the server for this watershed.
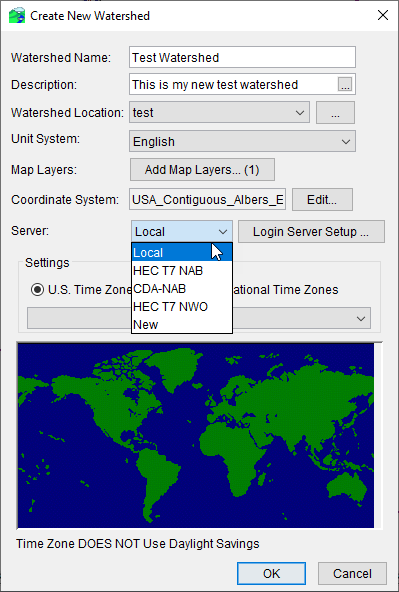
- If you need to define a new server for this watershed, click on the Login Server Setup button next to the server drop-down list. The CWMS Server Setup dialog will open.
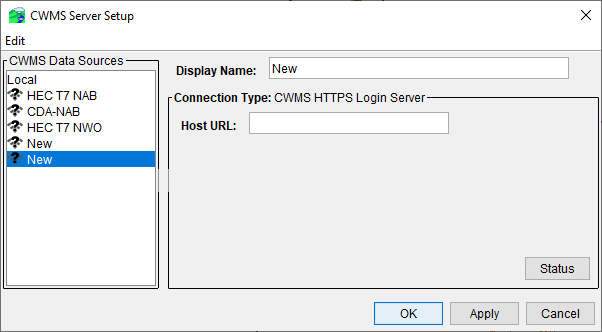
- From the Edit menu, select Add Data Source and then choose the type of connection you wish to create (CWMS HTTPS Login Server, CWMS Data API, or CWMS RMI Login Server).
- Enter a name in the Display Name field and the information required under the Connection Type section of the dialog. Your CWMS System Administrator will most likely have to provide the login server information that is required to set up a new connection.
- Click OK, the dialog will close and the new server connection will be created.
- Select the new server location from the drop-down list in the Create New Watershed dialog.
- The default server location is Local. From the Server drop-down list, you can choose other pre-defined locations as the location of the server for this watershed.
- Now you must define the time zone for the new watershed. By default, the radio button for U.S. Time Zones is selected. Select the appropriate time zone for your watershed from the drop-down list. Remember, you cannot change the time zone once you create your watershed.
- If necessary, you can change the time zone option to International Time Zones and choose one of the options from the drop-down list.
- If necessary, you can change the time zone option to International Time Zones and choose one of the options from the drop-down list.
- Once you have reviewed your choices and are happy with all of the settings for your new watershed, click OK. A Watershed Summary dialog will open, providing you a summary of the information you entered for your watershed.

- Click OK, and the watershed will be created. If you realize that you need to change a setting, click Cancel and return to the Create New Watershed dialog to make adjustments.
Last Chance to Make Changes
This is your last chance to make any changes to the settings of your new watershed. Once you click OK, you cannot change the name, coordinate system, units, or time zone settings.
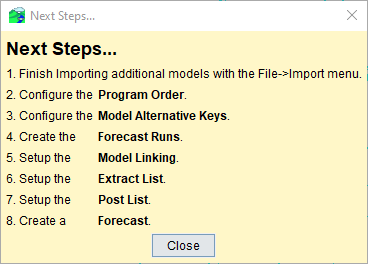
- Congratulations! You just created a new watershed. The Next Steps dialog will open, providing you with information on the next steps to take to configure your new watershed.
