Setting Up a CDA Extract
Introduction
The CWMS Data API (CDA) is a tool that anyone can use to gather data about current operations status and historical events from US Army Corps of Engineers districts across the United States. The ability to directly import data via CDA has been implemented within the CAVI to help streamline data collection. CDA can also be scripted against to pull data for CWMS/HEC-RTS models. General information about CDA can be found on GitHub under cwms-radar-api. For general information regarding the Extract Editor, please visit the CWMS User Manual section on Data Extract and Post Editors.
Set Up CDA Login
To utilize CDA, you must first set up the login information.
- Open the CAVI. Select Login under the File menu.
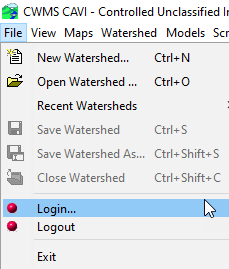
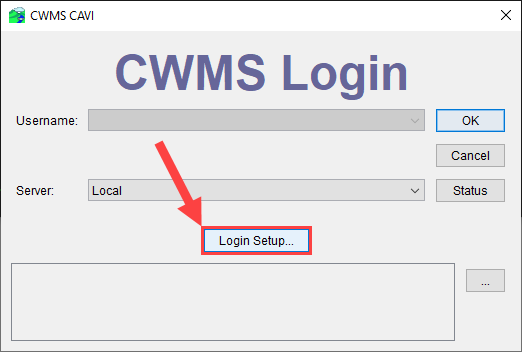
- The CWMS Login Dialog will open. Click on the Login Setup button.
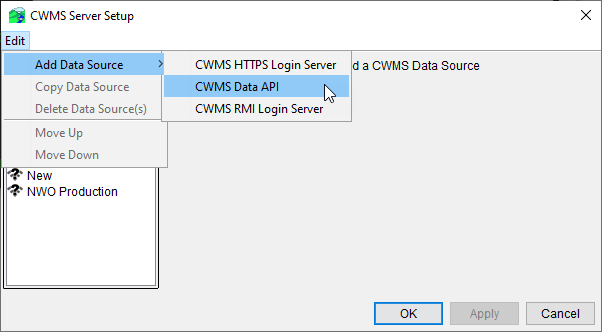
- From the Edit menu, select Add Data Source and then CWMS Data API.
- Enter the Display Name and the Host URL http://cwms-data.usace.army.mil/cwms-data/ in the appropriate boxes.
- This host URL can be any of the instances of CDA. The one listed here is for the National Database instance.
Choose the correct Office from the drop-down list.
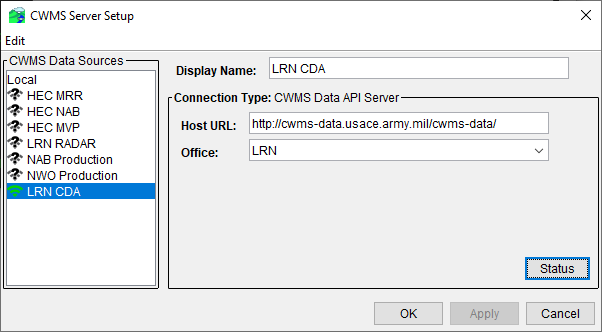
- Select OK and the CWMS Server Setup Dialog will close.
Set Up CDA Extract List
Once you have set up the login to CDA, you are now ready to create an Extract List that utilizes CDA.
- Open the watershed of interest in the CAVI.
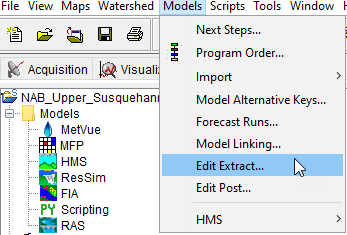
- From the Setup module, select the Edit Extract option from the Models menu.
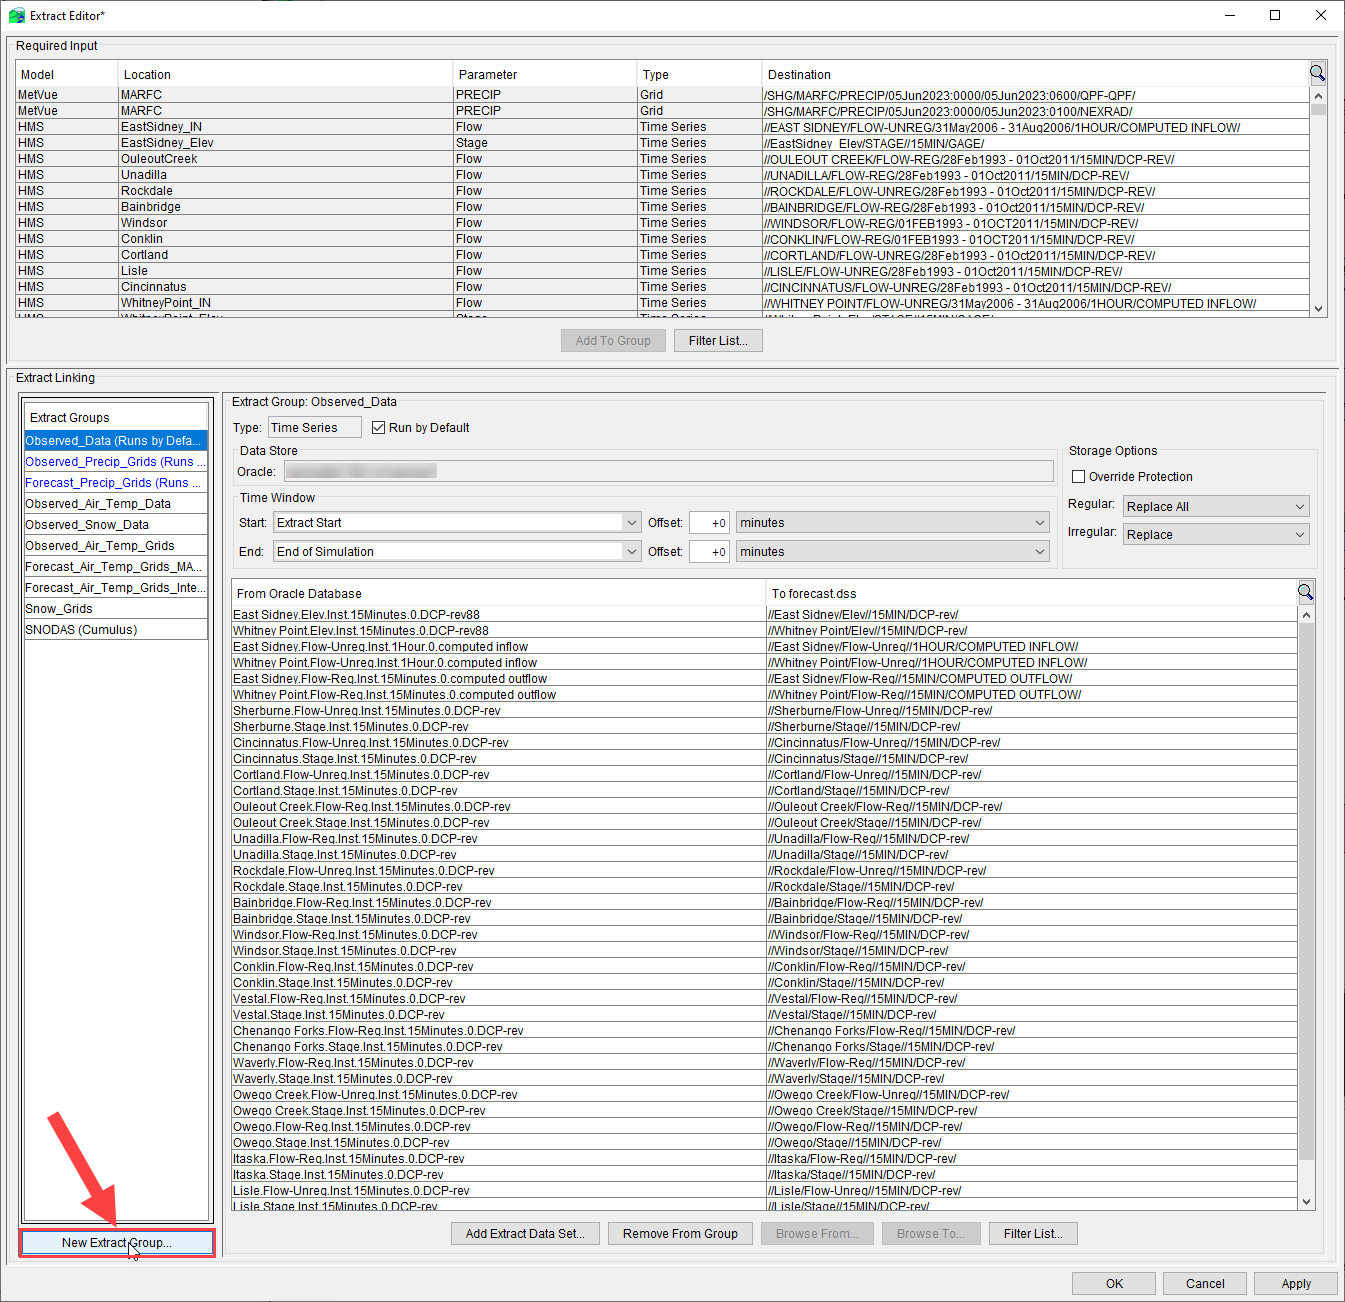
- The Extract Editor dialog will open. Click on New Extract Group.
- Within the New Extract Group dialog, enter an appropriate Name for the new extract group. Select Time Series for the Type, and select CWMS Data API as the Source.
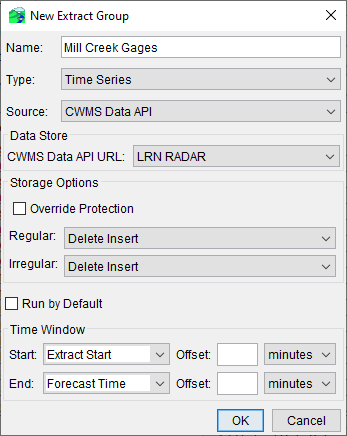
- For the Data Store option, select the CDA option you are wanting to utilize. Select the appropriate storage and time window options. If necessary, check the box for Run by Default.
- Click OK to create the new extract group.
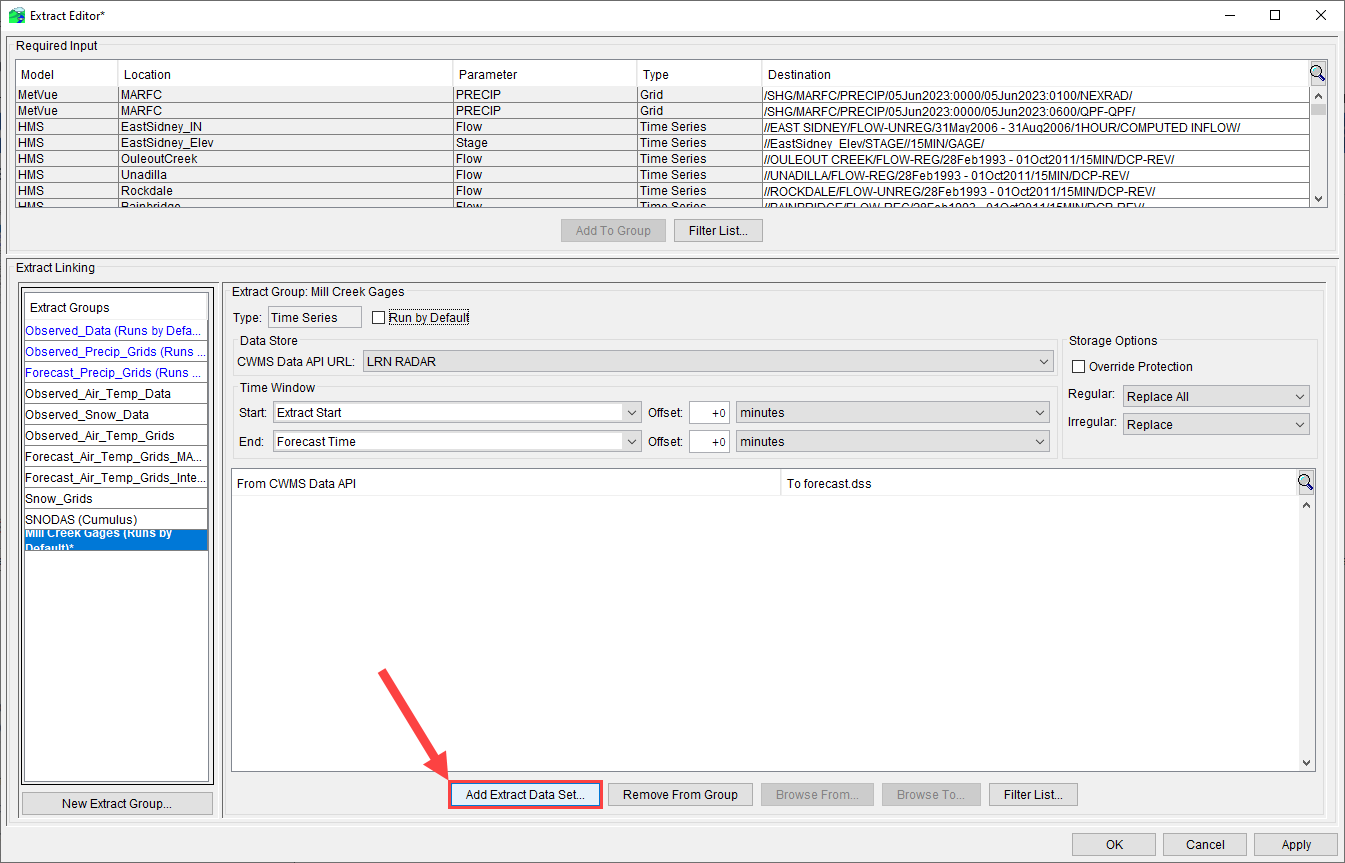
- From the Extract Editor dialog, click the Add Extract Data Set button.
- A CWMS Time Series Records Chooser dialog will open and will display the available data from CDA within the selected office domain.
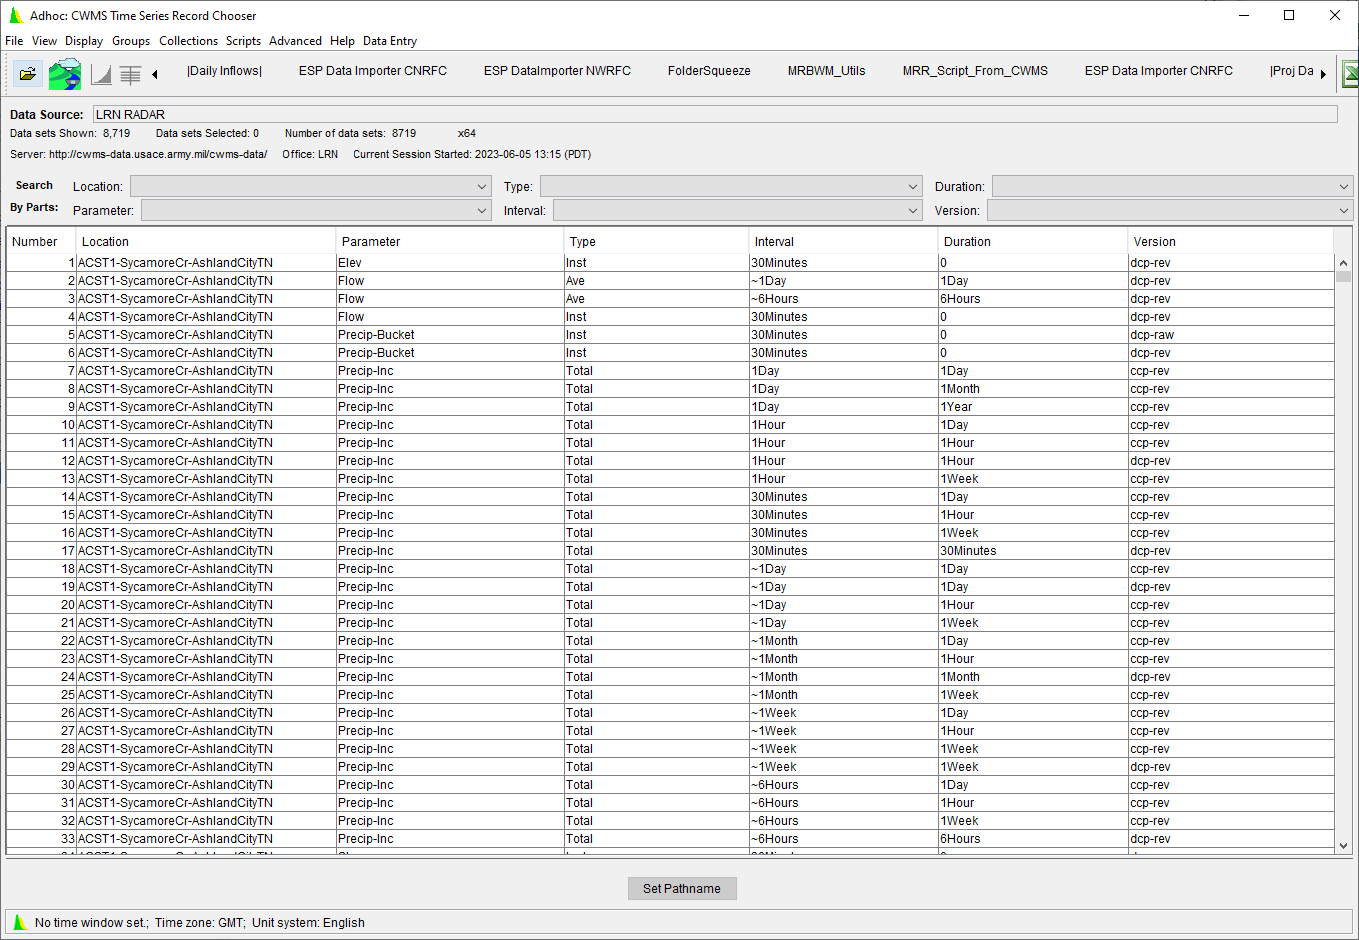
- Select (left-click) the rows you want to include from the list of available data from CDA. Use the Set Pathname button on the bottom of the interface to add those datasets to your extract list.
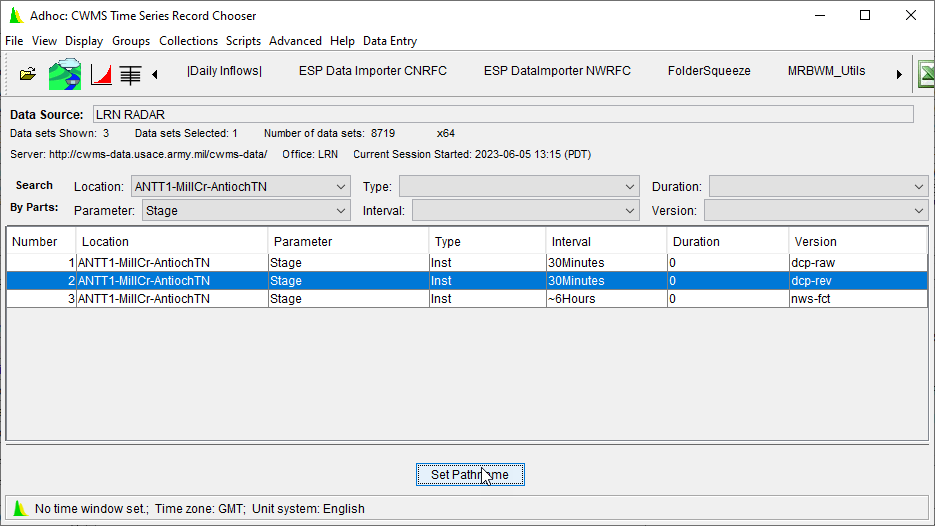
- Exit out of the CWMS-Vue interface once you have selected all of the desired datasets.
- The Extract Editor should now include the data you selected in the previous steps.
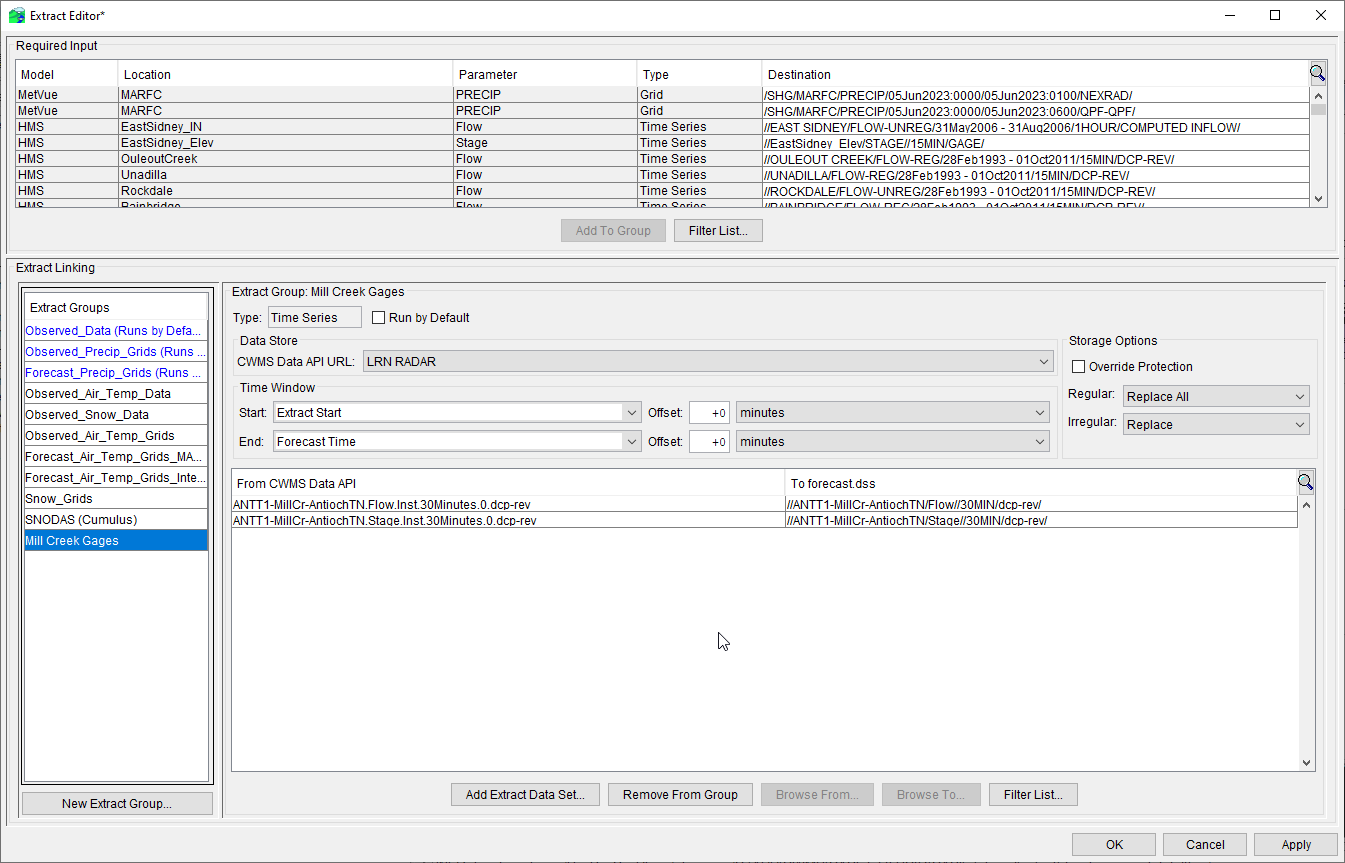
- Once all required data has been added ensure that it i, click Apply and then OK to close the Extract Editor dialog.