There are two ways to run a post group. A post group can be set to run automatically after a successful forecast compute or when a forecast is open in the Modeling module.
Automatic Posts
After a forecast is created and before the forecast is computed, you can automatically have the post process run after the forecast compute is completed. From the Modeling tab (make sure a forecast is open), from the Forecast tabs, click the Actions tab. Select Run Post after Successful Compute, now your post process will happen automatically once the forecast compute has finished.
Once a post process starts, from the Message Pane, a Post tab (Figure 1) will display. These messages include how many values were retrieved for each time series, where the time series were retrieved from, and the pathname that the time series will be stored under in the post file.

Manual Posts
To run a post group manually:
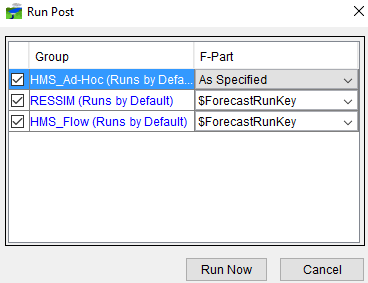
- From the Modeling module (be sure that a forecast is open), from the Models menu, click Post, the Run Post dialog will open (Figure 2).

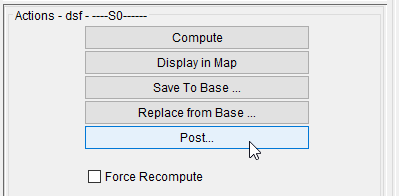
- Alternatively, from the Modeling tab (make sure a forecast is open), from the Forecast tabs, click the Actions tab (Figure 3), click Post. The Run Post dialog will open (Figure 2).

- Select the post groups you would like to run, click Run Now (Figure 2).
- The Run Post dialog will close, and the post process will start. Once a post process starts, from the Message Pane, a Post tab (Figure 1) will display. These messages include how many values were retrieved for each time series, where the time series were retrieved from, and the pathname that the time series will be stored under in the post file.