HEC-RTS Properties
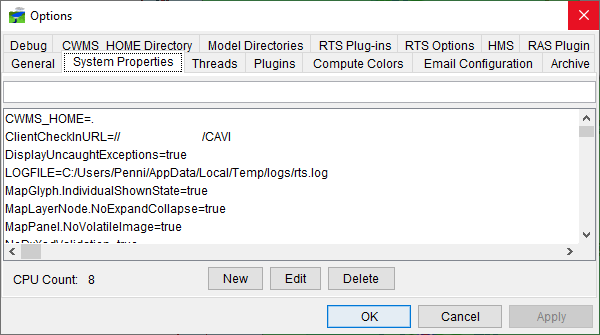
The System Properties, Threads, and CWMS_HOME Directory tabs from the Options dialog (Figure 1), pertain to settings that deal with the HEC-RTS software. From some of these tabs you can make changes, it is recommended that you only use this information from these tabs for debugging and viewing purposes. If you make changes to system properties, any changes made are not persistent and are not saved permanently.

System Properties Tab
The System Properties tab (Figure 1) allows you to view the system properties values set for the HEC-RTS software. If you have the correct user access, you can edit some or all properties. The recommendation is that you only use this information for debugging and viewing purposes. Editing must be done with extreme caution as any changes you make can directly affect the HEC-RTS functionality.
Add a System Property
To add a system property:
- If you have the correct user access levels, the New command will be available, and you can add system properties. Click New, a Changes Not Saved window will display (Figure 2), letting you know that any changes made are not persistent and are not saved permanently. Click OK, the Changes Not Saved window will close, and the New Property dialog (Figure 3) will open.


- In the Property cell, enter the name of the new system property. For the parameters of the new system property, enter the parameters in the Property Value cell.
- Click OK, and the New Property dialog closes. The new system property will display on the System Properties Tab (Figure 1).
Edit a System Property
- If you have the correct user access levels then the Edit command will be available, and you can edit system properties. From the list, select a system property to edit.
- Click Edit, a Changes Not Saved window will display (Figure 2), letting you know that any changes made are not persistent and are not saved permanently. Click OK, the Changes Not Saved window will close, and the Edit Property Value dialog (Figure 4) will open.

- In the Property and Property Value boxes, edit the items, as you need to.
- Click OK, the Edit Property Value dialog closes, and the changed system property will appear on the System Properties Tab (Figure 1).
Delete a System Property
- If you have the correct user access levels, then the Delete command will be available, and you can delete system properties.
- From the list, select the system property you wish to delete. To select, click on the system property, it will now be highlighted in blue.
- Click Delete, a Confirm Property Delete message will open (Figure 5). If you want to delete the selected system property, click Yes. The Confirm Property Delete message will close and the selected system property will be removed from the list.

Threads Tab
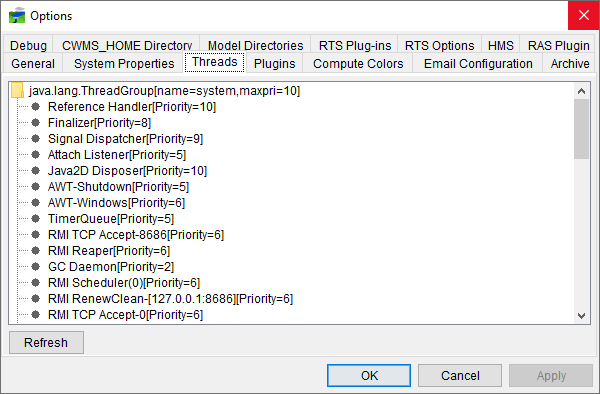
A thread is a single sequential flow of control within software. Within Java the user can have multiple threads in a piece of software all running at the same time and performing different tasks. HEC-RTS is a multi-threaded software application, to view HEC-RTS threads, from the Options, click the Threads tab (Figure 6). The Threads tab displays information regarding the threads that are actively being used by HEC-RTS. To provide an up-to-date list of the active threads, click Refresh (Figure 6). 
CWMS_Home Directory Tab
The CWMS_HOME Directory tab (Figure 7) pertains to two HEC-RTS system variables – CWMS_HOME and CWMS_EXE. In most cases, the normal user will not be doing anything to these two system variables. If you are dealing with client-side scripts, the tab provides an interface for overriding the values of CWMS_HOME and CWMS_EXE.
Local CWMS_HOME
To edit the CWMS_HOME variable, select Override local CWMS_HOME directory environment setting (Figure B.21). The Local CWMS_HOME box is now active. CWMS_HOME only needs to be overridden if client-side scripts rely on CWMS_HOME as a pointer to where data and models reside on the client file system. For example, CWMS_HOME might be set to a "watershed location", following a common convention to keep gridded DSS records in the "database" folder that is sister to a folder containing the watersheds.
Local CWMS_EXE
You should only need to override CWMS_EXE if client-side scripts rely on CWMS_EXE to locate HEC-RTS executables or .jar files. If you need to override *CWMS_EXE, from the Local CWMS_EXE box (Figure 7) enter the new value.
Archive Tab
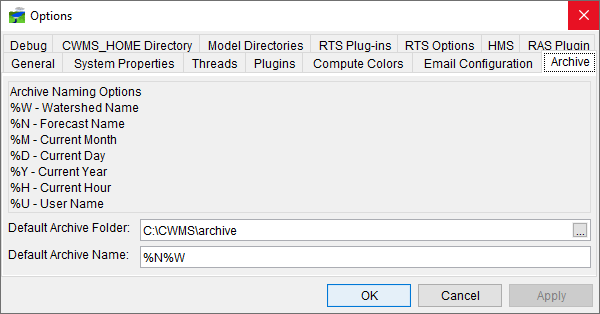
You can archive a forecast; the archive is posted to the selected watershed's default directory as a .zip file. If you wish to override the default directory and or the name of the archive, from the *Options dialog, click the Archive tab (Figure 8).

- If you want to change the location of where the archive file is saved, you can enter a folder name in the Default Archive Folder box (Figure 8). another way to get a folder name, to the right of the Default Archive Folder box (Figure 8), click
 , an Open browser will open. Navigate to the location where you want archives saved, once the name displays, click Open. The Open browser will close, and name will display in the Default Archive Folder box (Figure 8).
 - To override the default archive file name, from the Default Archive Name box (Figure 8), enter the appropriate archive naming options which are listed on the Archive tab (Figure 8).