HEC-RTS Forecast Run Details
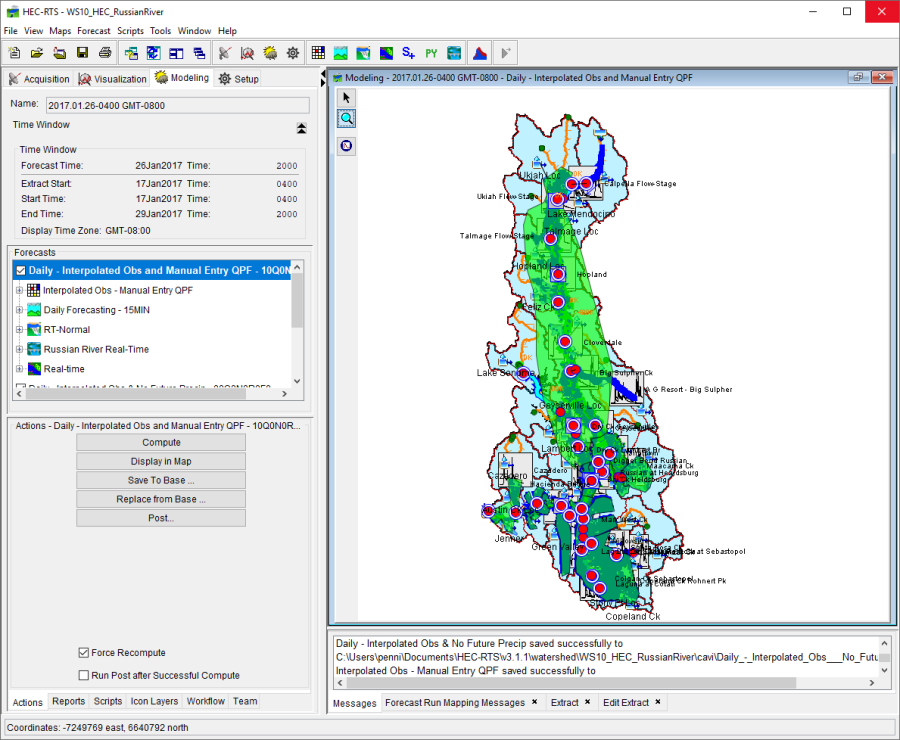
From the Forecast Run Details section of the Modeling module (Figure 1), you can view what forecast runs are part of the forecast that has been selected. In addition, you can view the individual model alternatives for a forecast run. By default, the first forecast run displays in the Map Window and the name of the forecast run is bolded (Figure 1) in the Forecast Run Details section. When a forecast run is bolded, this means that the forecast run is being displayed in the active Map Window of the Modeling module (Modeling Module - Forecast Information Displayed).

When you have clicked the checkbox next to a forecast run (Figure 1), you are indicating that you want to view output from the model schematic that is displayed in the Map Window for multiple forecast runs. In this version of HEC-RTS, the only software application that displays output results for multiple forecast runs is HEC-ResSim. In addition, the time series icons will display output for multiple forecast runs. MFP will display separate summary reports for each forecast run.
Forecast Runs – Shortcut Menu
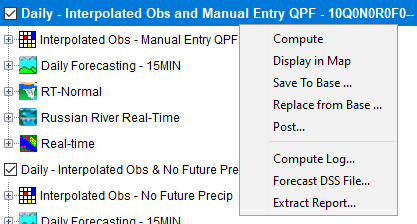
From the Forecast Runs Detail section (Figure 2) of the Modeling module, when you right click on a forecast run name, a shortcut menu will display (Figure 2). From this shortcut menu, you can perform many processes. Further details about these processes are detailed in Model Alternatives and Forecast Runs.
Model Alternatives – Shortcut Menu
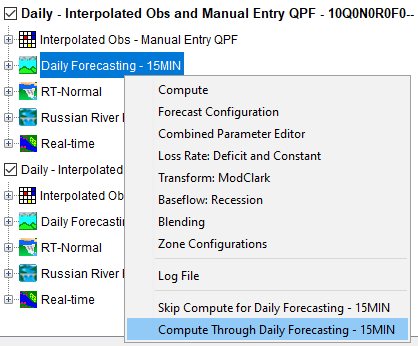
From the Forecast Runs Detail section (Figure 3) of the Modeling module, under a forecast run name, is the list of model alternatives that are associated with the forecast run. When you right-click on a model alternative name, a shortcut menu will display (Figure 3). From this shortcut menu, you can perform many processes. Further details about these processes are detailed in Model Alternatives and Forecast Runs.
From the shortcut menu you can compute individual model alternatives by clicking Compute (Figure 3). You can also identify whether you want a model alternative to be skipped during a forecast run or have the forecast run compute through a selected model alternative.
To skip a model alternative computing in a forecast run, right-click on a model alternative, from the shortcut menu (Figure 3), click Skip Compute. The icon of the model alternative will now have a down blue arrow drawn through it (Figure 4), and the Skip Compute item in the shortcut menu will have a have checkmark.
To have a forecast run compute through a selected model alternative, from the shortcut menu (Figure 3), click Compute Through. The icon of the model alternative will now have a red line and a red up arrow drawn through it (Figure 4), and the Compute Through item in the shortcut menu will have a have checkmark.

Model Alternative Map Schematic Element – Shortcut Menu
From the Forecast Runs Detail section (Figure 5) of the Modeling module, you can expand a model alternative (an MFP alternative does not have map schematic elements), which lists the map schematic elements associated with that model alternative. When you right-click on an element, a shortcut menu will display (Figure 5). Depending on the model alternative and the map schematic element, the shortcut menu will display different options. In addition, on the Model Schematic that is displayed in the Map Window, the selected element will be highlighted.
