Download page Using HEC-MetVue to Export SHG Grids to DSS.
Using HEC-MetVue to Export SHG Grids to DSS
Introduction
Gridded Data.zip The student will load gridded data into HEC-MetVue, view and inspect grids in map window, export grids to DSSVue and verify that the loading was successful by using HEC-DSSVue to examine the results. If there is time, the student can carry out some mathematical analysis of the loaded grids using HEC-MetVue and basin averages.
NOTE:The files referenced in this workshop are included in the ZIP package below. They should be downloaded and extracted to the following directory:C:\Class\DSS\Gridded Data.
For some grid processing, the following HEC-MetVue software package needs to be downloaded and unzipped to C:\metvue\metvue64.v3.2.0.171.
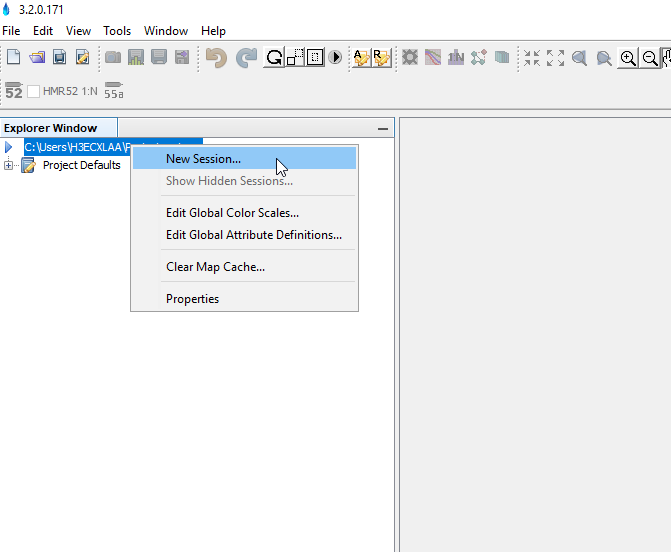
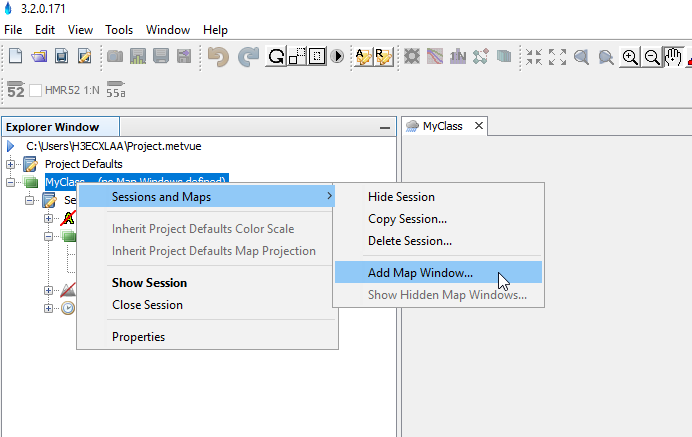
A pop-up window will display to input a session name. Give it a name of your choosing.
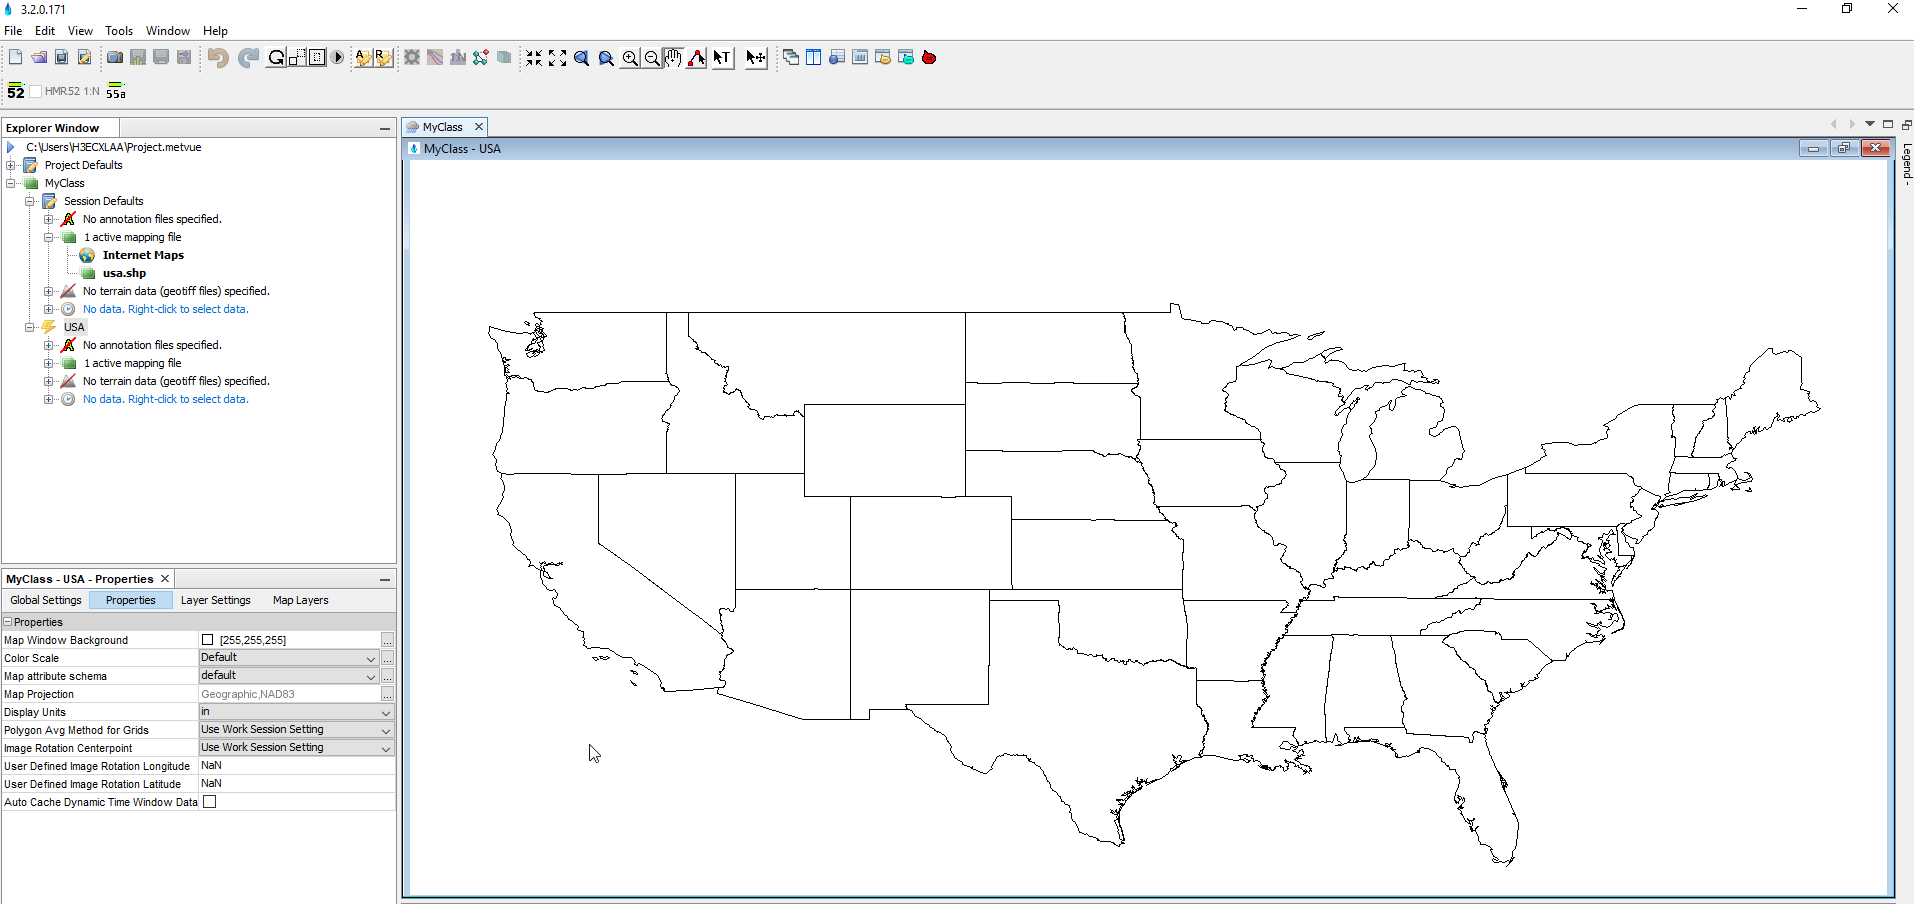
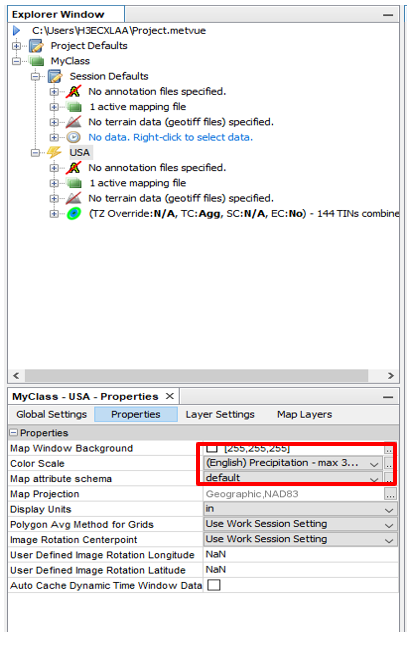
Add the USA shapefile to the session.
You can find the shapefiles in the "additionalContent" folder in your metVue install directory under "...\additionalContent\shapefile\samples". You will need to extract that folder to see the shapefiles.
Create a new map panel.
A pop-up window will display input for New Map Window Name. Give it a name of your choosing.
Your new map panel should look like this:
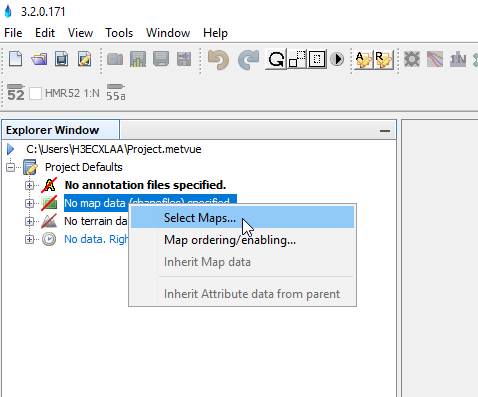
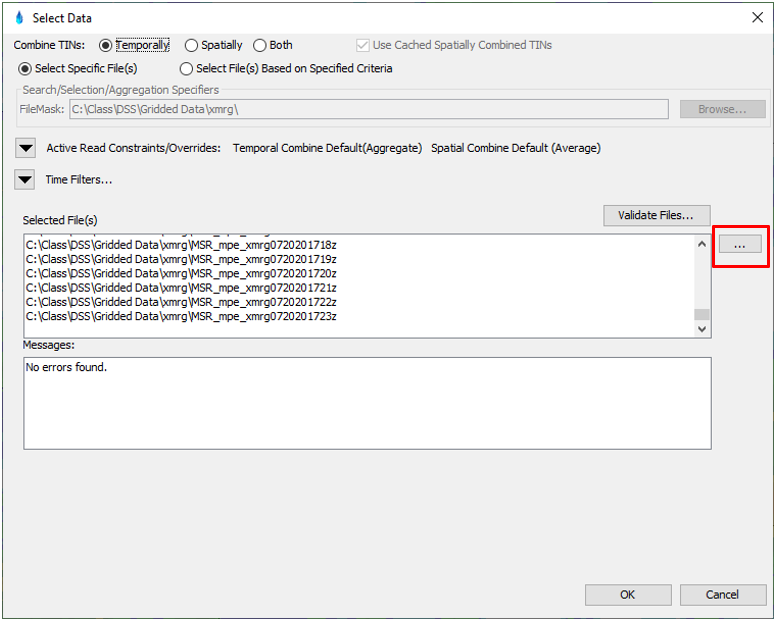
Next, in the Explorer Window, right click on "No data. Right-click to select data" of the new Map Panel that you just created and select "Select TIN files".
In the pop-up window for Select Data, click on thebutton on the right side of the window.
Navigate to thexmrgfolder under the Gridded Data directory. Select all of theMPEfiles in the directory. If there are no errors found, selectOK.
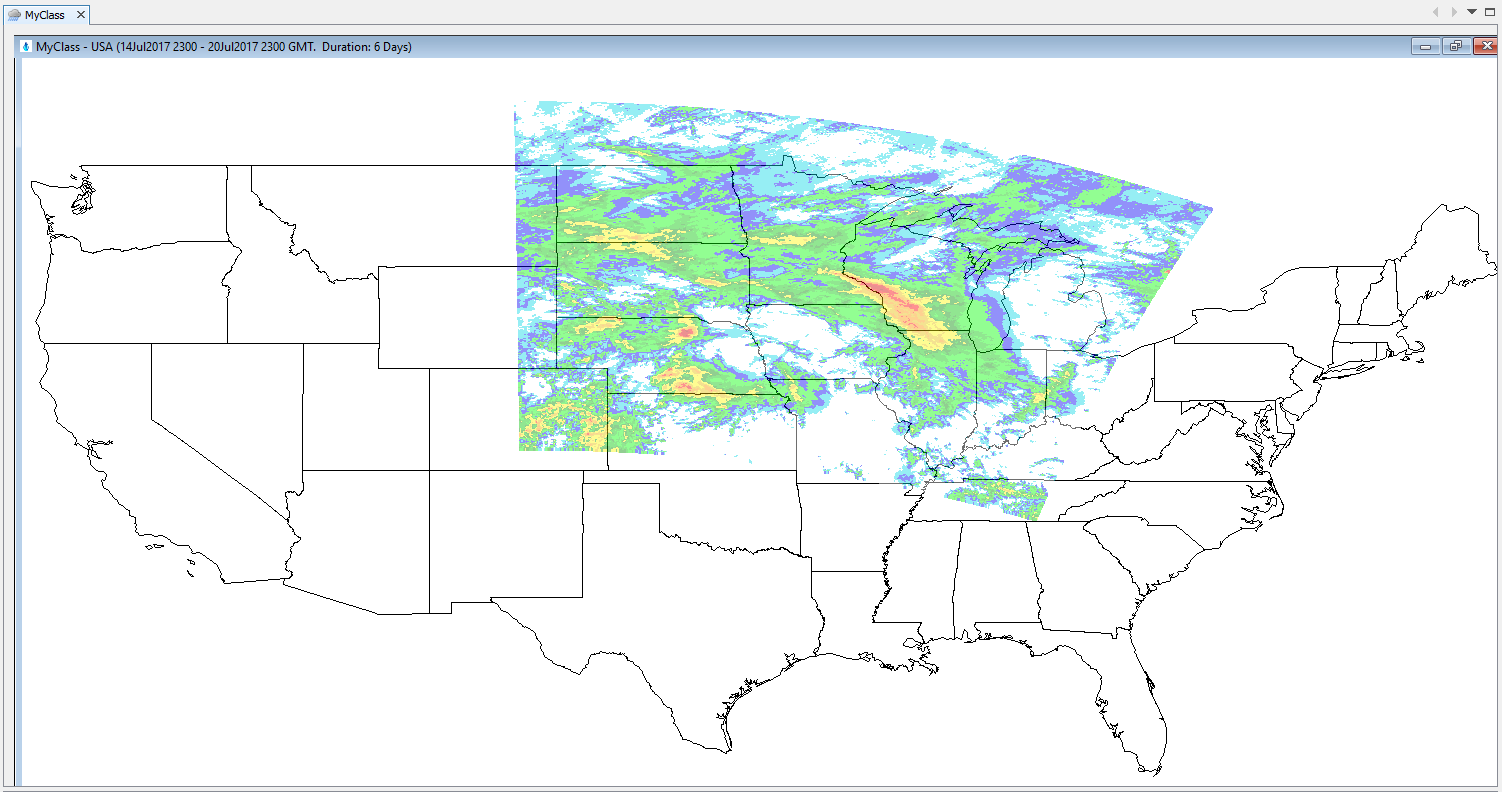
By default, the image you see will look like this:
Wait for the image to load, you should see a blue progress bar at the bottom.
For better visualization, edit theColor Scalefrom the Properties Window from Default to "Precipitation".
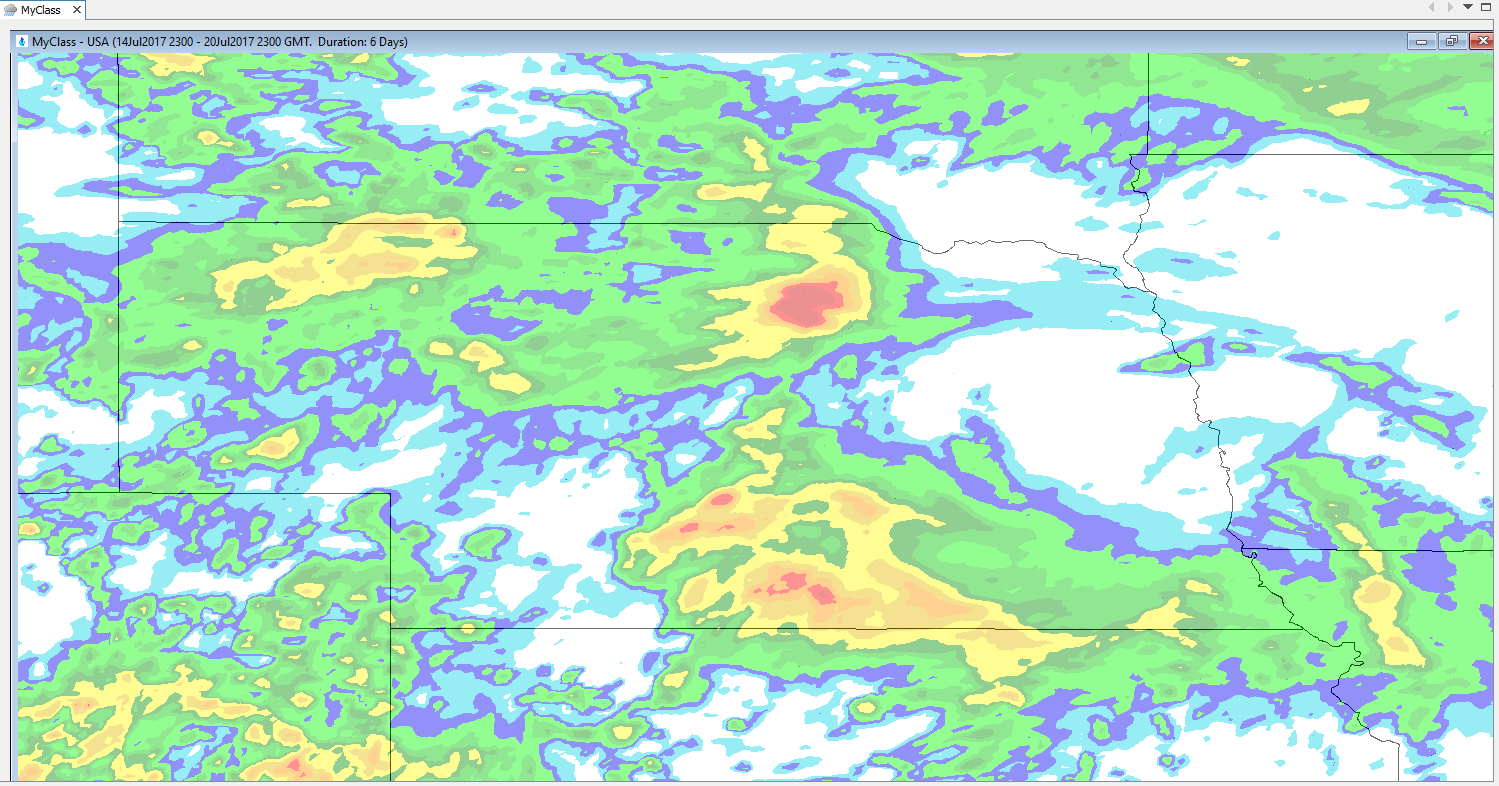
Now the image you see will look like the this:
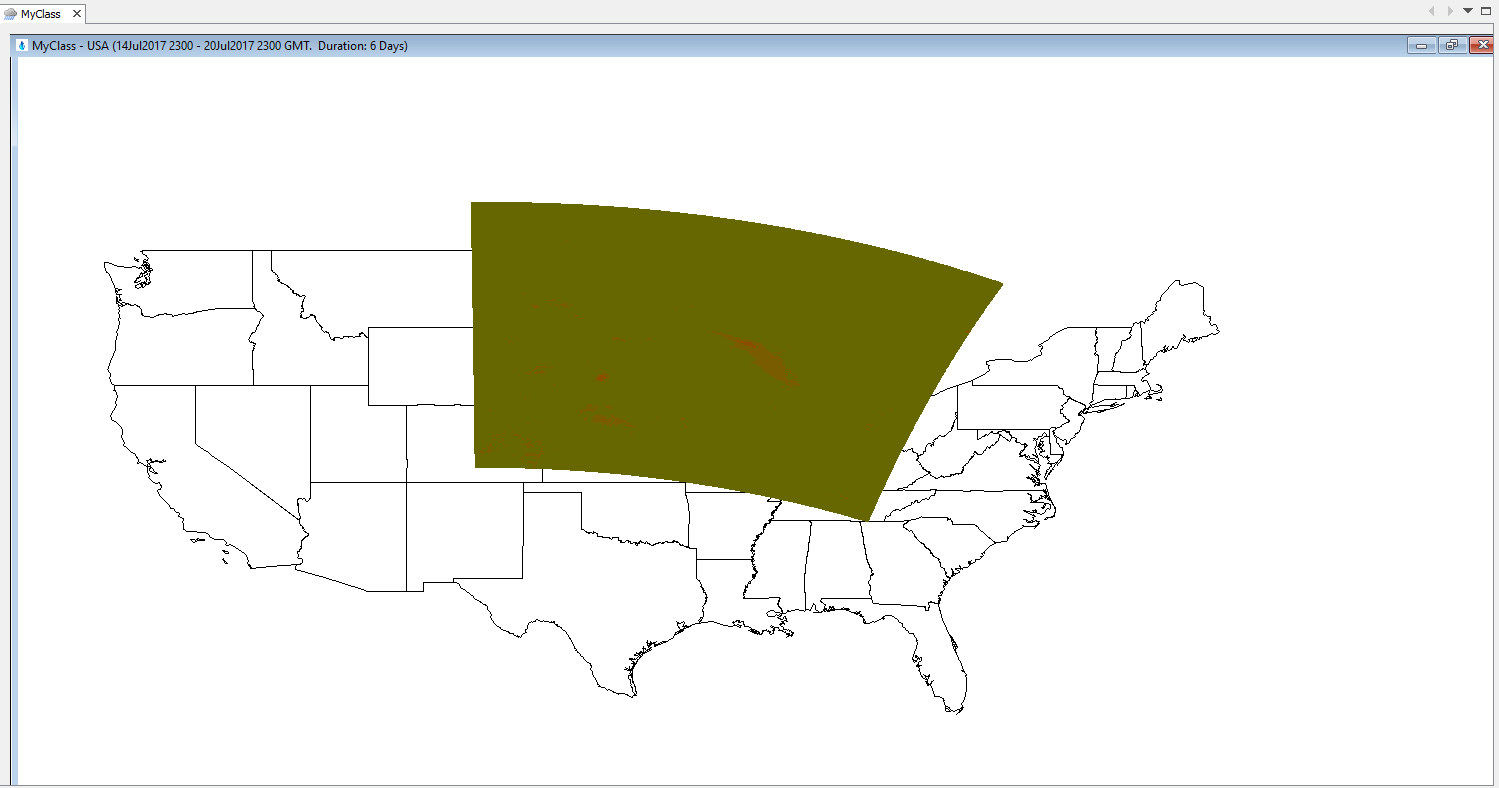
Zoom into Nebraska so that it covers as much as the map panel as possible:
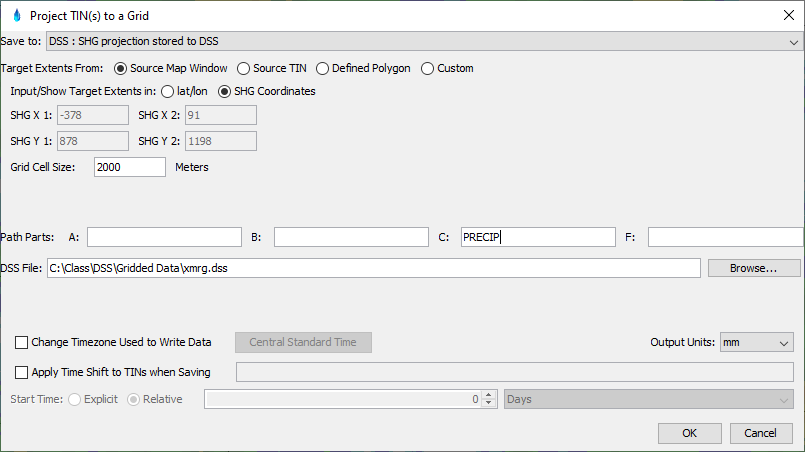
Use the Save Current Image buttonto save the data to DSS in SHG.
Constrain the output to the Map Panel extent.
Specify the pathname and the DSS file as shown below:
When the process is complete look to your dss file to see if your new constrained grids are there.
Optional: you can create a new MetVue map panel and load the constrained DSS grids into it to review them.