Importing and Exporting Microsoft Excel and ".csv" Data
HEC-DSSVue has feature to export time series and paired data to Excel, and editing time-series data in Excel.
You can also import time-series data in a comma separated format (.csv) or data separated by blank spaces, using the same procedure with the "Time Series Wizard". This plug-in is in a development stage; check the plug-ins web page for updates.
Note: Excel uses beginning of period dates, whereas HEC-DSS uses end of period. Thus, the average data for a day will show at 0000 hours in Excel and 2400 hours in HEC-DSS. This can cause a time shift by a day if the data is not imported or exported carefully; Check your data after the operation. You can shift data to the correct times by using the Time Functions tab in the Math Functions screen.
Exporting Data to Microsoft Excel
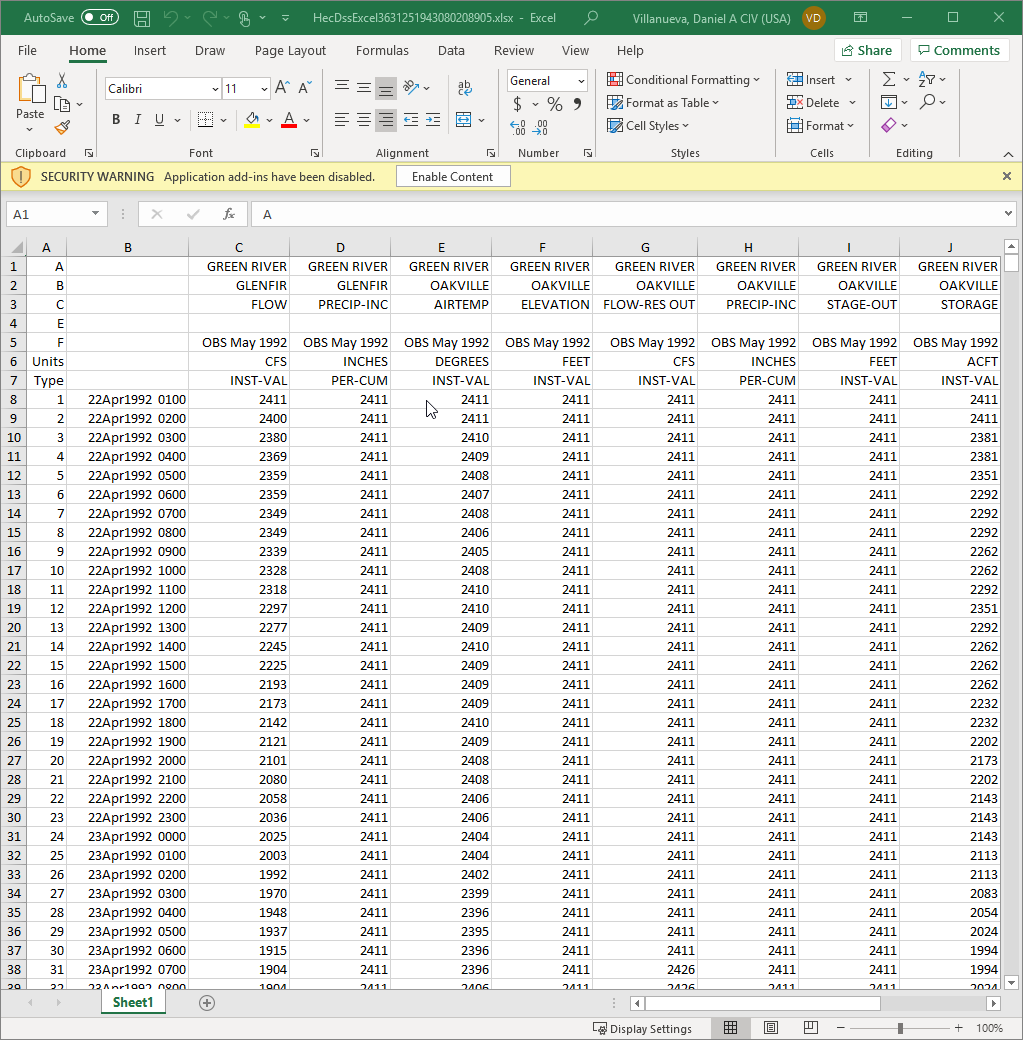
 To export data to Excel, simply select the data sets you want to export and then press the Excel Icon on the tool bar, or from the Display menu, click Tabulate in Excel. An example of data tabulated in Excel is shown below. You can then save the Excel file to the name that you desire. Currently you cannot format the data in a different manner.
This capability assumes that you have Microsoft Excel loaded on your computer or another program that is associated with ".xls" files.
Editing Data in Microsoft Excel
You can edit data in Microsoft Excel by selecting the pathnames that need to be edited. From the Edit menu, click Edit in Excel, an Excel Data dialog box will open (below), as well as Microsoft Excel. The data associated with the selected pathnames will be display in the spreadsheet.
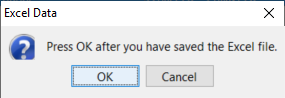
After you have made your changes, save the Excel file, and close Microsoft Excel. From the Excel Data dialog box click OK, the dialog box will close and the edits made to the data for those selected pathnames will be stored in the DSS file. If you do not want to save your changes back to HEC-DSS, click Cancel.
Note: You can only change data in Excel when you are editing - you cannot add or delete data. The data must remain in the same format with the same number of rows and columns to be stored back to HEC-DSS.
Importing Data from Microsoft Excel or ".csv" files using Data Entry
You can import time-series data from Excel, a ".csv" file, or a blank separated file using the Data Entry dialog box. At this time, you can only import time-series data (both regular interval and irregular interval data). Check the HEC-DSSVue plug-ins web page for updates.
1.From the HEC-DSSVue main window open a DSS file, from the Data Entry menu, point to Import, click Excel (below).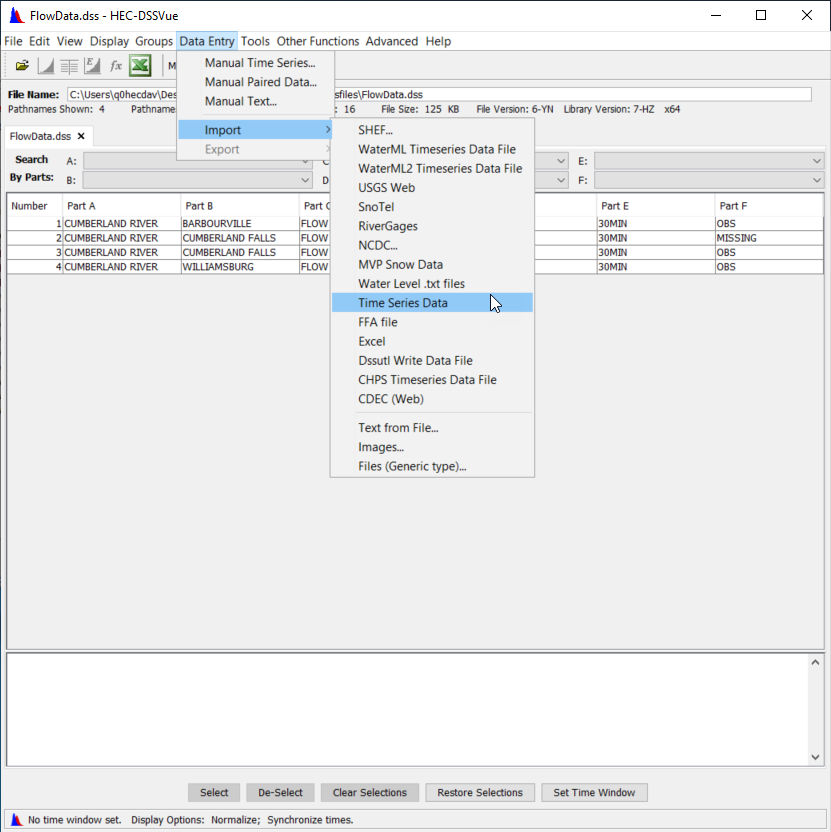
2. If your data is in a ".csv" or blank separated file, select Time Series Data instead of Excel. An example of the browsing window is shown below.
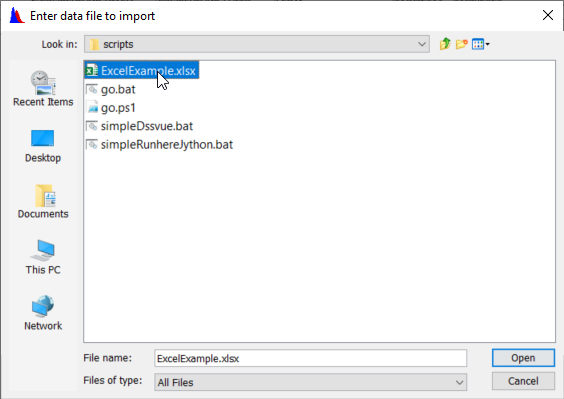
3.Select your file to import. Data should be in columns, separated by comma or spaces. Ideally, a row should contain a location or parameter, and a column should contain date/time.
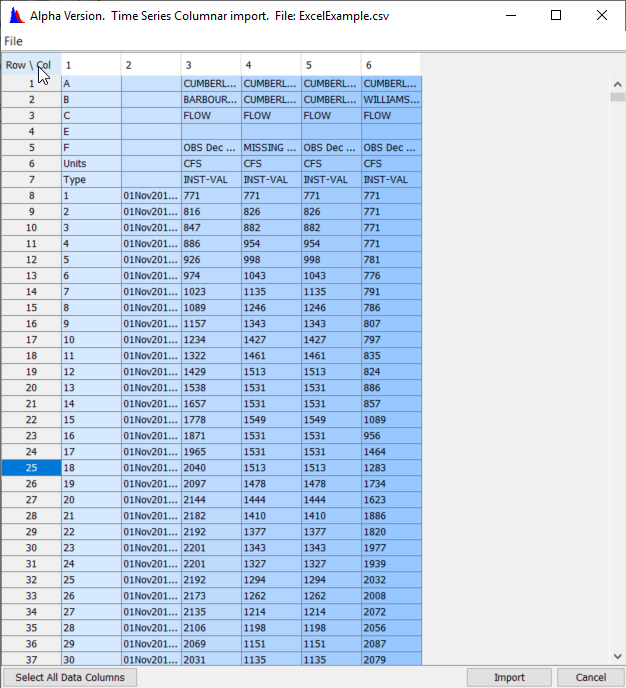
4. The file will be read into an editable table as shown below.
5.For regular-interval time series data, select the column cells that you wish to import. For irregular-interval data, you need to select date/time column cells also.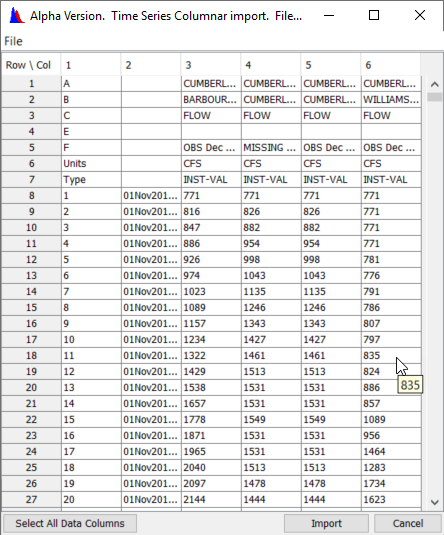
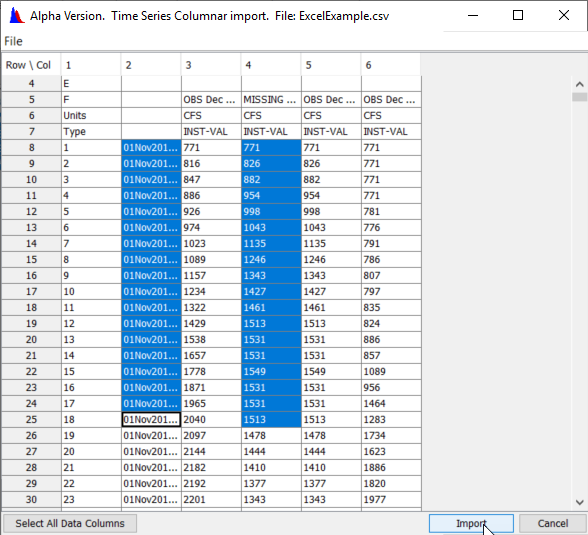
6.Press the Import button and your selected cells will be entered into the time series data entry dialog, as shown below.
7.Enter the pathname parts, units and type, and then press Save. An example of the Time Series Data Entry window that appears after data have been imported is shown below.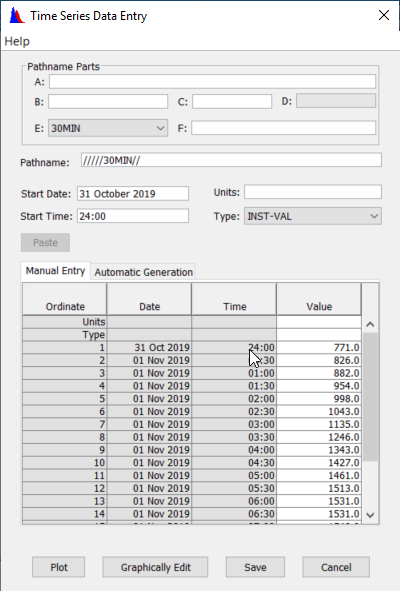
Note: Excel uses beginning of period dates, whereas HEC-DSS uses end of period. Thus, the average data for a day will show at 0000 hours in Excel and 2400 hours in HEC-DSS. This can cause a time shift by a day if the data is not imported or exported carefully; Check your data after the operation. You can shift data to the correct times by using the Time Functions tab in the Math Functions screen.
Importing Data from Microsoft Excel or ".csv" files using Time Series Wizard
You can import multiple columns of time-series data from Excel, a ".csv" file, or a blank separated file using the Time Series Wizard. The Time Series Wizard is a plug-in that is distributed in a development stage; check the HEC-DSSVue plug-ins web page for updates.
1. Open your DSS file from the Data Entry men, point to Import, click and click Excel.
2. If your data is in a ".csv" or blank separated file, click Time Series Data instead of Excel.
3.Select your file to import. Data should be in columns, separated by comma or spaces. Ideally, a row should contain a location or parameter, and a column should contain date/time.
4. The file will be read into an editable table.
5.Select any location, parameter, units, or version, etc. rows by right clicking on the header row in the first column and selecting the item, as shown below. You may also skip any rows that are not to be imported or used. 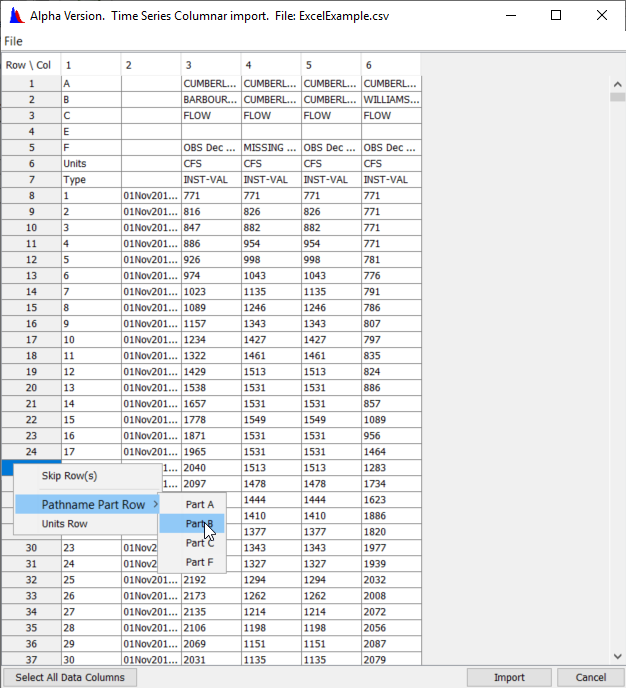
6.From the top header row, select any columns that contain dates or times.
7. You can also select individual data columns from the header popup.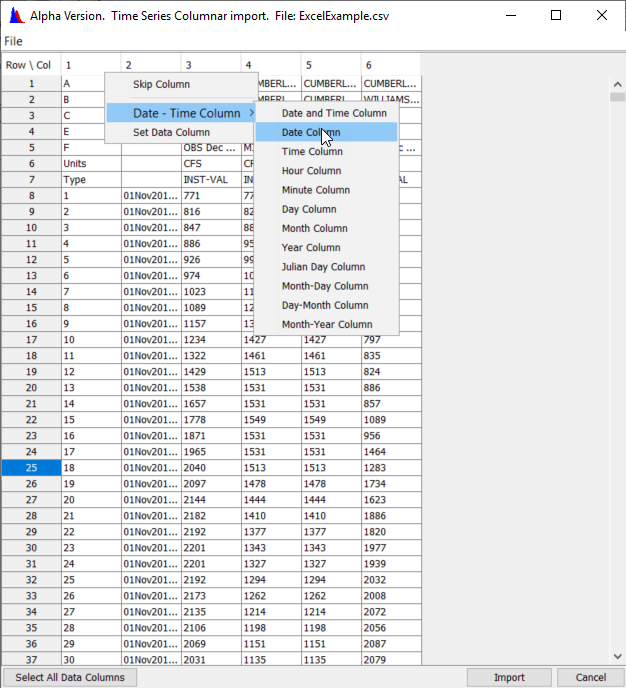
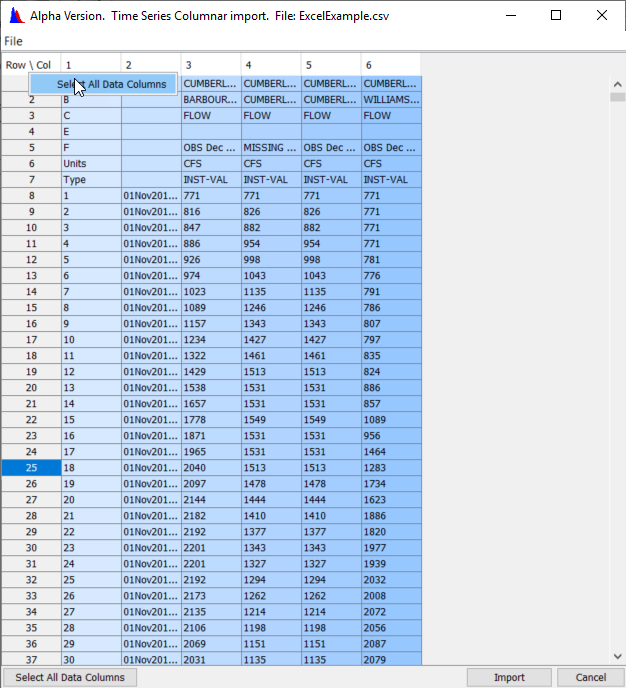
8. Alternatively, you can enter all data into DSS at one time by right-clicking the upper left cell and selecting Set All Data Columns, as shown below.
9. This will bring up a dialog to set additional pathname parts or units, as shown below.
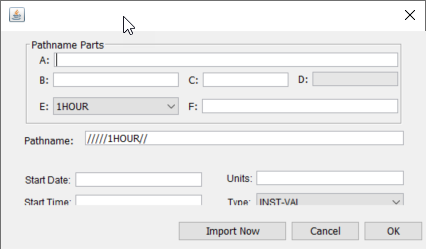
10. Enter additional information desired. To import all the data sets, click Import Now. A confirmation window will appear.
11. Alternatively, if all columns are not to be imported, individual data set columns can be imported by right clicking on the header row of the column and selecting Set Data Column.
12. Fill in the additional information and click Import Now if you are finished importing data from this file, or click OK to select other columns. When you have selected all the columns you want to import, click Import Now, or click Import at the bottom of the table. A confirmation window will appear.