1. Open HEC-EFM and use the "File – New" menu option to start a new project. Enter title, author, and project description into the model information section of the Properties Tab.
2. The dataset for this project is part of the completed demonstration project for HEC-EFM, which was copied to your computer when the HEC-EFM software was installed. Use the "Help – Install Demonstration Project…" menu option to extract the demonstration project to a directory on your computer or network (Figure 21).
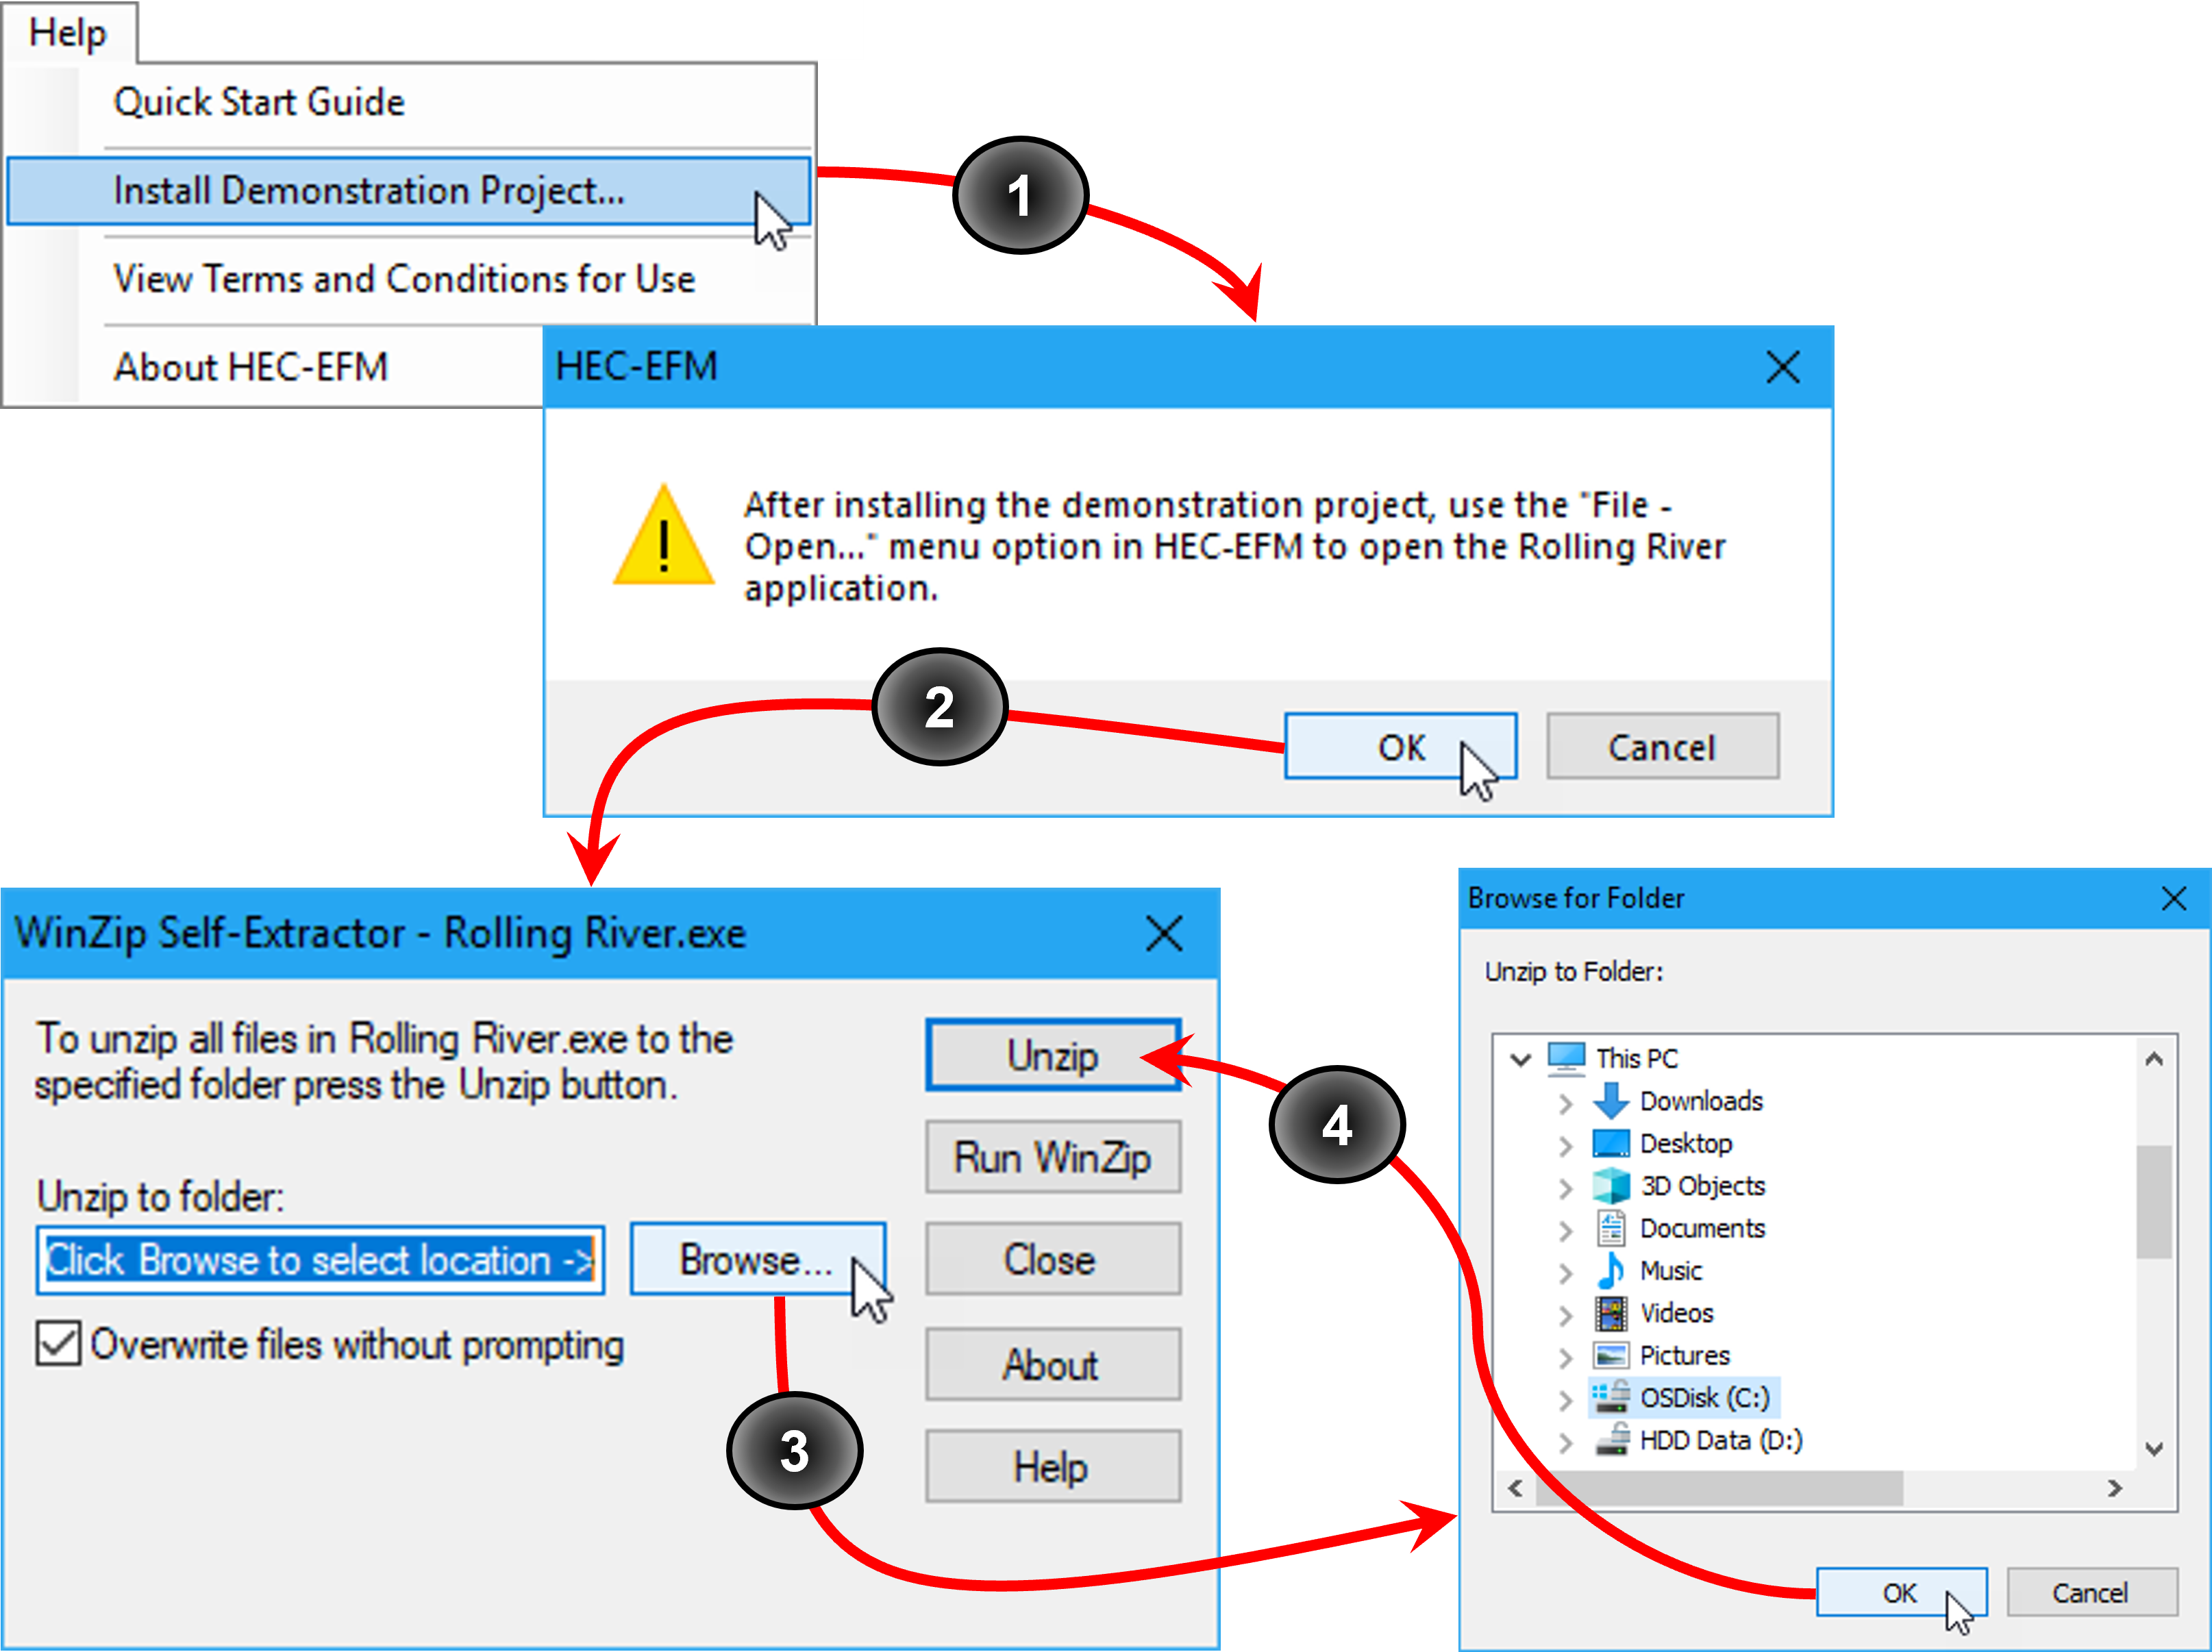
Figure 21. Setting up a working directory.
3. Data for the flow regimes are located in "Rolling River Data.dss", which is included in the demonstration project. The first flow regime acts as a placeholder and must be renamed. Use the “Edit – Flow Regimes – Rename…” menu option to open the Rename Flow Regime In the New name text box, enter Natural and click OK (Figure 22).

Figure 22. Naming a flow regime.
4. Add data to this flow regime by moving the cursor over the Filename cell and pressing the browse button (Figure 23). Browse to the Rolling River folder in the extraction location, select "Rolling River Data.dss", and click OK. Note: The browse button only appears when you have the Filename cell selected.
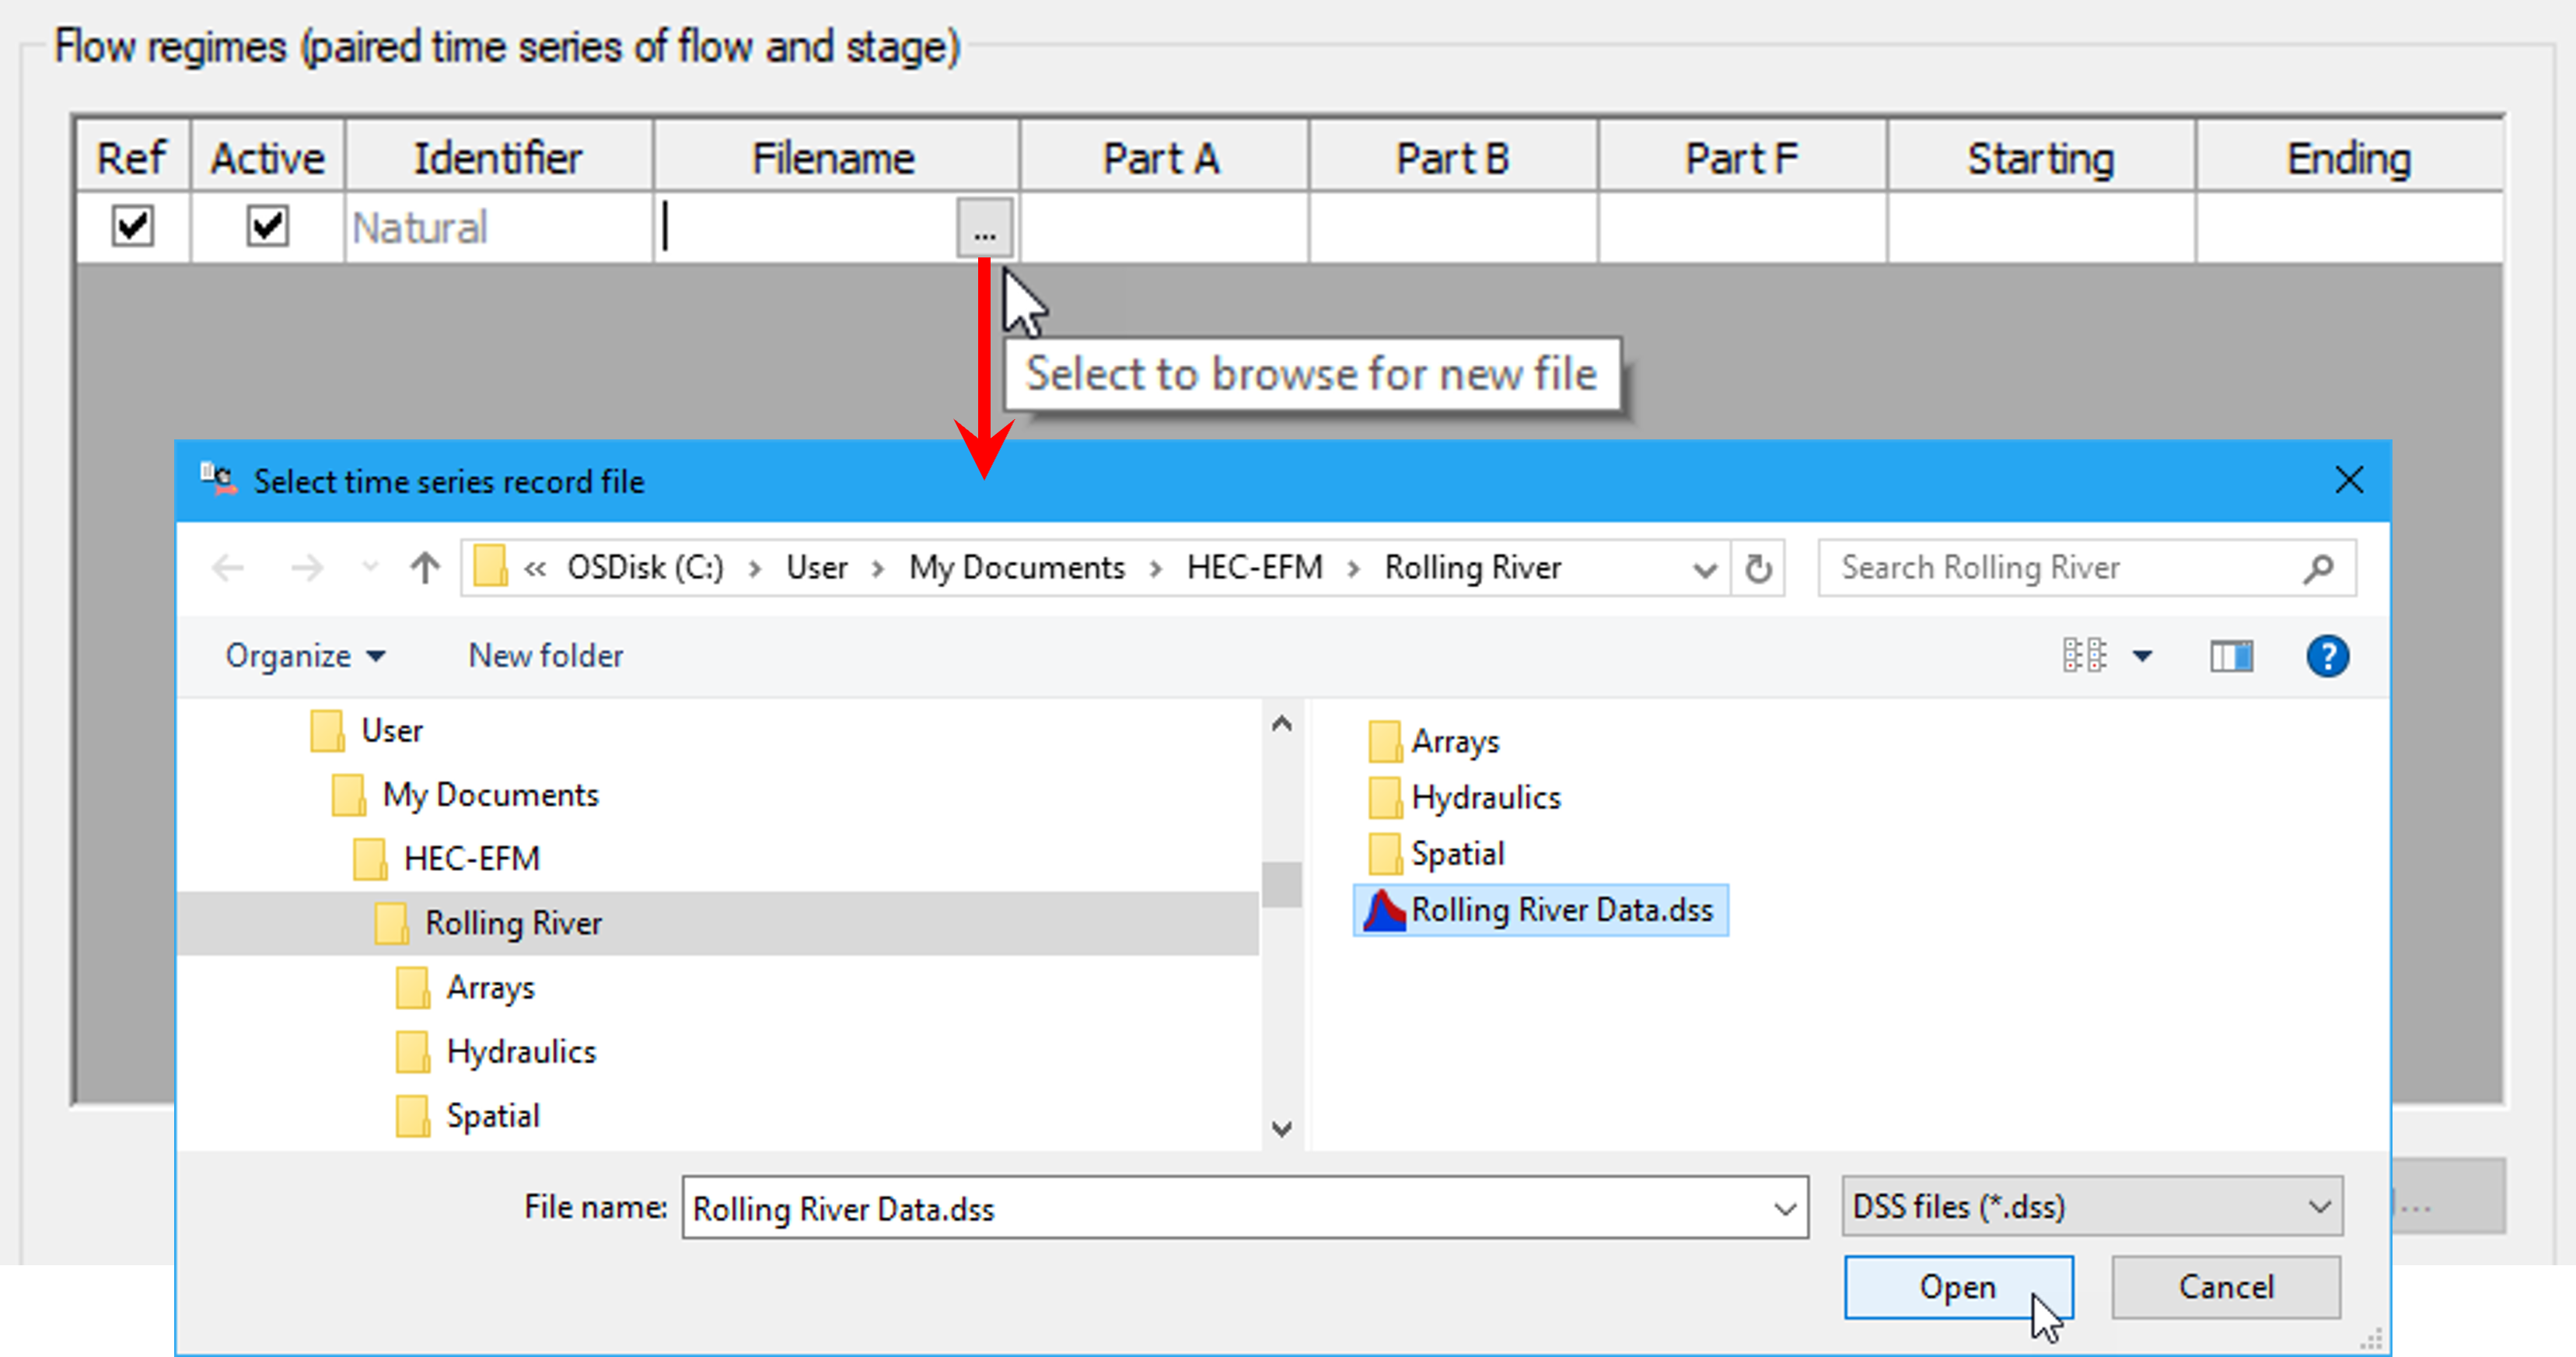
Figure 23. Adding the flow regime data file.
5. Click the Open DSS Catalog button to open the HEC-DSS Catalog Browser for that flow regime (Figure 24).
Browse to /ROLLING RIVER/AT EFM XS/FLOW//1DAY/NATURAL/, highlight the f-part "NATURAL" and click Select. HEC-EFM has an auto-mapping feature that looks for stage time series whose a-, b-, and f-parts match the selected flow record. If HEC-EFM finds a match, a message box opens asking whether the matching time series should be used as the corresponding stage values for that flow regime. Click Yes. Once both the stage and flow time series have been selected, press OK.

Figure 24. Selecting flow and stage time series.
6. Use the "Edit – Flow Regimes – Add…" menu option to open the Add Flow Regime In the Name text box, enter Gaged and click OK. Repeat steps 4 and 5 to add data to the new flow regime. Remember to click the Open DSS Catalog… button while the cell highlighted in the table of flow regimes is in the row for Gaged and to select the f-part "GAGED" after opening the DSS catalog.
7. It is important to define the reference flow regime, which is the flow regime that serves as the basis for comparison when looking at direction of ecosystem change. In this example, use the Natural flow regime as the reference. To make a flow regime the reference, click on the box in the Ref column of that flow regime (Figure 25). In this case, a check mark is already in the box because Natural was the first flow regime created. Only active flow regimes are considered during calculations.

Figure 25. Reference and active flow regimes.
8. The Properties Tab should now look like Figure 26. Use the "File – Save As" menu option to save your project. Note: The completed demonstration project is called Rolling River.efm. If saving in the extraction directory, please use a different name for your project.

Figure 26. Completed Properties Tab for the demonstration project.