Data
Data for this tutorial are provided in the file “EFMSim Spatial Setup.zip”. Data layers are for a reach of the Truckee River at Lockwood, Nevada. Please download a copy of that file and extract contents to your computer. Images in this tutorial use files extracted to C:\Temp\EFMSim.
 EFMSim Spatial Setup.zip
Objective
This tutorial shows 1) how to create new EFMSim projects and 2) how EFMSim projects are organized on your computer.
Creating a new project
1. Start HEC-EFMSim.
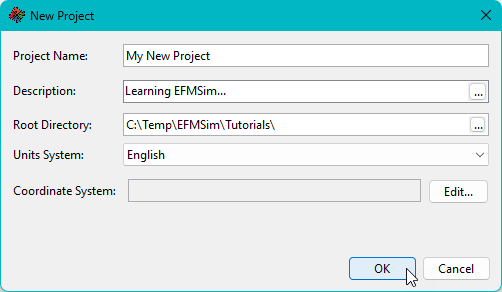
2. Select the File | New Project menu option. Enter project name, description (optional), root directory, and units system.

3. Click the Edit… button to select or browse to the desired coordinate system.
4. Either select the desired coordinate system…

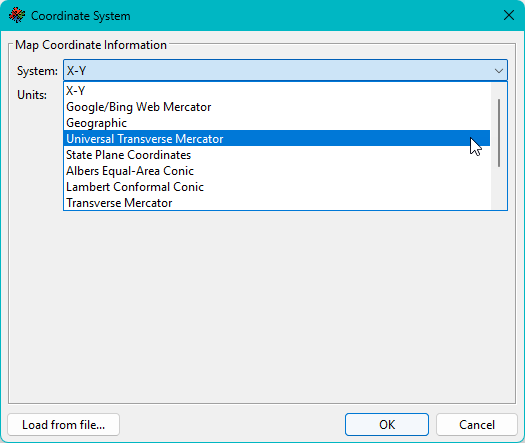
5. …or browse to a projection file that has the desired coordinate system.


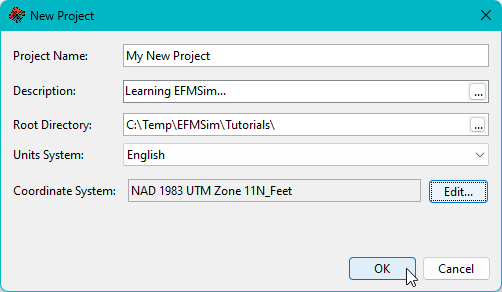
6. Click OK to create the new project.
Please note that EFMSim uses spatial data for both visualization and computational purposes. It is recommended that that all spatial data used in an EFMSim project share the same coordinate system (which should be selected as the project coordinate system).
Understanding how EFMSim projects are organized
1. Open a File Explorer and browse to the root directory (see image above) of the new project.
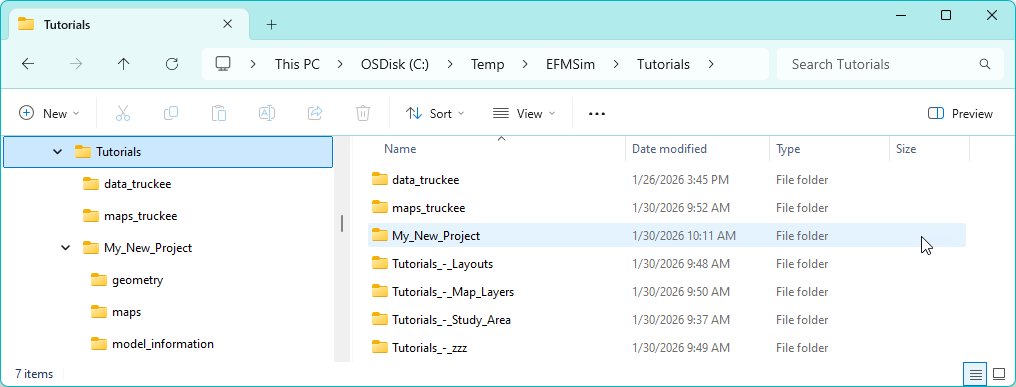
2. A new folder has been created based on the project name (spaces replaced with underscores). It contains the project file (ProjectName.prj) and several supporting files and subfolders that store information about the project.

3. As a model is developed additional subfolders are added, including a “simulations” subfolder to store results for simulations and alternatives.

4. Doing a File - Project Save as… saves a copy of the current project with a new project name and folder structure. Importantly, only files and folders that are part of the EFMSim project are copied. Associated files such as modeling notes created by the user are not copied.


At this point in EFMSim modeling, a new project has been created and the associated units and coordinate systems have been set. Typically, the next step would be to create a study area. Please see the study area tutorial for more information.