Download PDF
Download page Creating a study area.
Creating a study area
Data
This tutorial follows the “creating a new project” tutorial. If that tutorial was completed successfully, then no additional data are needed here – just keep working with the new project that was created. If you are starting anew, please download a copy of “EFMSim Spatial Setup.zip” and extract contents to your computer. Images in this tutorial use files extracted to C:\Temp\EFMSim\. Data layers are for a reach of the Truckee River at Lockwood, Nevada.

Objective
This tutorial shows how to create a study area in EFMSim by 1) importing from an external data layer, 2) importing from an existing EFMSim project, and 3) drawing.
Note: In EFMSim, the study area is a polygon that encompasses the area to be simulated. There is one study area per application and it must be contiguous.
Creating a study area – Importing from an external data layer
1. Start HEC-EFMSim and open the EFMSim project.
If you are continuing from the new project tutorial, please consider using the File - Save Project As... menu to save your project with a new name such as "Study Area".
If you would like to use the project provided for this tutorial, please use the File – Open menu to open a project called “Tutorials_-_Study_Area.prj”, which is located in the \Tutorials\Tutorials_-_Study_Area\ folder.
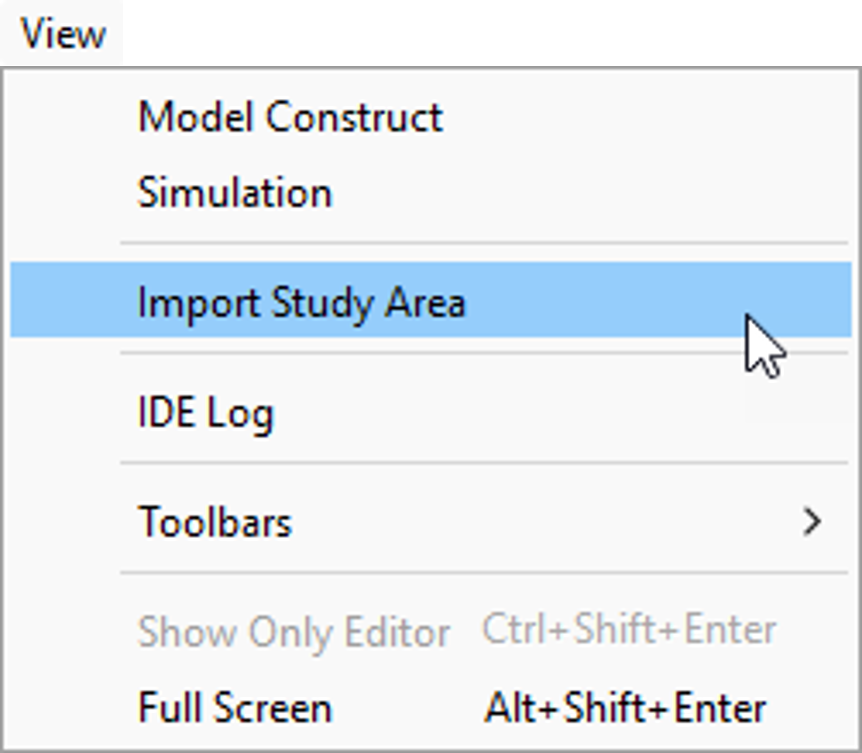
2. Select the View | Import Study Area menu option.
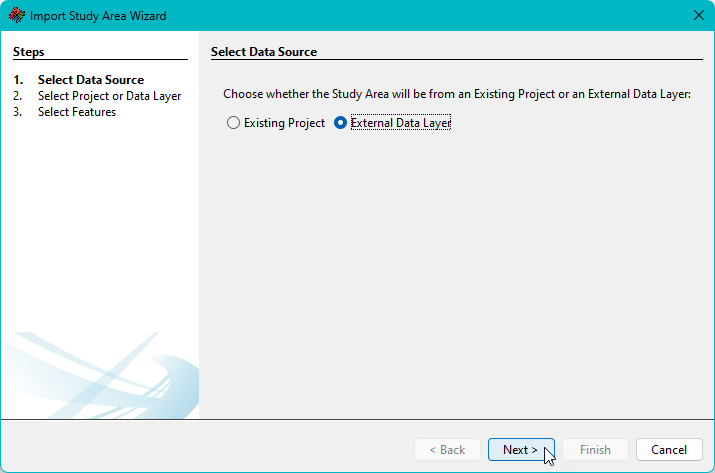
3. An interface called the Import Study Area Wizard will open. The first step is to choose whether the study area will be imported from an existing project or an external data layer. Select the External Data Layer option and click the Next button.
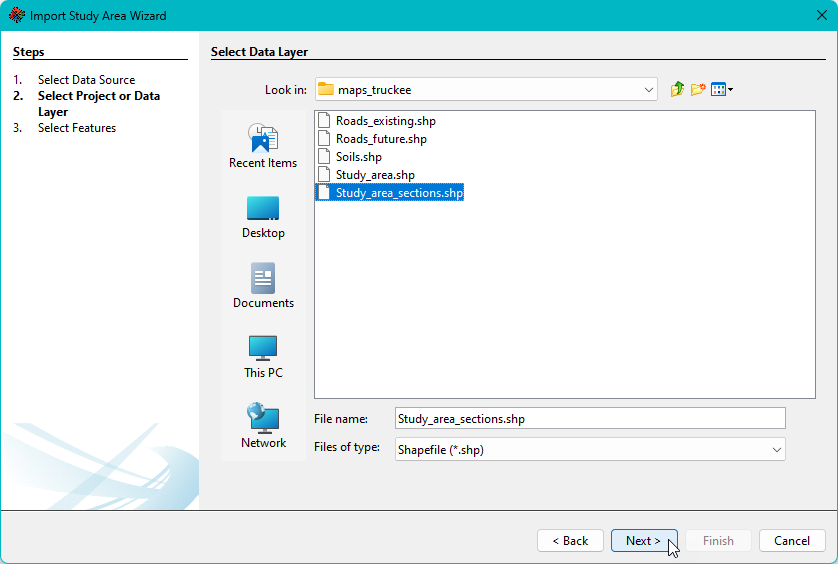
4. Browse to the \maps_truckee\ directory, select “Study_area_sections.shp”, and click Next.
5. Polygons are selected via left mouse clicks. A single click will select a single polygon. Multiple polygons can be selected via left mouse clicks when the CTRL button is pressed. Multiple polygons can also be selected by clicking and holding the left mouse button and then moving the mouse to do a frame select. Try selecting a variety of polygons.
Remember the study area must be contiguous. If selected polygons are not contiguous, users are given an option to “buffer” the selected features. Buffering expands selected features slightly before merging into a single contiguous polygon. Buffering is only meant to handle small separations between features that are most likely unintended gaps created as neighboring areas are manually created in GIS. If features are separated by more than the buffer distance, a message is provided about buffer fail, and users are asked to reselect polygons.

6. When ready, please select a few neighboring polygons and click Run Import. There may be messages about buffering and about the implications of changing the study area - users should be aware that updating the study area could affect other related components of the EFMSim application. Please continue with the import as you see fit. Click the Finish button when the import is complete.


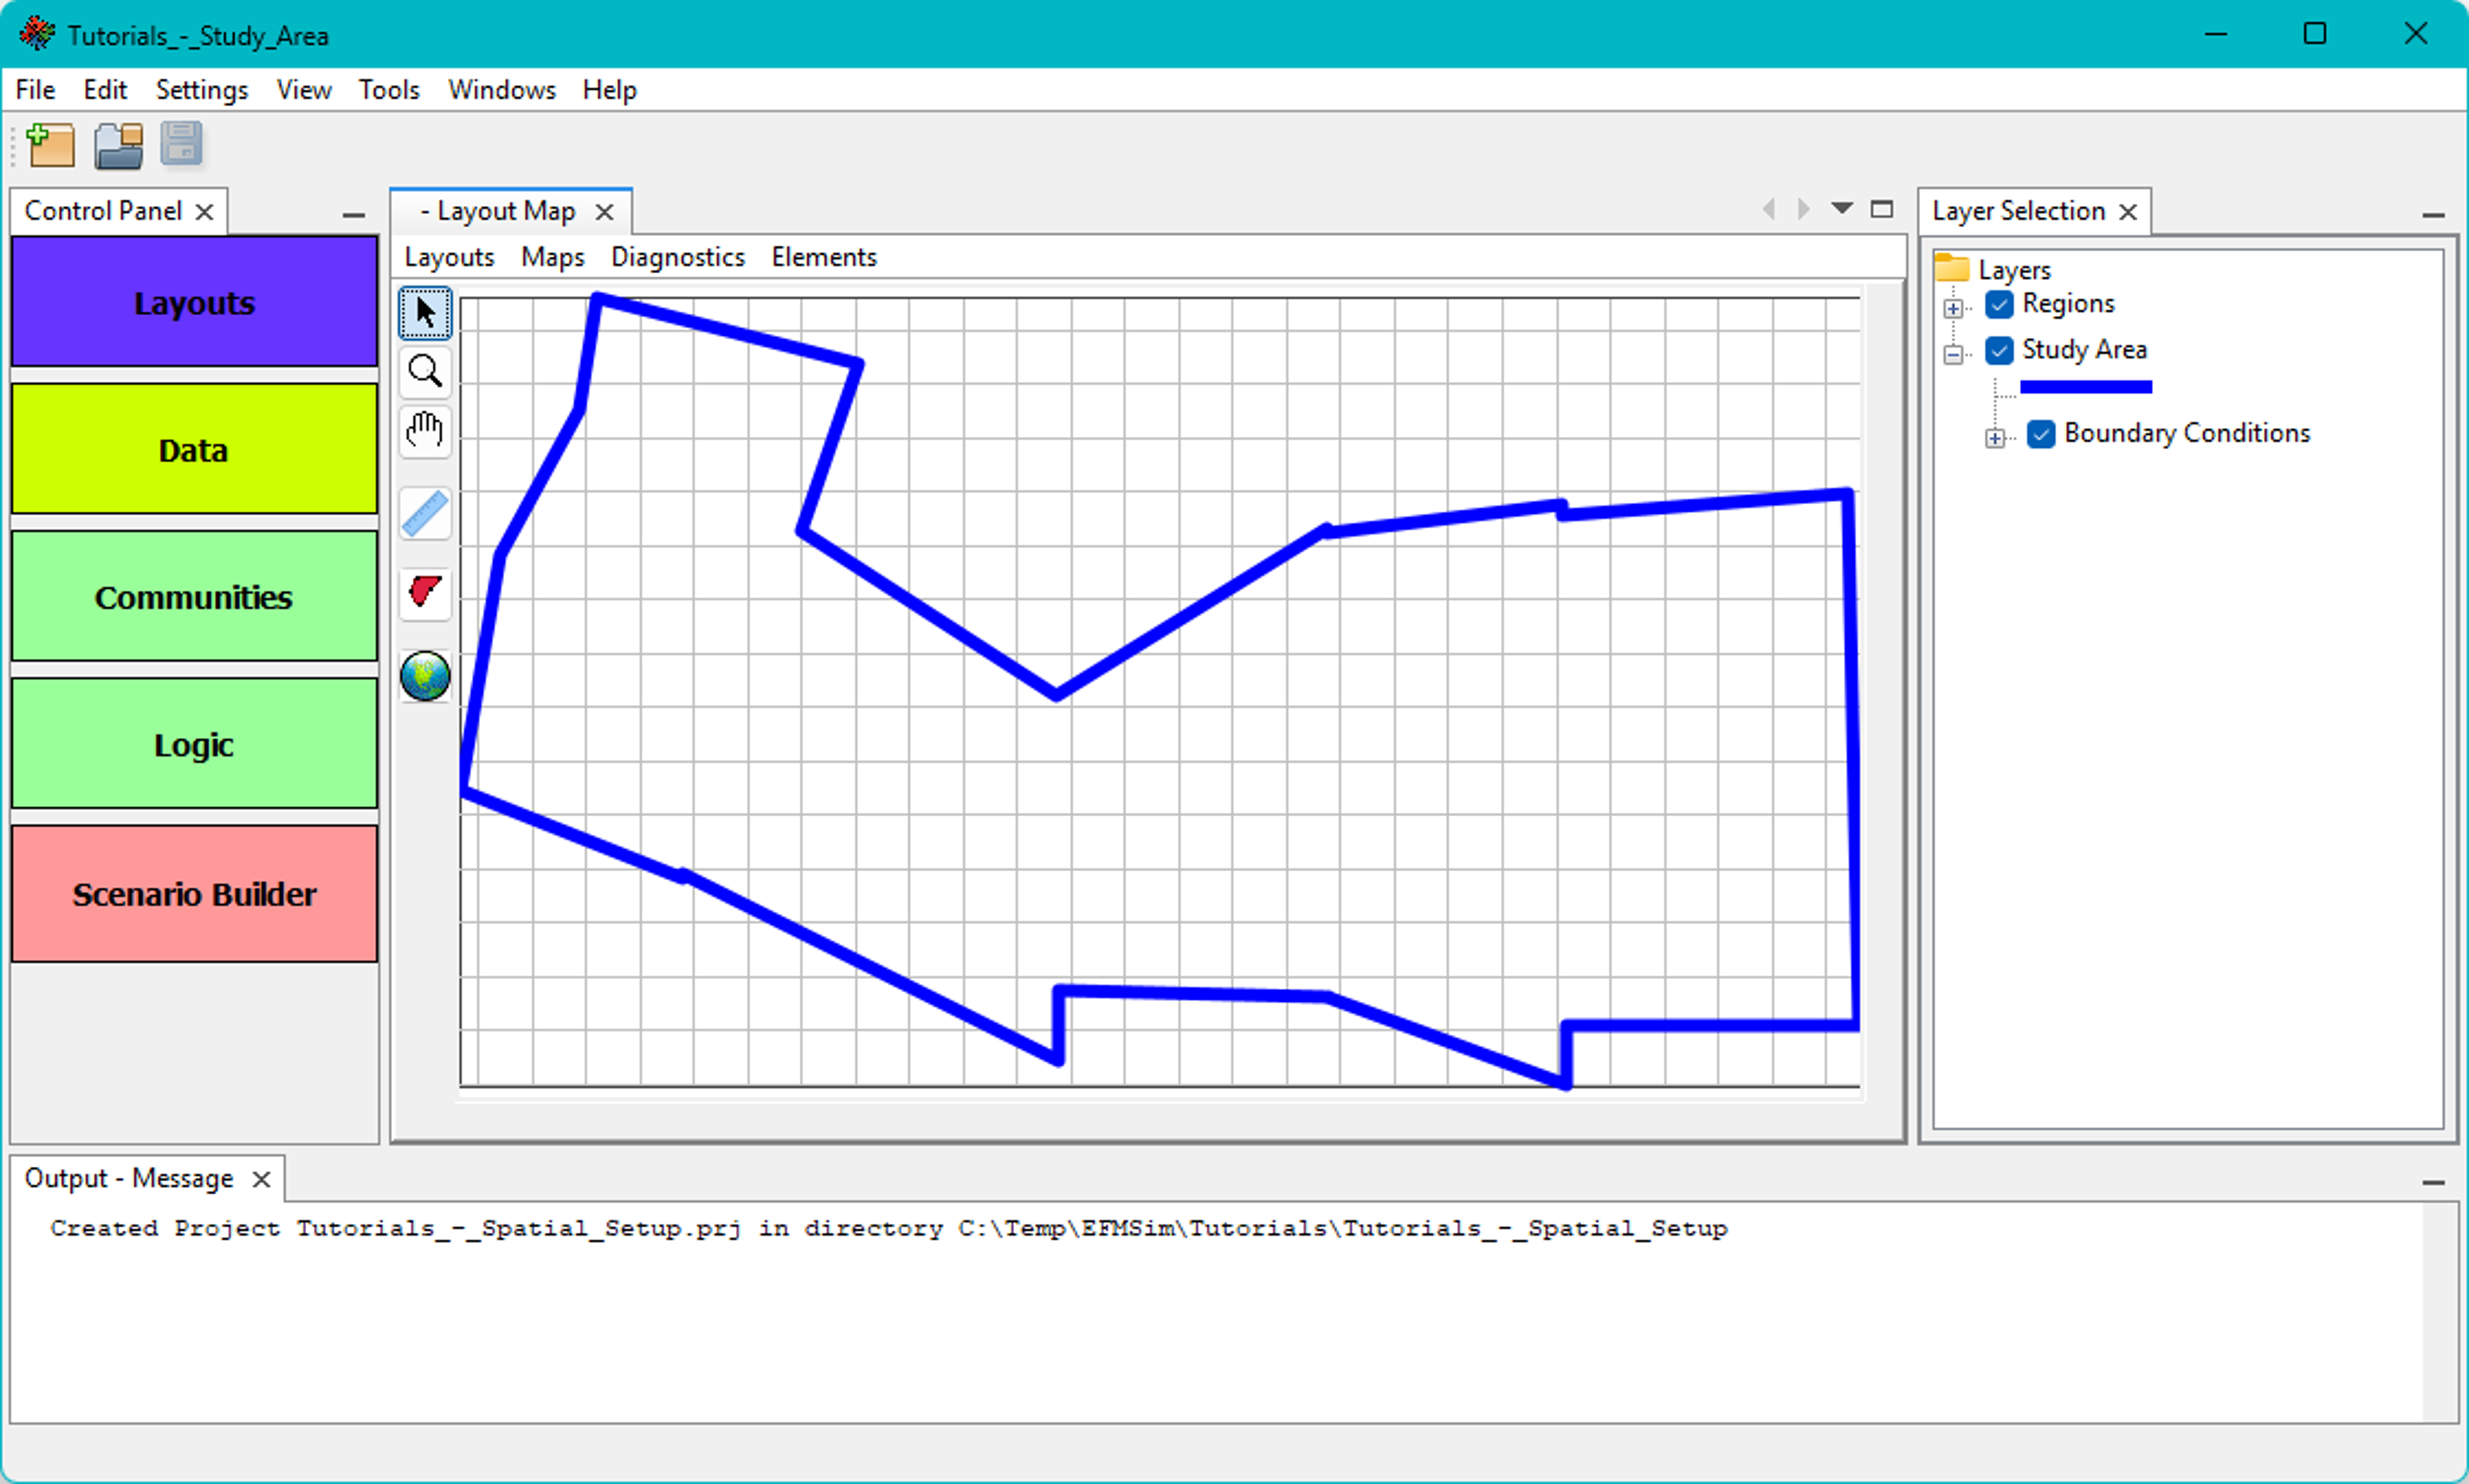
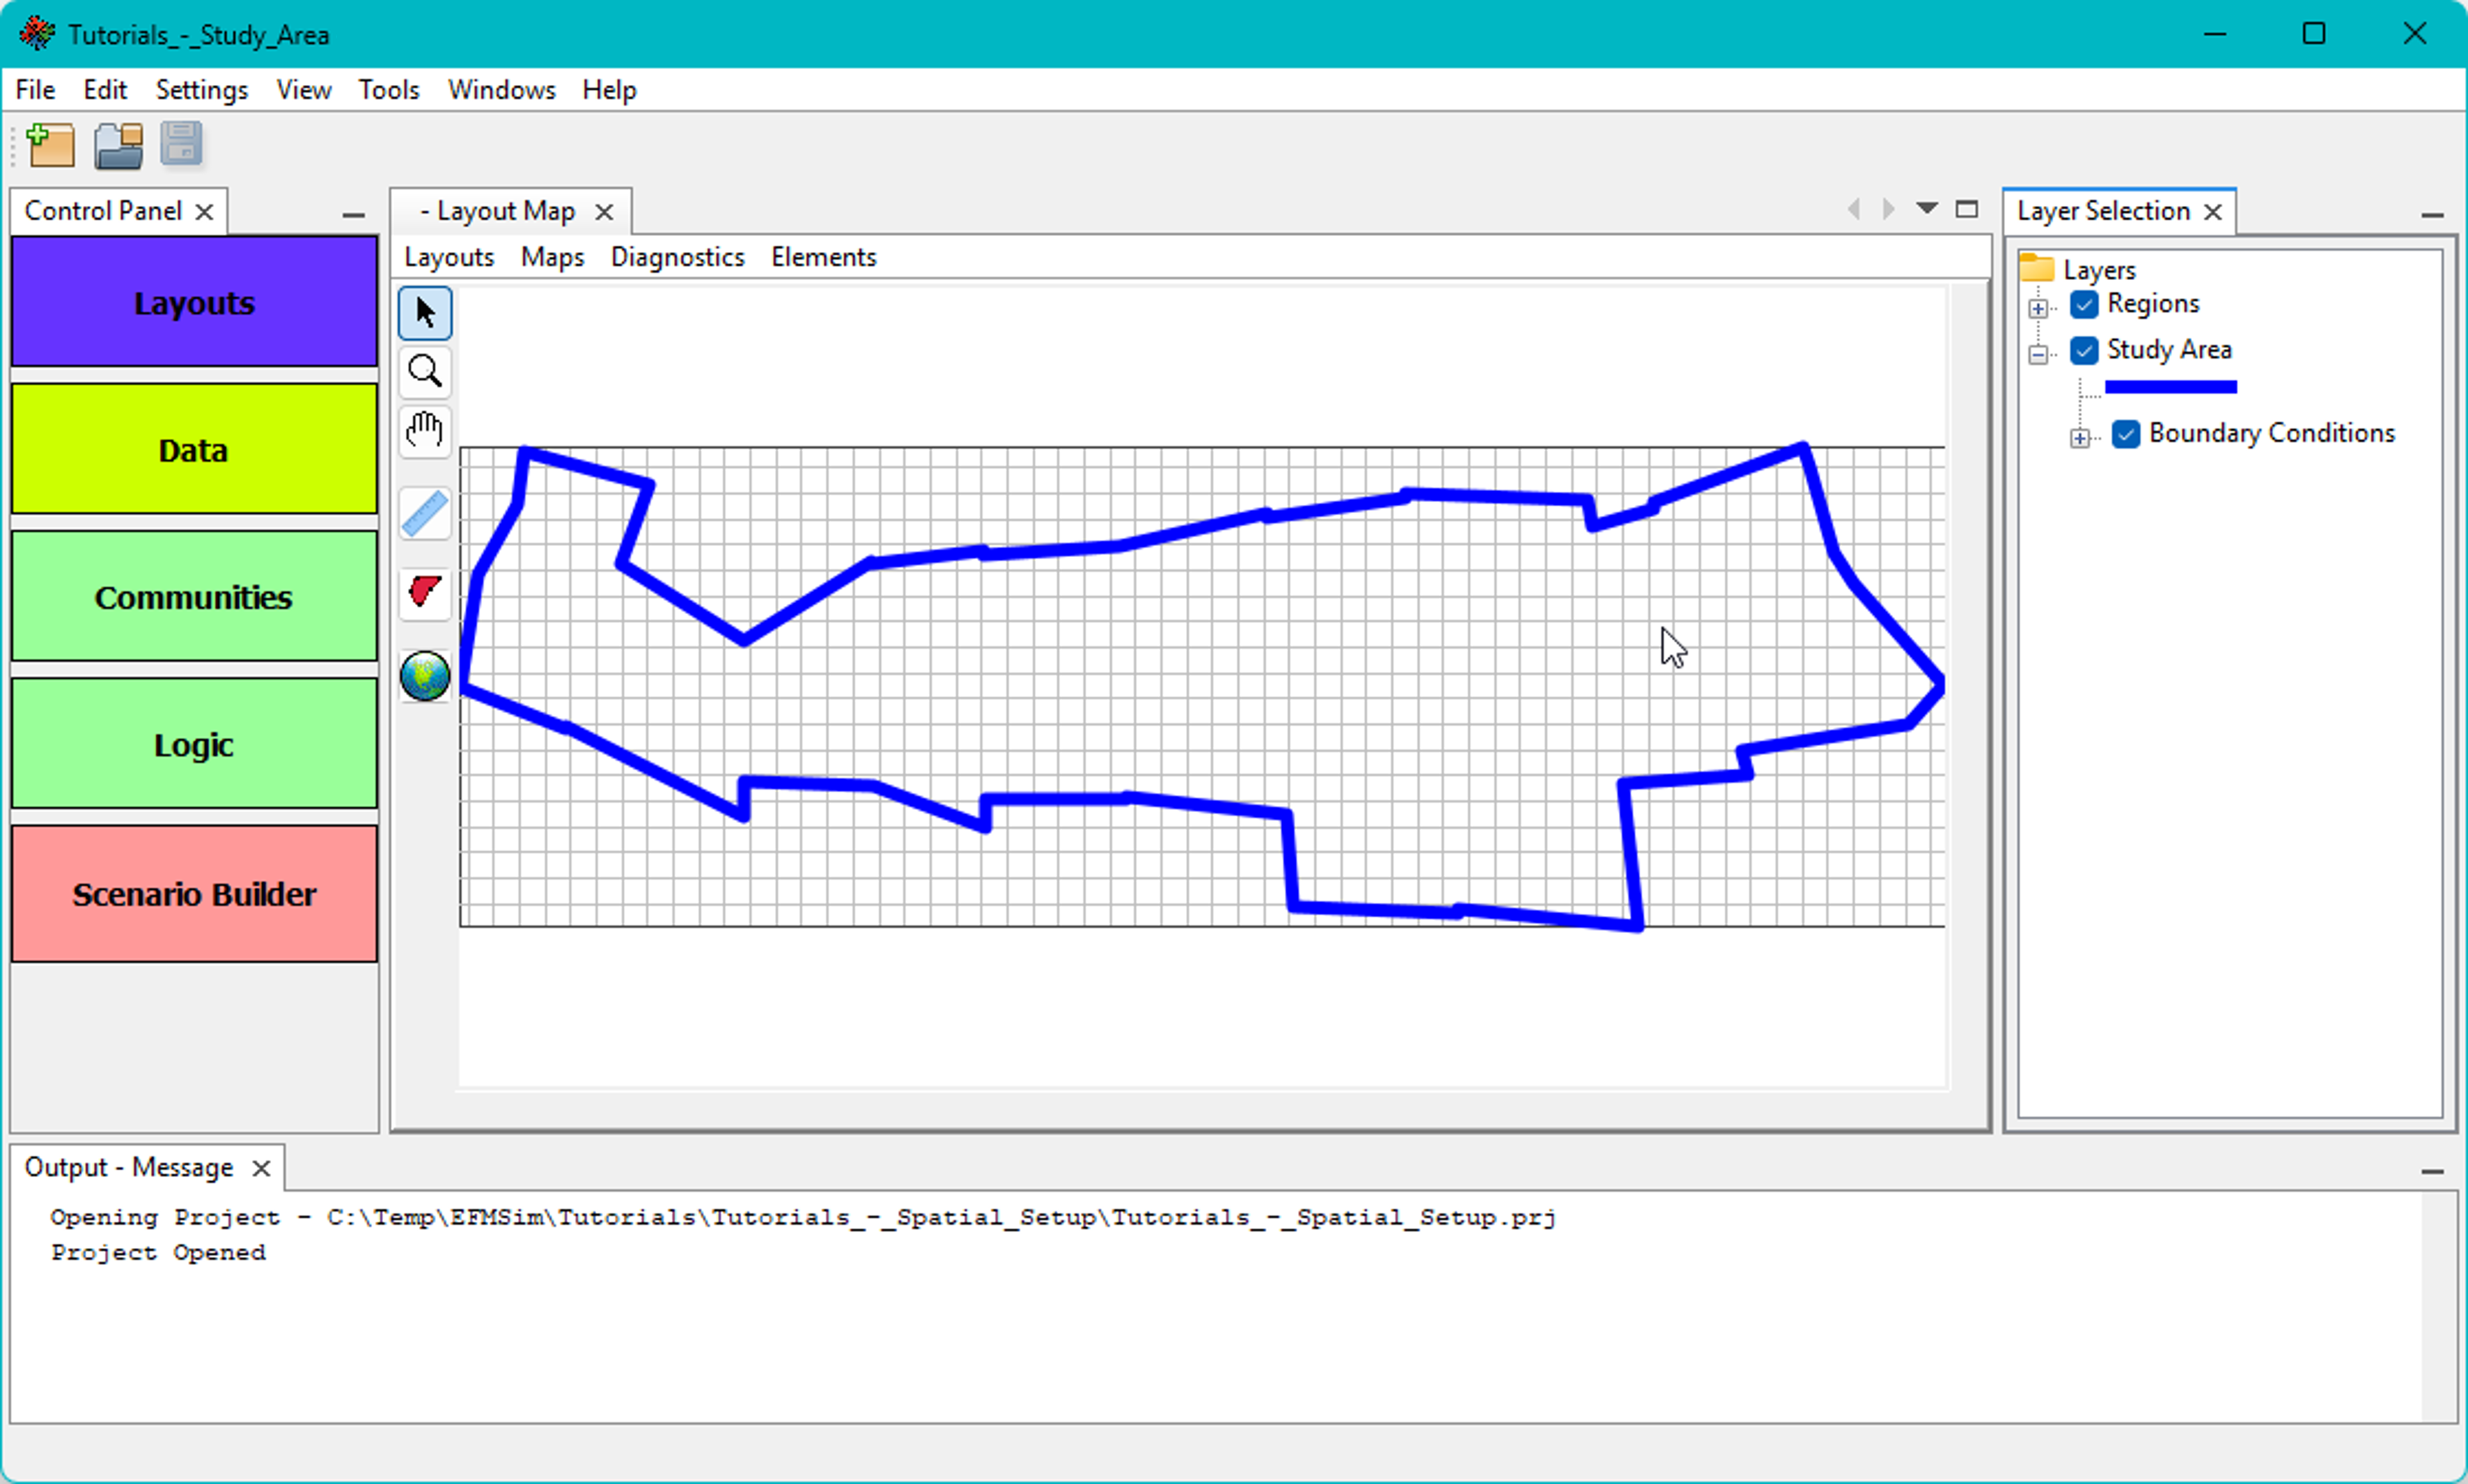
7. The project should now have a study area.
Creating a study area – Importing from an existing project
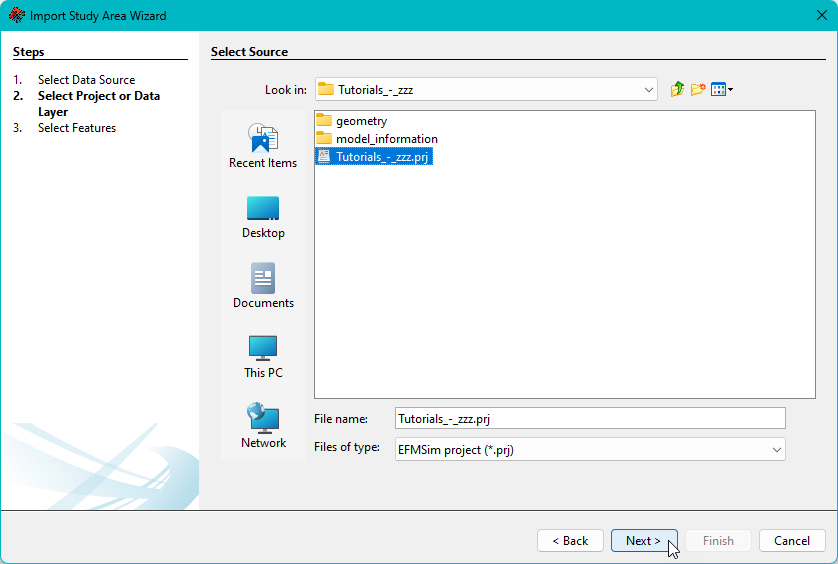
1. Select the View | Import Study Area menu option.

2. The Import Study Area Wizard will open. Select the Existing Project option and click the Next button.

3. Browse to and select the “Tutorials_-_zzz.prj” project and click Next. “Tutorials – zzz.prj” is an EFMSim project developed for instructional purposes (i.e., here used as a source project for a study area).
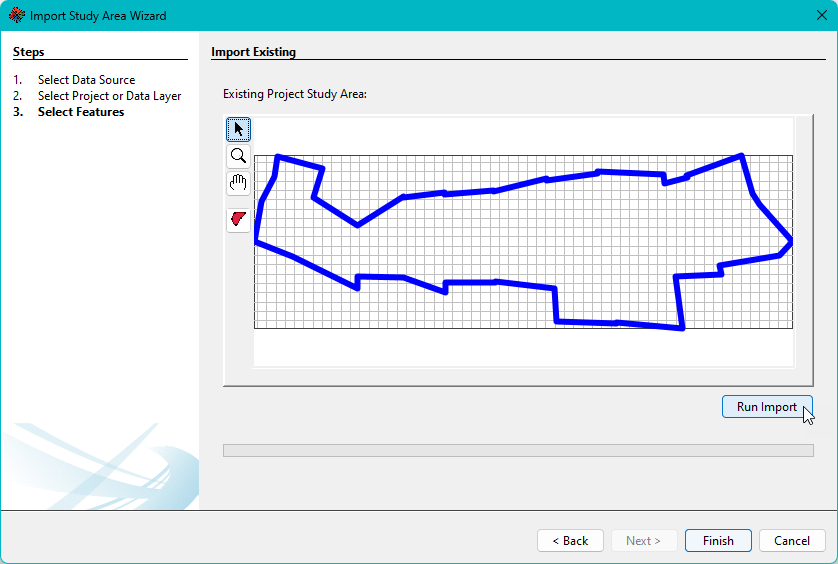
4. The wizard interface will show the existing project study area. Remember there is only one study area per project, which means the choice here is either “yes, that is the study area I want” (click Run Import) or “no thanks” (click Cancel). Click Run Import, click OK to acknowledge the implications of updating the study area, and then click Finish when import is complete.

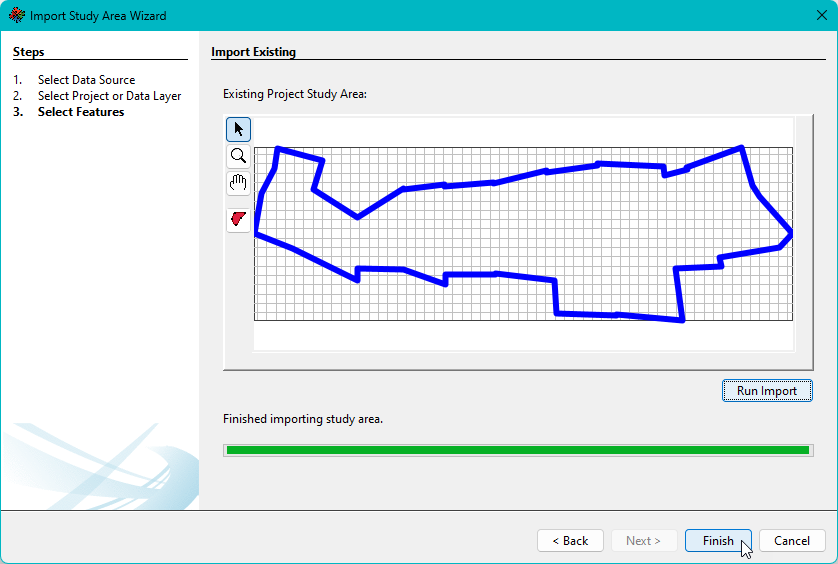
5. The project should now have an updated study area.
Creating a study area – Drawing
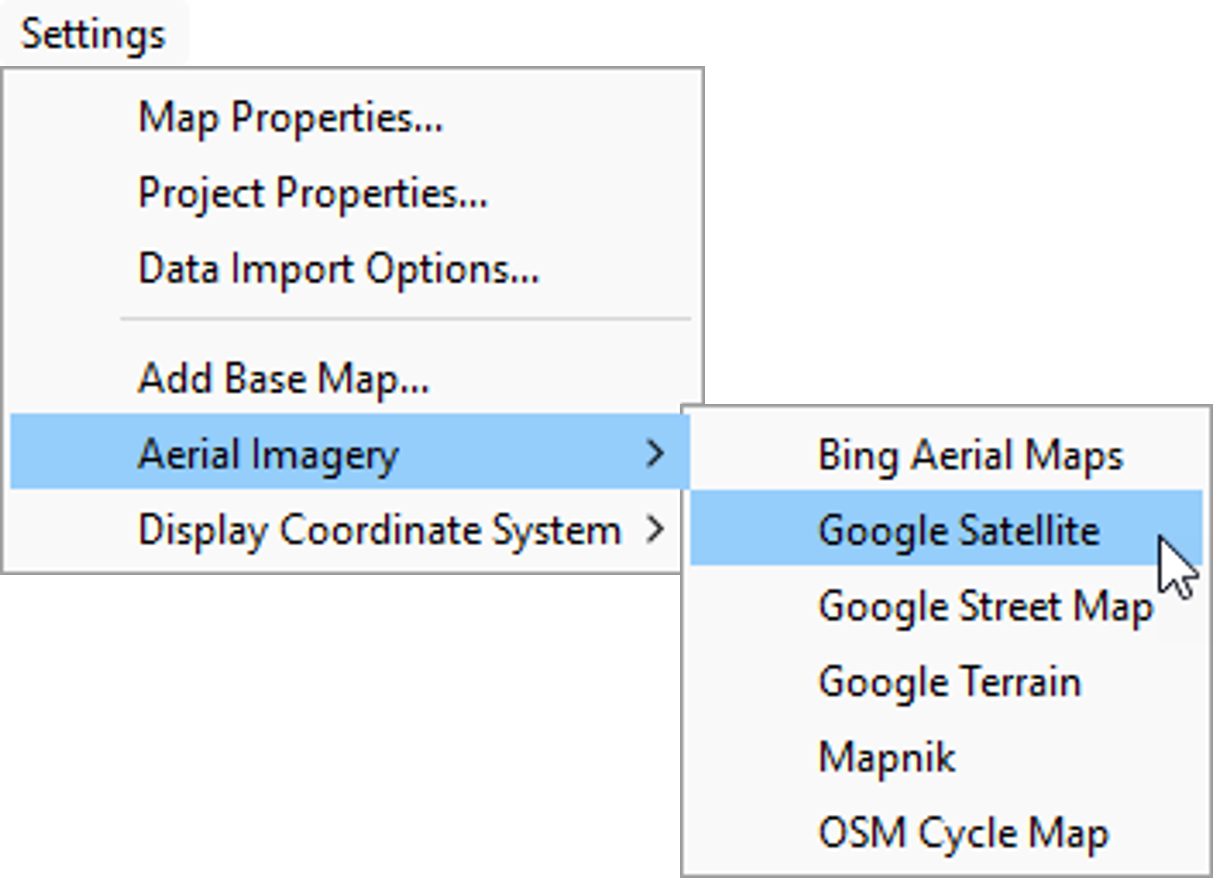
1. Study areas can also be drawn. Typically, a map layer is used to help visualize the spatial domain while drawing. For this tutorial, please select the Settings – Aerial Imagery – Google Satellite menu option. A layer called “Aerial Imagery” will be added as a layer in the Layer Selection.
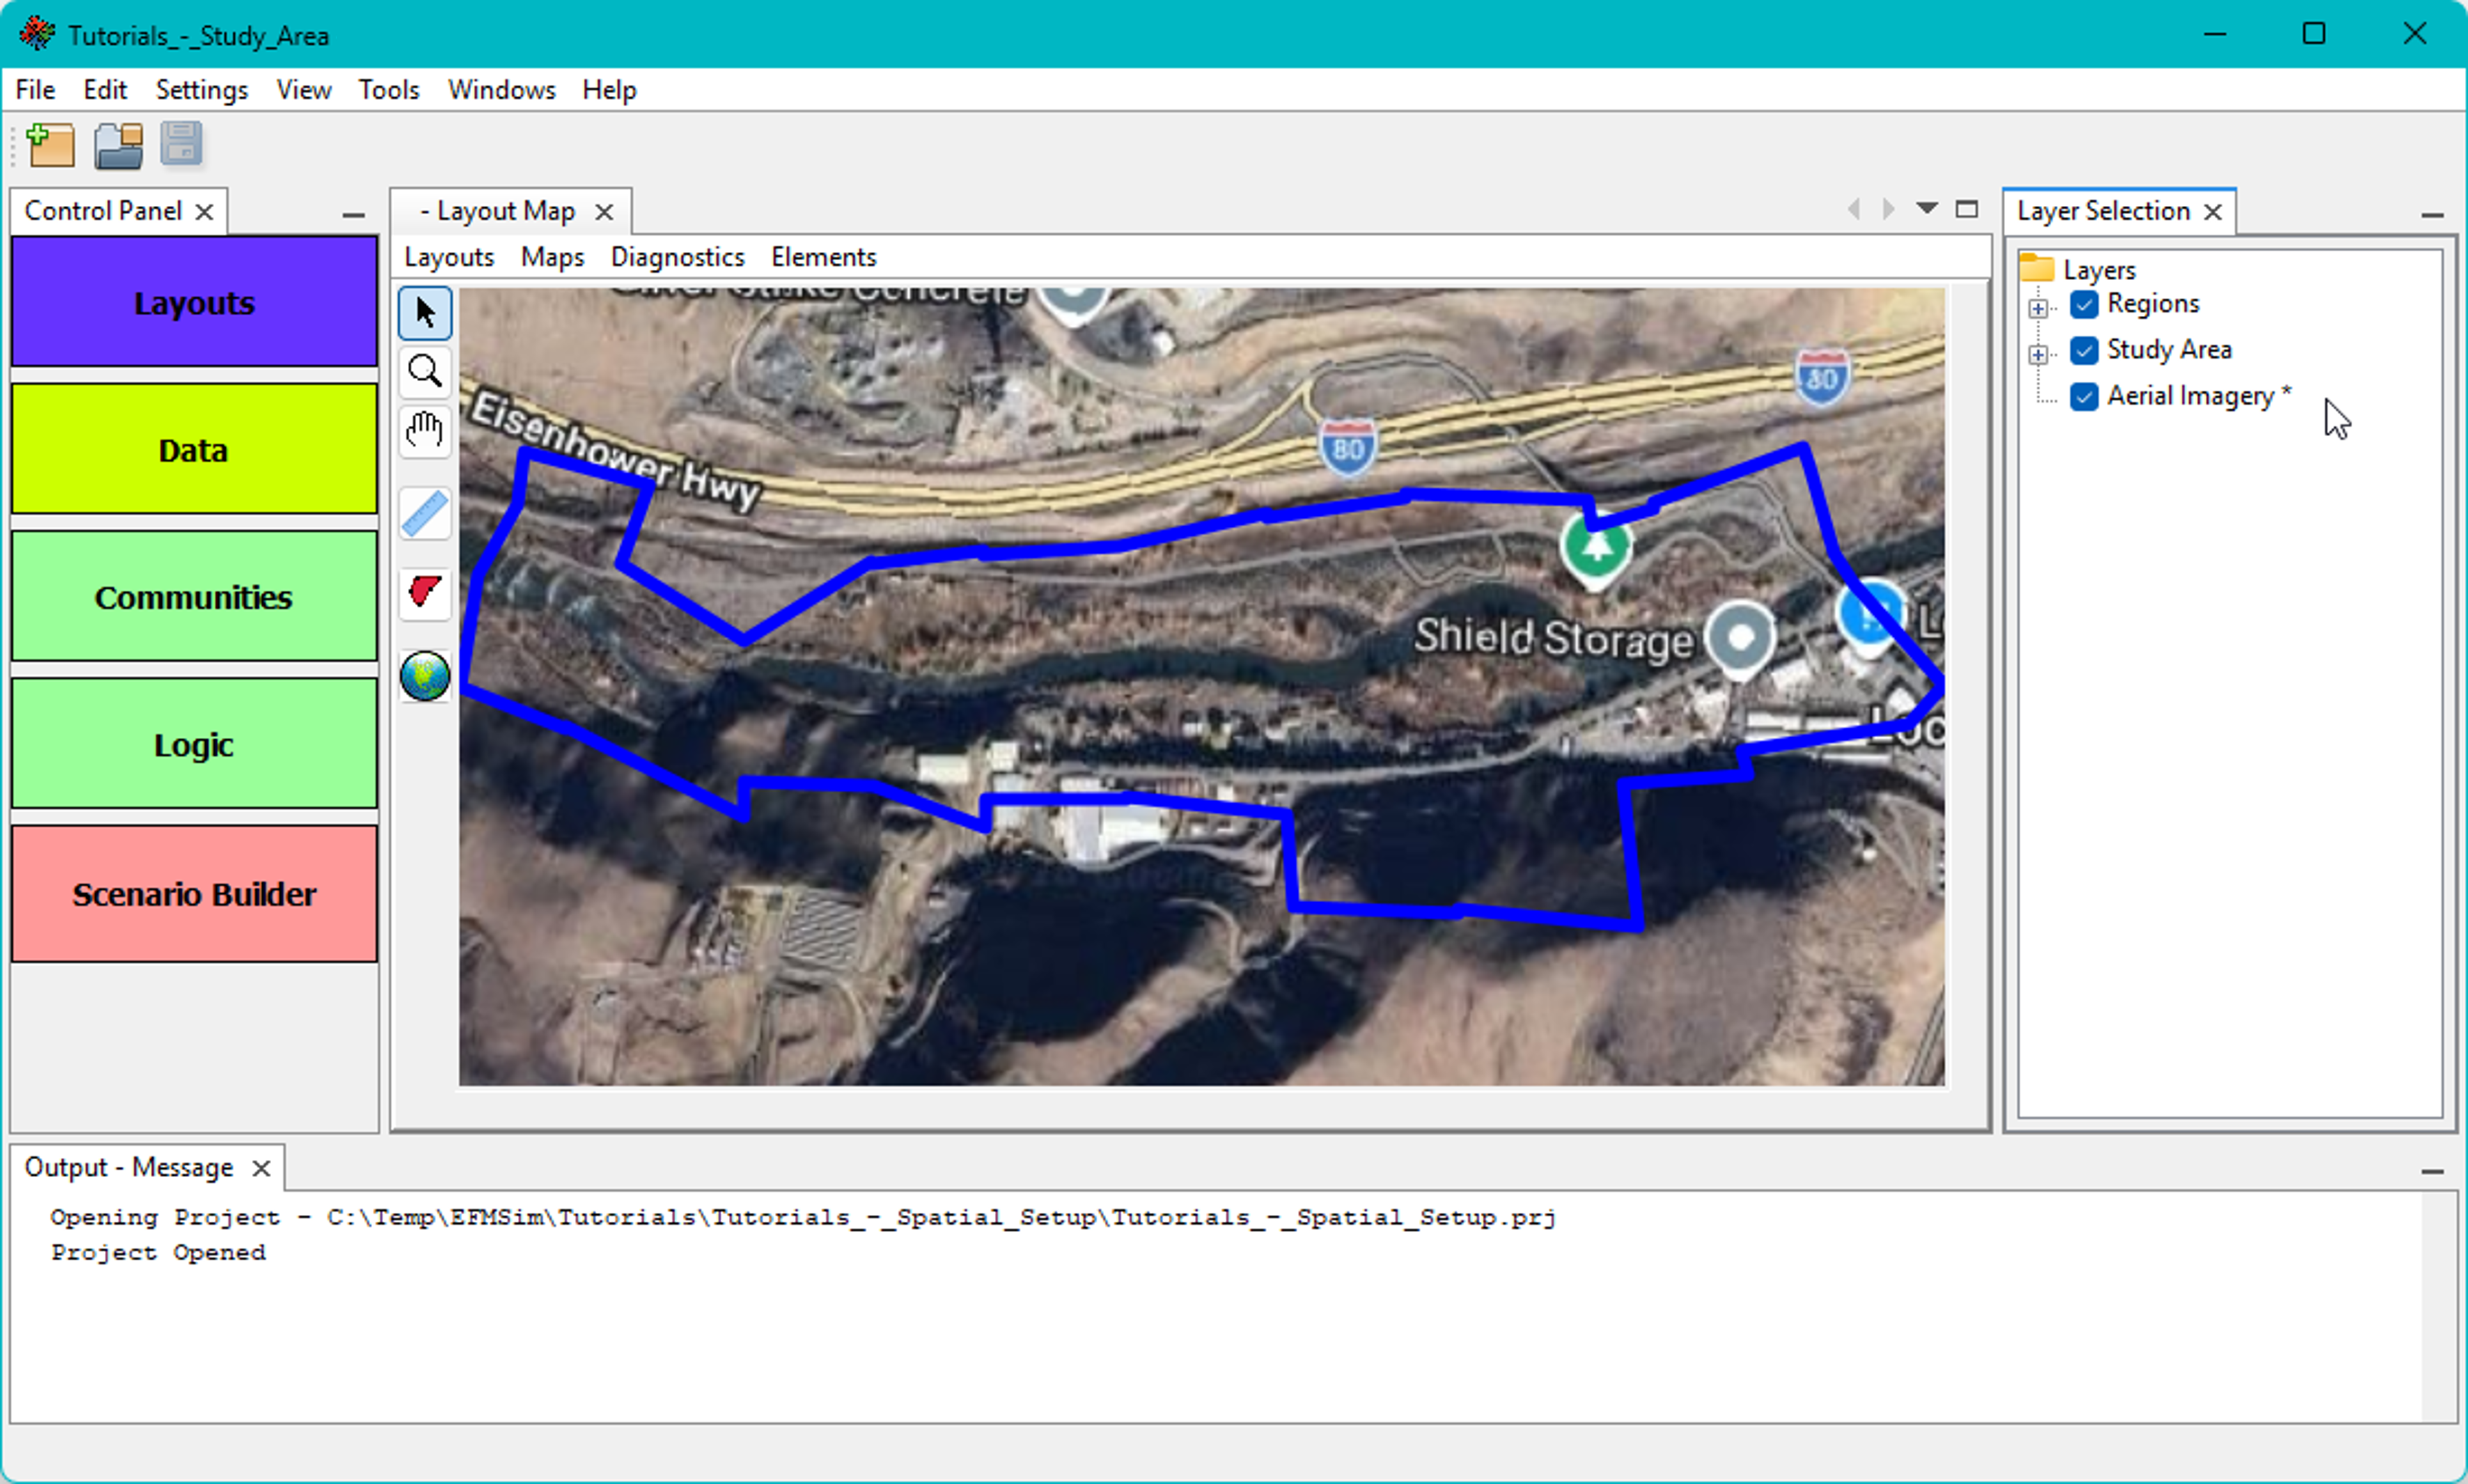
2. To draw a study area, click on the Study Area button (red-filled polygon icon; the cursor changes to a “+”), press and hold the control key, use left mouse clicks to enter study area boundary vertices, release the control key and use a final left mouse click to add the final vertex, which is automatically connected to the first vertex to close the study area polygon.


3. The project should now have an updated study area.
