Download PDF
Download page Creating New Basin Model Elements by Importing GIS Features in Shapefiles.
Creating New Basin Model Elements by Importing GIS Features in Shapefiles
 Initial_GIS_Import.zip
 Final_GIS_Import.zip
This tutorial is designed to help new users of HEC-HMS learn how to create an HEC-HMS Basin Model by importing existing shapefiles.
Overview
In this tutorial, you will create a basin model from existing shapefiles.
Background
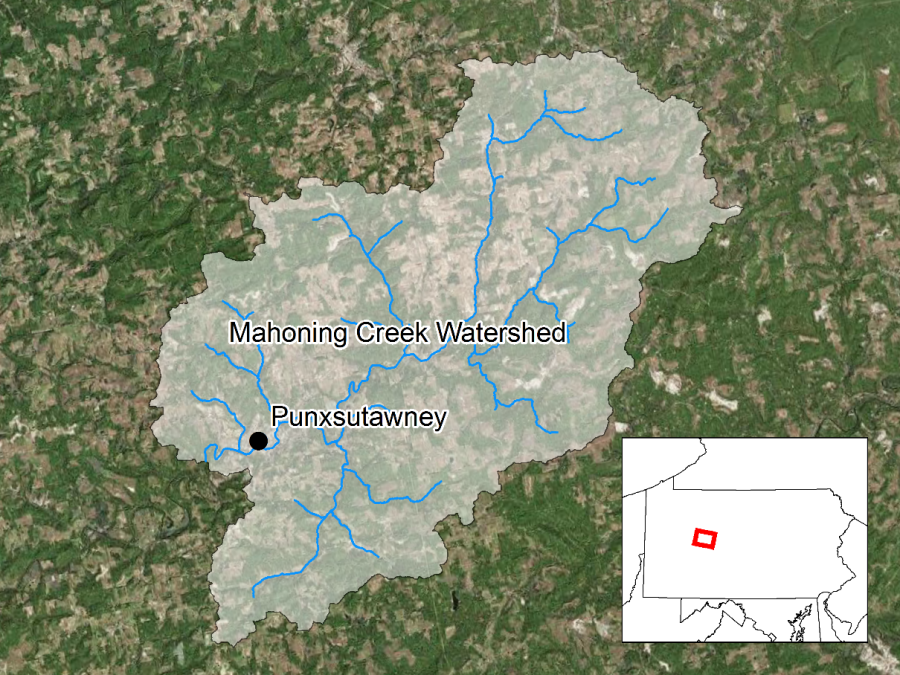
The Punxsutawney Watershed (400 km2) is part of the Allegheny River Basin located in western Pennsylvania, USA. Primary conveyance streams include: Stump Creek, East Branch Mahoning Creek, and Mahoning Creek. The confluence of Stump Creek and East Branch Mahoning Creek is located east of the enclave of Big Run. Mahoning Creek is downstream of the confluence. A map of the watershed is shown in Figure 1.
Create a Basin Model from Existing Shapefiles
Basin geometry is defined by delineating subbasins and river reaches. HEC-GeoHMS, an add-in to ArcGIS, can be used to create the initial Basin Model from terrain information. Another option is to import GIS features from shapefiles and then link the elements using junctions. This task shows how to import shapefiles, which can be used to define HEC-HMS subbasin and reach elements. The subbasin delineation is shown in Figure 2. 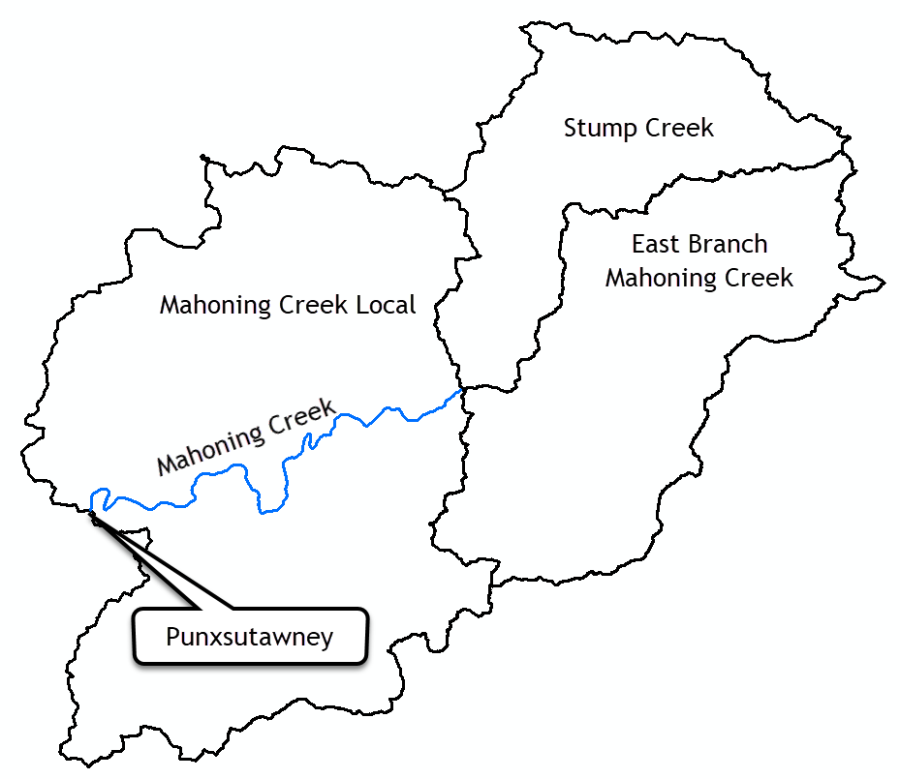
- Double click the HEC-HMS icon
 to start the program.
- The main program window will appear; notice the menu bar across the top of the window with menus beginning with File and ending with Help.
Also part of the window are the tool bars directly beneath the menu bar, the Watershed Explorer, the Component Editor, Message Log, and the Desktop.
- The main program window will appear; notice the menu bar across the top of the window with menus beginning with File and ending with Help.
- To open an existing project, click File and select Open….
- The Open an Existing Project window will open; click Browse to open the Select Project File window.
- Navigate to the project directory and select the "HMS_Example.hms" file.
- Click the Select button and the existing project will open.
- Create a new Basin Model using the Basin Model Manager (select the Components | Basin Model Manager menu option).
- Click on New. Name the basin model "MahoningatPunx". Click on Create.
- Open the basin model by selecting it in the Watershed Explorer. The basin model map will be empty.
- Go to the GIS menu and choose the Coordinate System menu option.
- Within the Coordinate System editor, choose the Browse button and navigate to the … \HMS_Example\maps directory on your computer.
- Select the Subbasins.prj file. Click Select. Click Set.
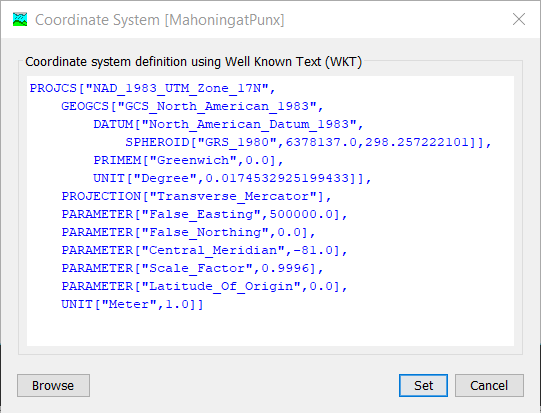
- The coordinate system information should populate as shown in Figure 3.
- Import GIS element by selecting the GIS Menu and choose Import Georeferenced Elements menu options.
- Choose the Subbasins element type and click the Next button.
- Navigate to the … \HMS_Example\maps directory and select the Subbasins.shp file. Click Select. Click Next.
- Choose the "Name" attribute field to set the subbasin element names. Click the Finish button.
- You will see three subbasin elements in the basin model map. You can interact with the elements by clicking on the subbasin polygons or element icons.
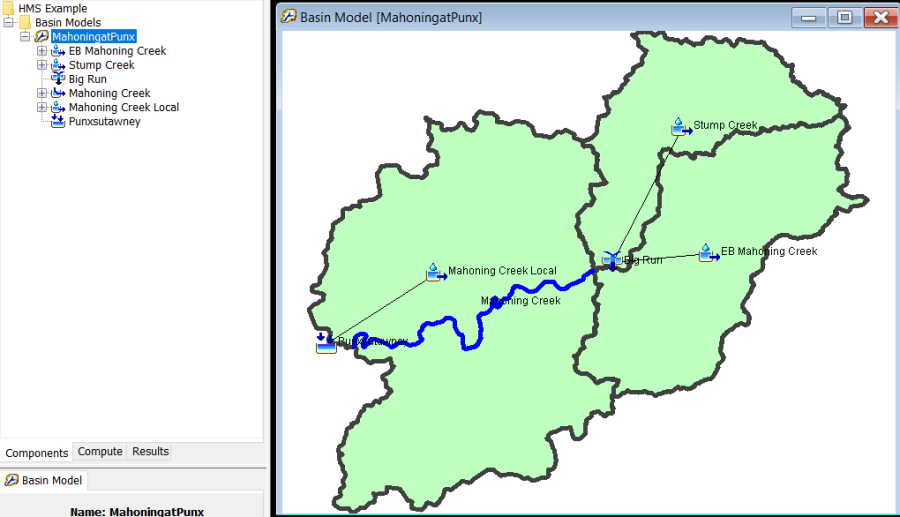
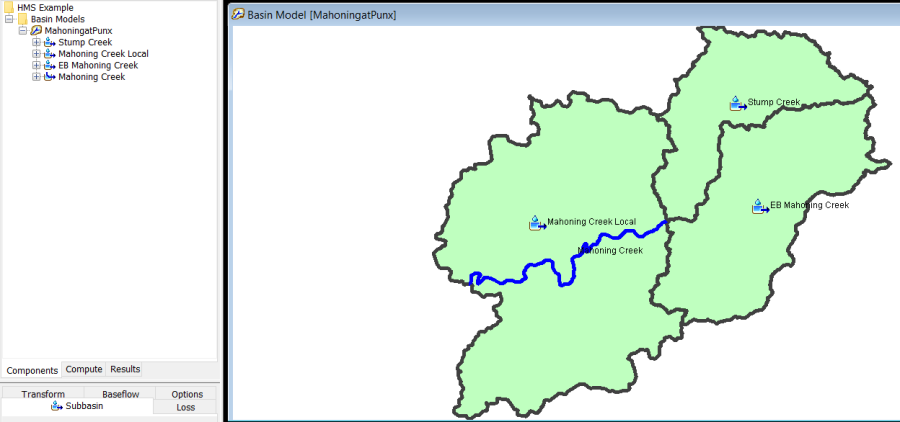
- Follow the previous steps and import the reach feature in the Reach.shp file. Figure 4 shows the three subbasin elements and the one reach element that were imported from the two shapefiles. These elements are not connected to one another.
- Add a junction element to the basin model map. Click on the Junction Creation Tool toolbar button
 and then click in the map around the upstream end of the Mahoning Creek reach element. Name the junction "Big Run". Click on Create.
 - Connect both Stump Creek and the EB Mahoning Creek subbasin elements to the Big Run junction element.
- Then, connect the Big Run junction element to the Mahoning Creek reach element.
- Elements can be connected by right clicking on the element icon in the map, selecting the Connect Downstream menu option, and then clicking on the downstream element.
A simple connection should be shown in the map when elements are connected to one another. The exception is when elements are connected to a reach created by GIS features.
You will not see the simple connection from the Big Run junction to the Mahoning Creek reach element, but the Big Junction Component Editor will show the connection.
- Click on the Sink Creation Tool toolbar button
 and add a sink element and name it Punxsutawney.
- Connect the Mahoning Creek Local subbasin element and the Mahoning Creek reach element to the new sink element.
- Now, the elements should be linked to one another in the basin model map.
- Right click on the MahoningatPunx basin model name in the Watershed Explorer and choose the Resort Elements Hydrologically menu option.
- The elements in the Watershed Explorer should be ordered from upstream to downstream, as shown in Figure 5.
