Download PDF
Download page Updating Subbasin and Reach Delineations using HEC-HMS GIS Tools.
Updating Subbasin and Reach Delineations using HEC-HMS GIS Tools
This tutorial was completed using HEC-HMS 4.10 beta 6.
Download the initial project files here - Initial_Updated_Subbasin.zip
This tutorial is designed to help new users of HEC-HMS learn how to update changes to existing subbasin and reach delineation. Instead of creating an new basin model when there are changes to subbasin and stream delineation for a particular area, users can import the changes to the delineation with updated subbasin and reach shapefiles.
Overview
In this tutorial, you will update an existing subbasin and reach delineation with more detailed subbasin and reach delineation contained in shapefiles.
Background
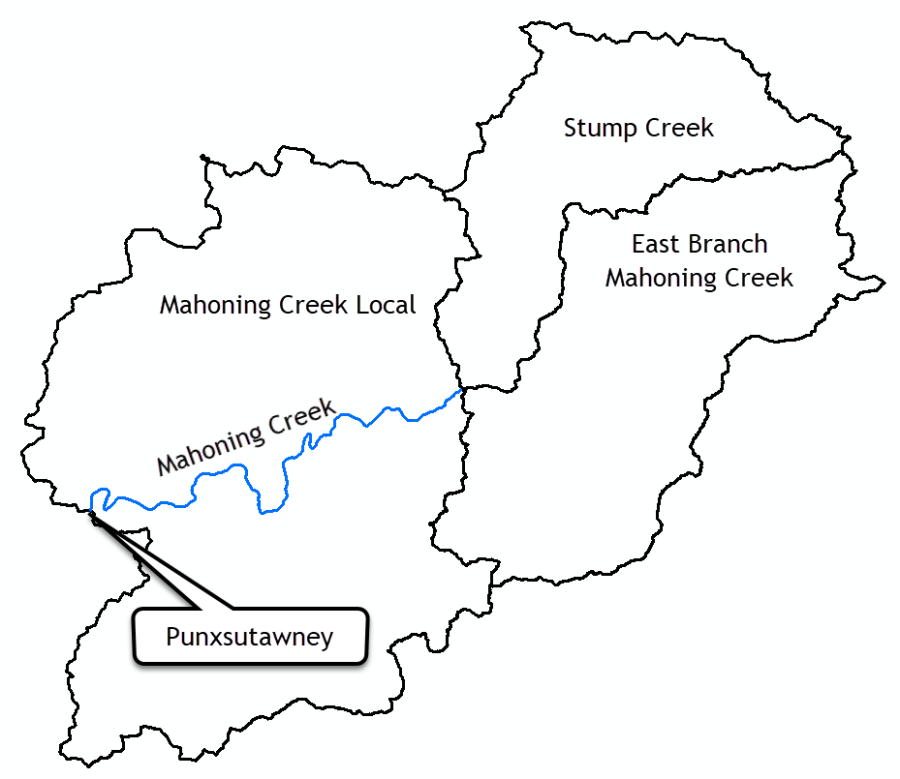
The Punxsutawney watershed (400 km2) is part of the Allegheny River Basin located in western Pennsylvania, USA. Primary conveyance streams include: Stump Creek, East Branch Mahoning Creek, and Mahoning Creek. The confluence of Stump Creek and East Branch Mahoning Creek is located east of the enclave of Big Run. Mahoning Creek is downstream of the confluence.
A map of the watershed is shown in the figure below.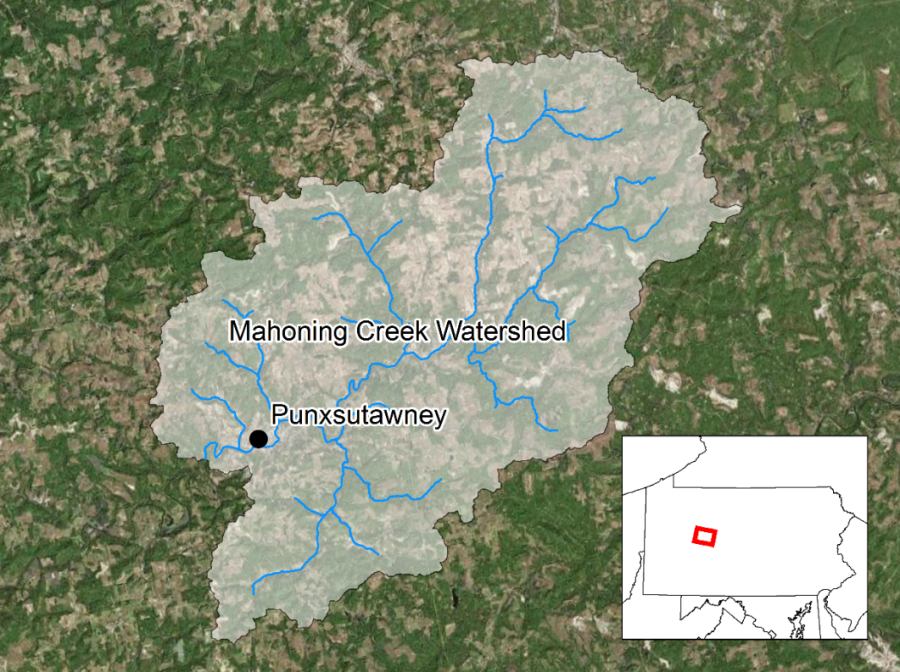
The existing subbasin and reach delineation is shown in the figure below.
Update Existing Elements using Shapefiles
Basin geometry was originally defined by delineating subbasins and reaches. The subbasin and reach elements were previously imported into an HEC-HMS basin model using shapefiles. The initial project files attached to the tutorial show the beginning state of the project, which includes the initial delineation. You can download the project to your computer and follow the steps below.
- Double-click the HEC-HMS icon
 to start the program. The main program window will appear.
 - To open an existing project, click File and select Open….
- The Open an Existing Project window will open; click Browse to open the Select Project File window.
- Navigate to the project directory and select the "Subbasin_Update.hms" file.
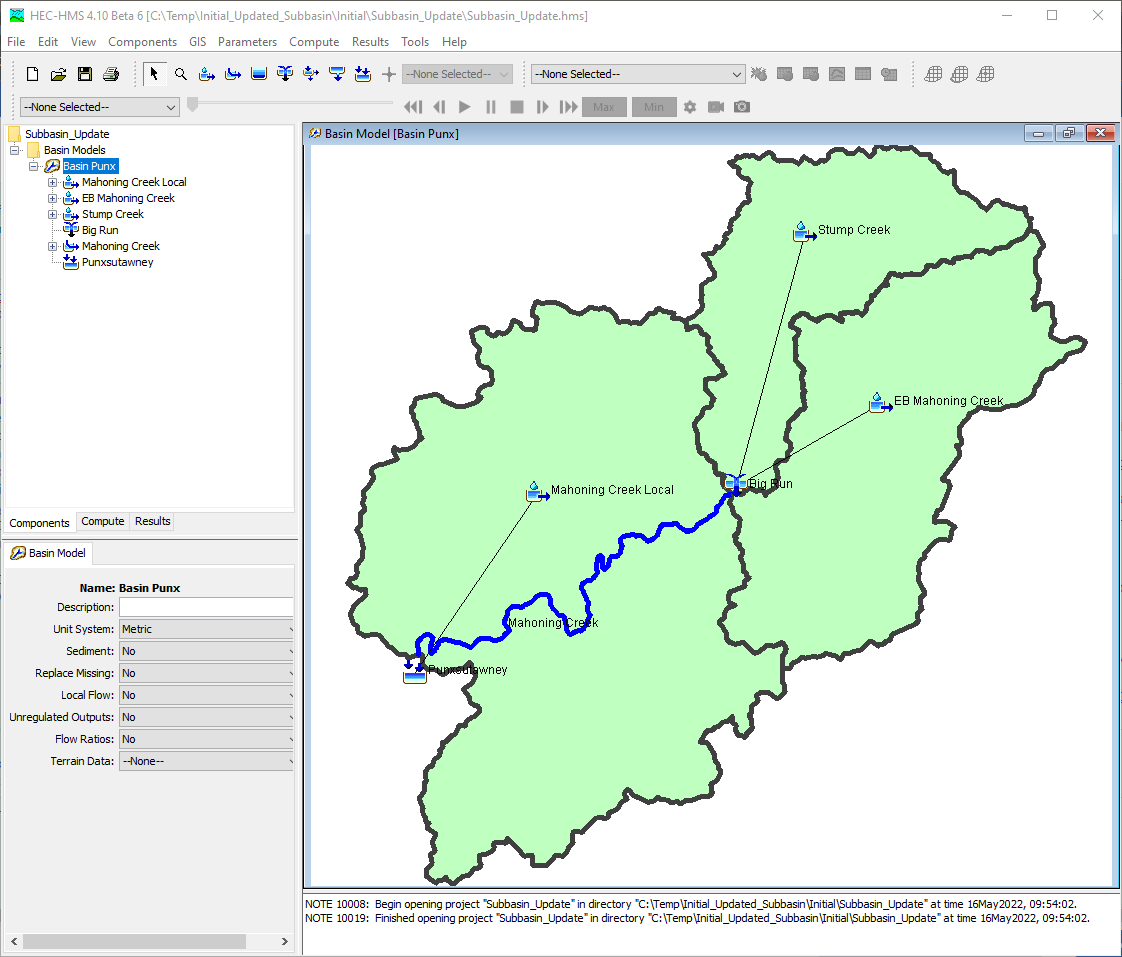
- Click the Select button and the existing project will open as shown in the figure below.
- To update changes in subbasin and reach delineation for the Stump Creek subbasin, you should first delete the existing Stump Creek subbasin element.
- Using the Arrow Tool toolbar button,
 , select the Stump Creek subbasin from the Watershed Explorer or basin map as shown in the figure below.
 - Right-click on the Stump Creek subbasin and select Delete Element. Click OK.
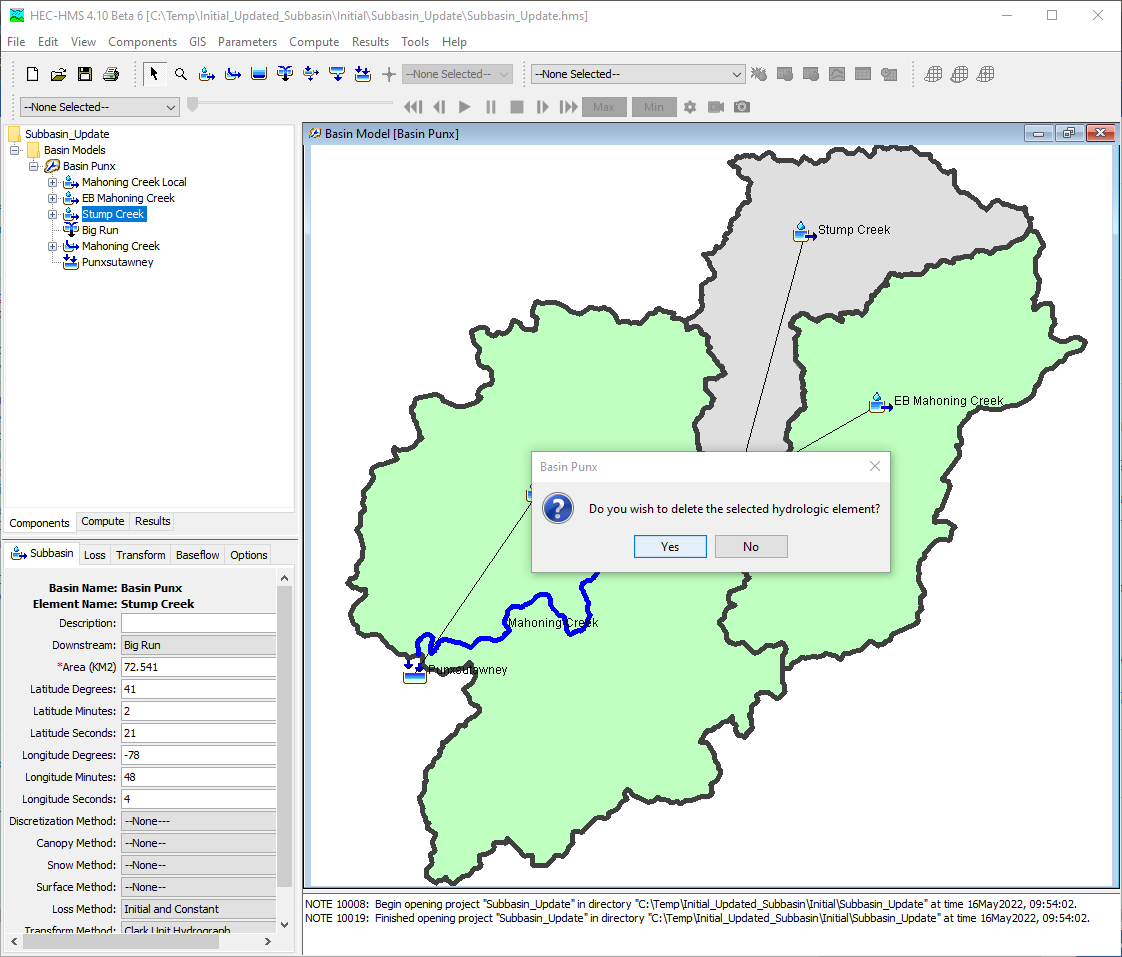
The basin model with deleted Stump Creek subbasin is shown in the figure below.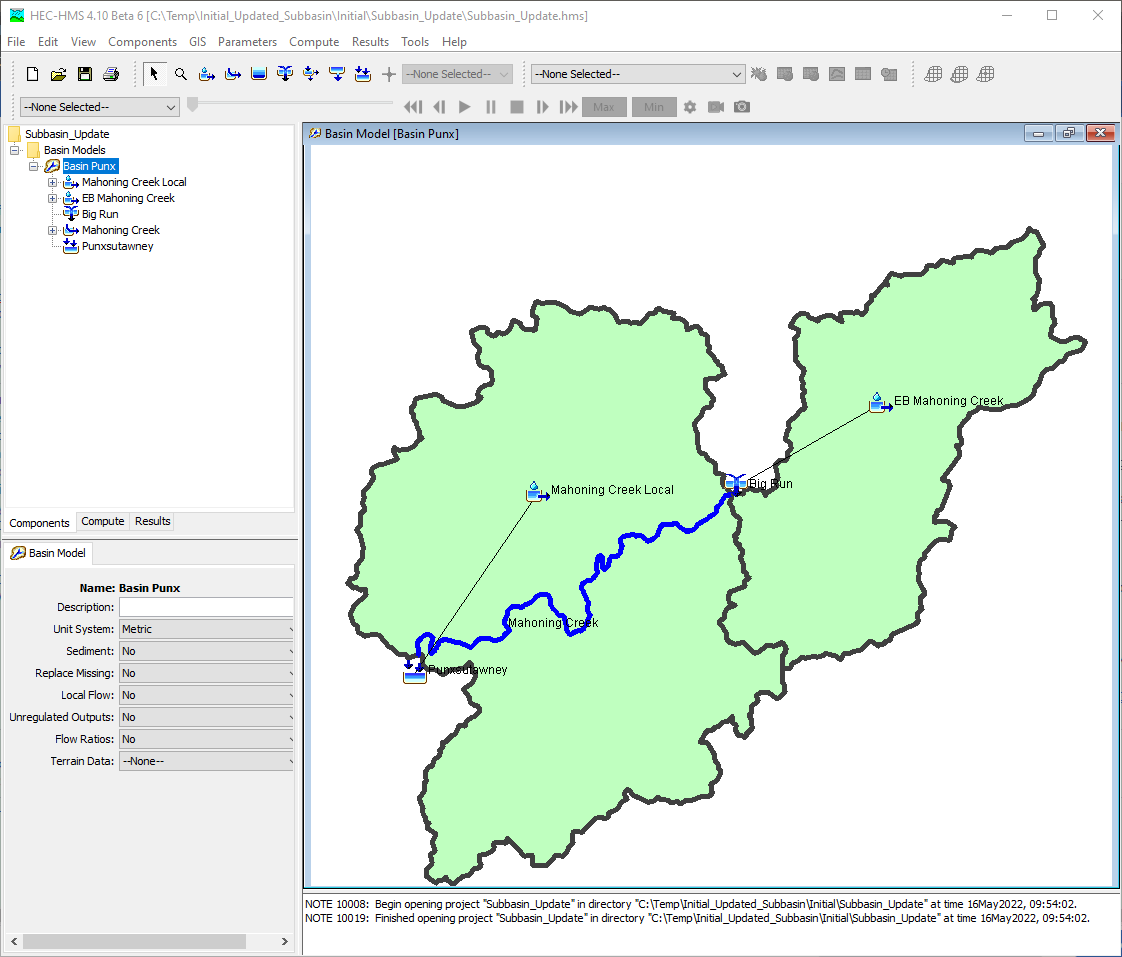
A separate HEC-HMS project was used to refine, or re-delineate the Stump Creek watershed. In the separate project, a terrain model was added and tools on the GIS menu were used to delineation additional subbasin elements. The next figure shows the Stump Creek watershed delineated as one subbasin.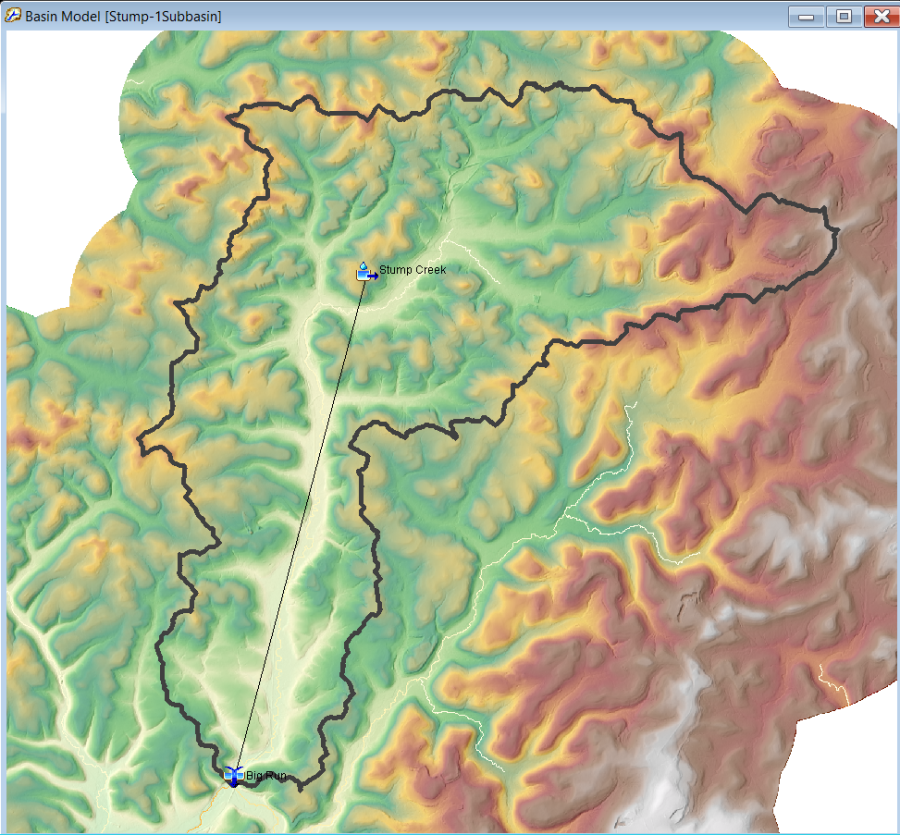
The updated subbasin and stream delineation of the Stump Creek watershed is shown in the next figure. There is a menu option on the GIS menu to export subbasin and reach elements as shapefiles. The refined subbasin features shown in Figure 7 were saved in the Stump-UpdatedSubbasins.shp file. Updated reach features were saved in the Stump-UpdatedReach.shp file.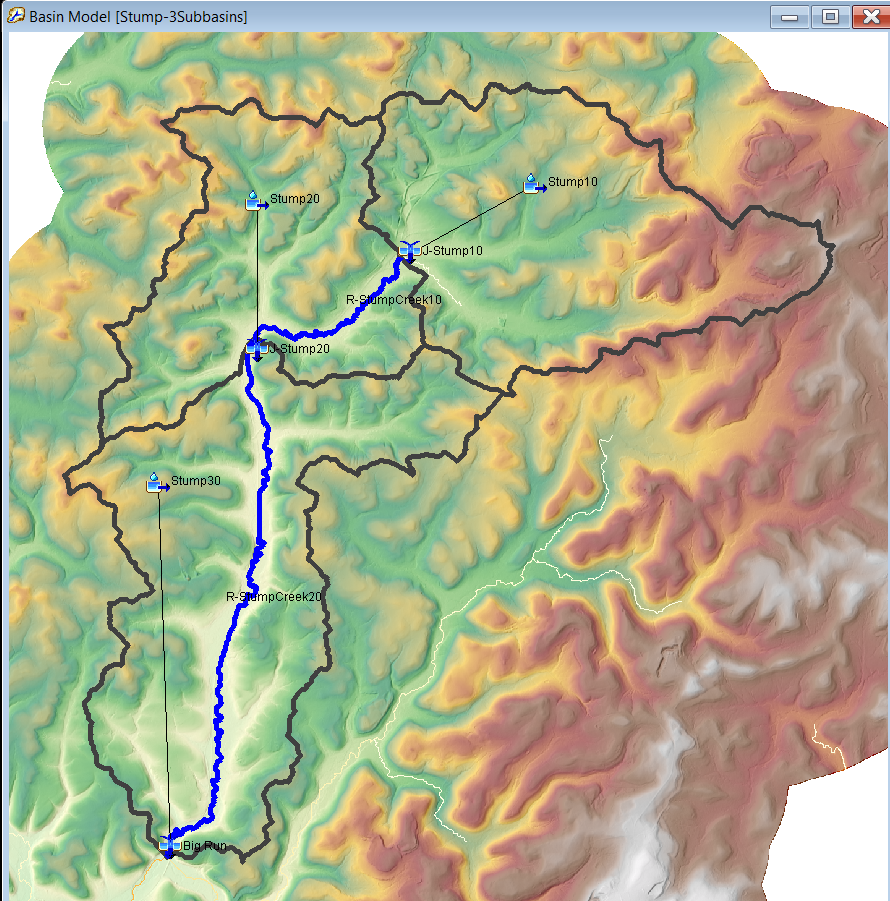
- Using the Arrow Tool toolbar button,
- This step illustrates how to import GIS elements into a basin model with existing elements. Go to the GIS menu and choose the Import Georeference Elements menu option.
- Choose the Subbasins element type and click the Next button.
- Navigate to the … \Subbasin_Update \maps directory and select the updated subbasin shapefile, the Stump-UpdatedSubbasins.shp file. Click Select. Click Next.
- Choose the "name" attribute field to set the subbasin element names.
- Click the Finish button.
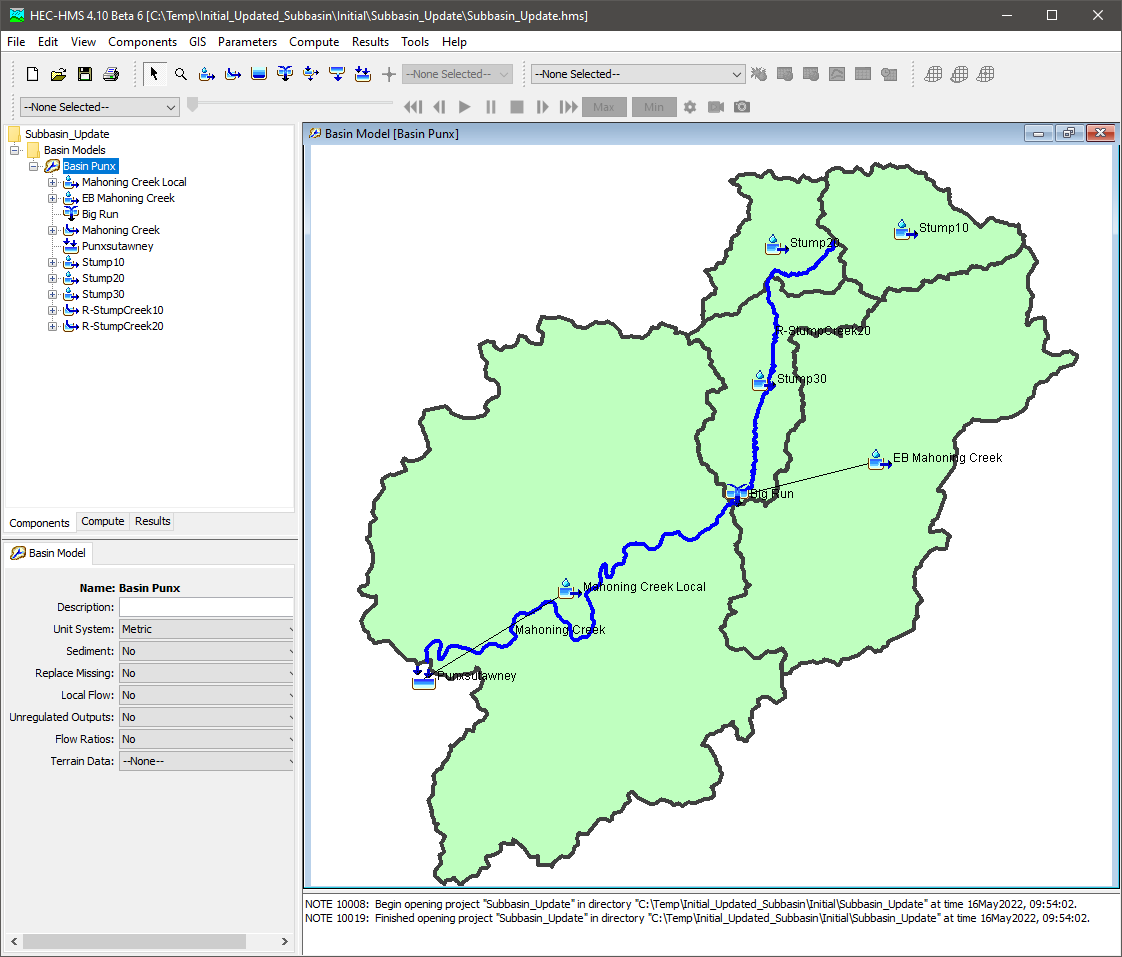
- Follow the previous steps and import the updated reach features in the Stump-UpdatedReach.shp shapefile. The next figure shows three subbasins (Stump10, Stump20, and Stump30) and two reach (R-StumpCreek10 and R-StumpCreek20) elements were imported into the basin model. These new elements will be connected in the following steps.
- Add two junction elements to the basin model map. Click on the Junction Creation Tool toolbar button,
 , and then click in the map near the R-StumpCreek10 reach element.
- Name the junction "J-Stump10". Click on Create.
- Name the junction "J-Stump20". Click on Create.
- Elements can be connected by right clicking on the element icon in the map, selecting the Connect Downstream menu option, and then clicking on the downstream element.
- Connect subbasin Stump10 to junction J-Stump10.
- Connect junction J-Stump10 to the upstream end of reach R-StumpCreek10.
- Connect subbasin Stump20 and the downstream end of reach R-StumpCreek10 to junction J-Stump20.
- Connect junction J-Stump20 to the upstream end of reach R-StumpCreek20.
- Connect subbasin Stump30 and the downstream end of reach R-StumpCreek20 to junction Big Run.
The connected elements for the Stump Creek watershed are shown in the next figure.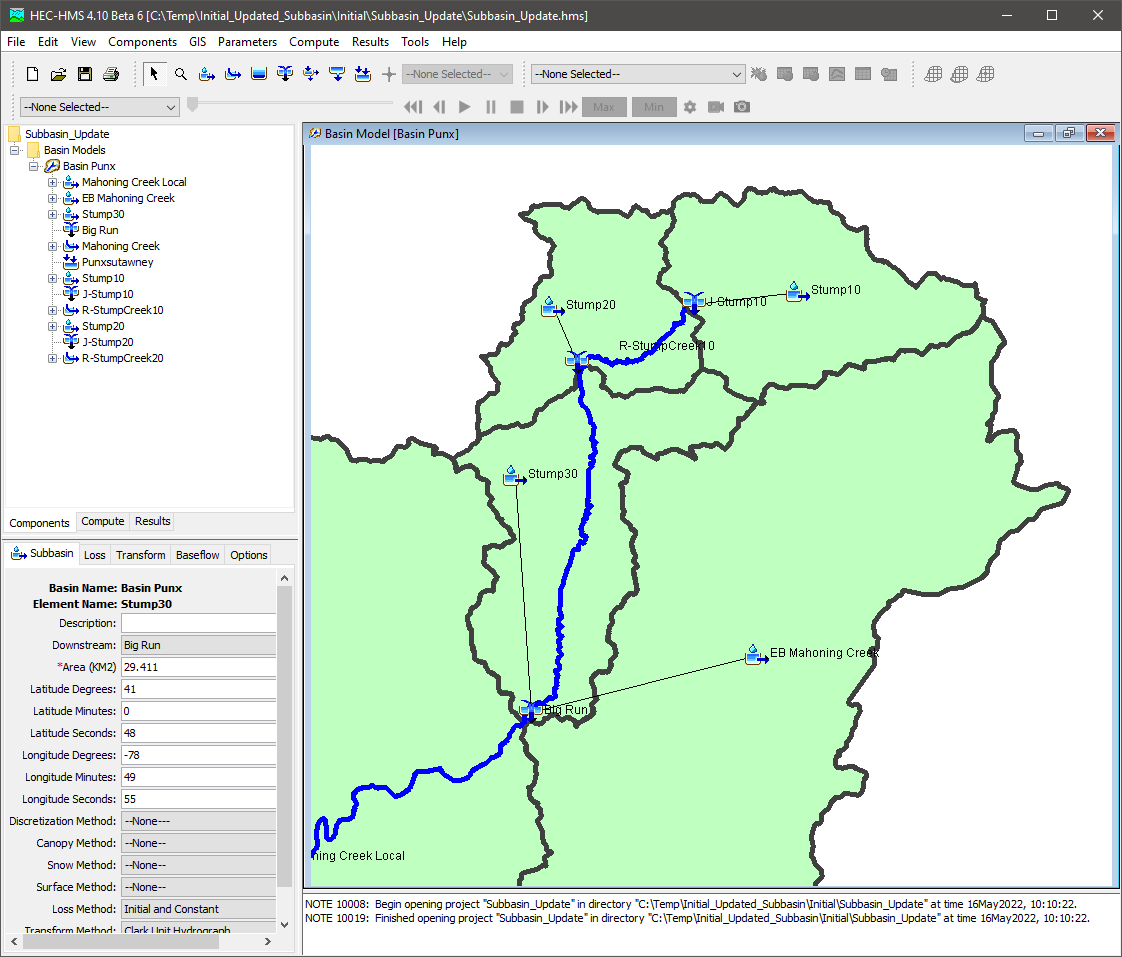
The entire basin model with updated elements for the Stump Creek watershed is shown in the next figure.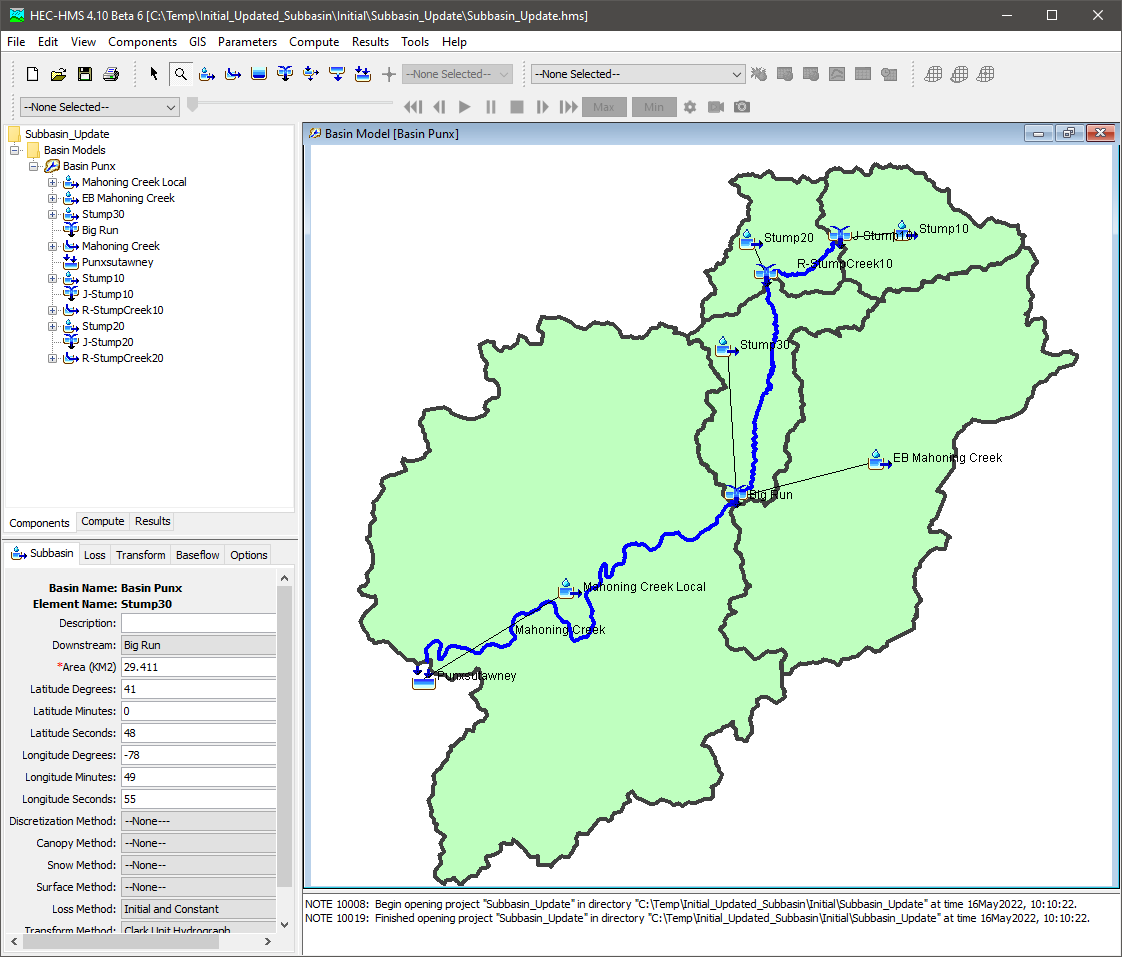
Download the final project files here - Final_Updated_Subbasin.zip