Download PDF
Download page Importing HEC-RAS HDF Files.
Importing HEC-RAS HDF Files
In order to utilize the 2D Diffusion Wave Transform Method, a Computational Mesh is required. This computational mesh must be stored within an HDF 5 file. Currently, users must create a 2D mesh and any associated normal depth, flow, stage, and/or rating curve boundary conditions within HEC-RAS (version 5.0.7 or newer) and then import to HEC-HMS. In the future, users will be able to create and modify both 2D meshes and boundary conditions entirely within HEC-HMS. Also, users may only use one 2D mesh per Basin Model. In the future, user's will be able to use multiple 2D meshes within the same Basin Model. Precipitation boundary conditions will not be imported; they must be created and linked within HEC-HMS. If an HDF file is imported from a version of HEC-RAS that is older than 5.0.7, some features may not be imported correctly. Unrecognized input data is automatically ignored during the import process. Imported components should always be checked for accuracy.
Selecting and Processing a File
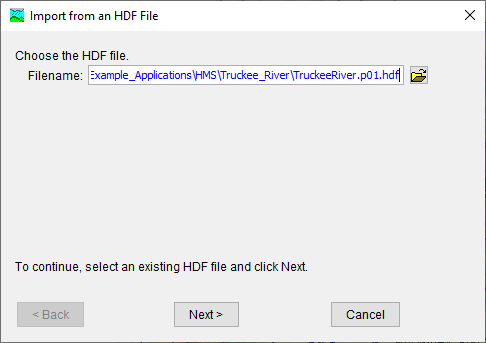
Begin the process of importing features from an HEC-RAS HDF File by clicking the File menu and selecting the Import | HEC-RAS HDF command. An Import from an HDF File wizard opens where you can specify the HDF file to be imported as shown in the following figure. If you change your mind about importing an HEC-RAS HDF file, you can press the Cancel button or the X button in the upper right of the Import from an HDF File wizard.
Unsteady Plan HDF files have extensions of ".p##.hdf" where "p##" corresponds to the specific plan of interest. If you do not know the exact path of the file which you'd like to import, you can click the button to the right of the file name field to open a File Browser. Use the browser to navigate the file system and find the correct HEC-RAS HDF file. The browser will automatically filter out all files that do not have an extension of ".hdf". However, this filter can be removed by changing the Files of Type drop down menu to All Files. Once you have located and selected the desired HEC-RAS HDF file, press the Select button. If you change your mind about selecting a file, you can press the Cancel button or the X button in the upper right of the browser to return to the Import from an HDF File wizard without selecting a file. Once an HDF file has been selected, click the Next button to advance.
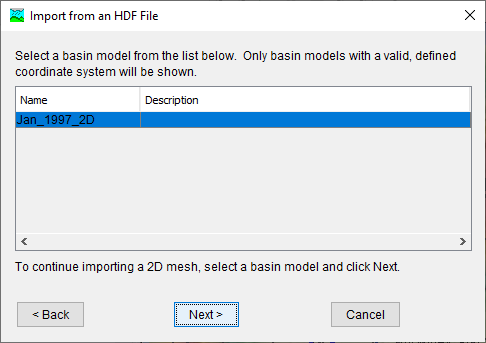
The next step requires the selection of a Basin Model that is contained within the currently opened Project, as shown in the following image. Only Basin Models that have a valid, defined coordinate system will be shown. Once a valid Basin Model has been selected, click the Next button to advance.
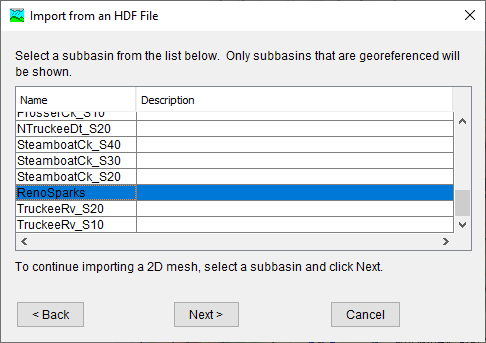
The next step requires the selection of a Subbasin within the previously selected Basin Model, as shown in the following figure. Only subbasins that are georeferenced will be shown. Once a valid subbasin has been selected, click the Next button to advance.
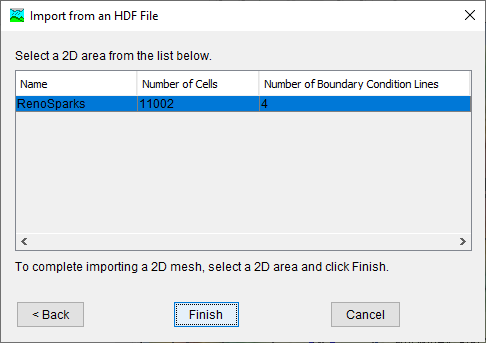
The final step requires the selection of a 2D Area within the previously selected HDF file, as shown in the following figure. All 2D areas that are encountered within the selected HDF file will be shown along with the associated number of cells and boundary condition lines. Once a 2D area has been selected, click the Finish button to finalize the import process.
Upon clicking the Finish button, the mesh and any associated normal depth, flow, stage, and/or rating curve boundary conditions will be imported to the selected subbasin. The mesh and 2D connections can be viewed within the map panel by toggling the Discretization and 2D Connection layers on, as shown in the figure below. This menu can be accessed by clicking View | Map Layers or right clicking within the map panel and selecting Map Layers.
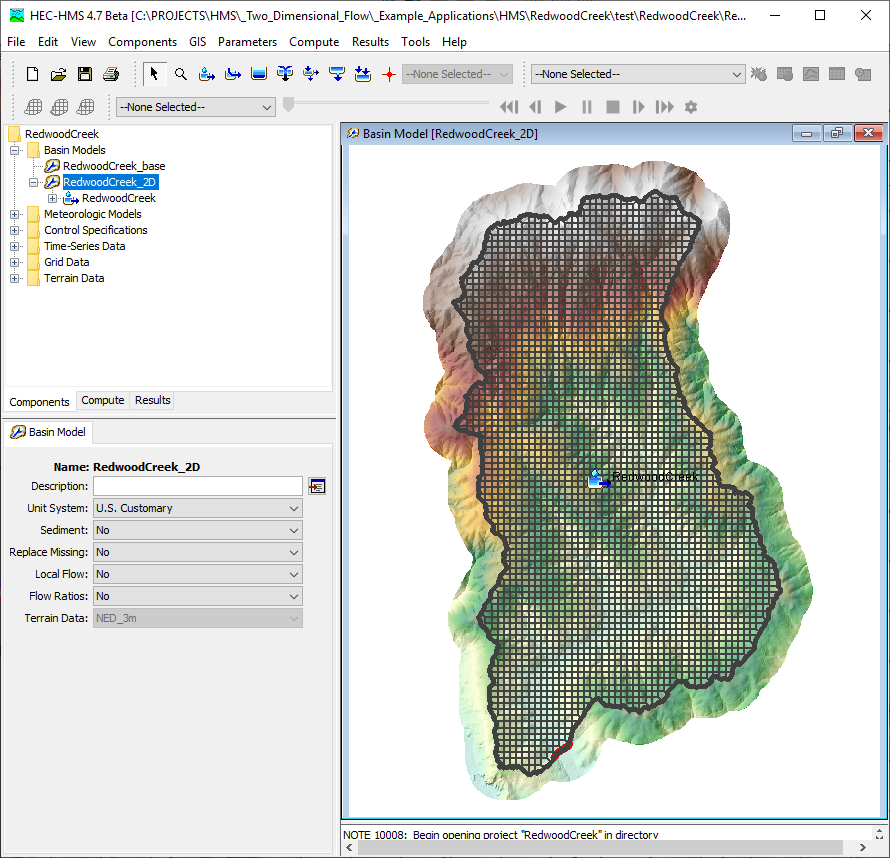
An example application demonstrating the process of creating a new HEC-RAS Project, loading the required data, generating a 2D mesh, creating a plan HDF file, and importing to an HEC-HMS Project is shown here: Creating a Simple 2D Flow Model within HEC-HMS.