Download PDF
Download page Projects.
Projects
A Project represents all of the input data and simulation output necessary to answer an engineering question. Possible questions could include the following:
- What will be the flow rate at the bridge due to a 1% storm?
- How will the average in-stream flow depth for the month of July change after the operation schedule of an irrigation diversion is modified?
- What is the impact of changing the land use on 7% of the watershed from cow pasture to home sites?
- How will the frequency curve be affected by building a reservoir?
The questions may involve a single watershed or several adjacent watersheds. There may only be a single representation of the watershed, or multiple representations may be needed for different future scenarios. The Project is flexible enough to work with any of these applications.
Creating a New Project
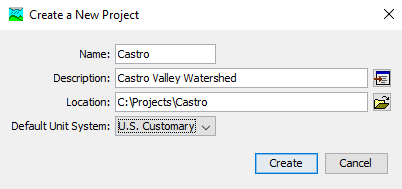
Select the File | New menu command to create a new Project. After this command is selected, the Create a New Project window will open where you can name, select the location on your computer or network server to store the Project, and describe the Project with a description (illustrated in the following figure). If the Project description is long you can use the button to the right of the description field to open an editor. A default location is provided. The default location for creating new Projects is specified in the program settings described in Program Settings. You are not required to use the default directory and may create a new Project on the local computer or a network resource anywhere your security limitations permit. All Project files created by the program will be saved in a folder (the folder name is the name of the Project) in the location entered. Select the default unit system for creating new components. The unit system of a component can always be changed after it is created. Press the Create button when you are satisfied with the name, location, and description. You cannot press the Create button if no name or location is specified. If you change your mind and do not want to create a new Project, press the Cancel button or the X button in the upper right to close the window. The Create a New Project window can also be opened by pressing the Create a New Project button on the toolbar.
Opening a Project
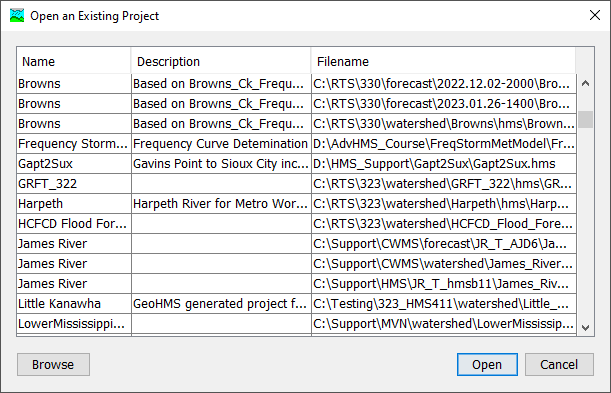
Open a Project by selecting the File | Open menu option. After this option is selected, the Open an Existing Project window will open as shown in the following figure. This window contains all Projects in the Watershed List. The Watershed List contains all Projects previously opened by the program. Open a Project by clicking the Project name and pressing the Open button. You may also double-click a Project name to open it. You cannot press the Open button if no Project is selected.
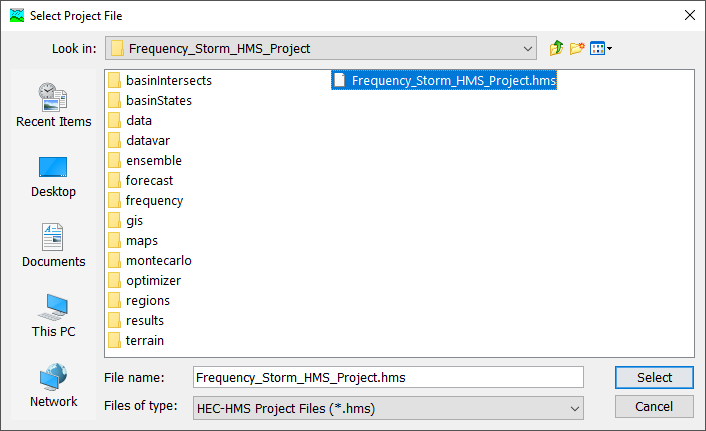
If the Project you want to open is not in the list, press the Browse button. The Select Project File window opens that lets you navigate to the directory containing the desired Project. If you change your mind and do not want to open a Project, press the Cancel button or the X button in the upper right to close the window. The Open an Existing Project window can also be opened by pressing the Open a Project button on the toolbar.
Copying a Project
Copy a Project by selecting the File | Save As menu option. After this option is selected, the Save Current Project As window will open where you can name, select the location on your computer or network server to store the Project, and describe the Project as shown below. A default location is provided. The default location for creating new Projects is specified in the program settings described in Program Settings.

You are not required to use the default directory and may copy a Project to the local computer or a network resource anywhere your security limitations permit. All Project files will be copied to a folder (the folder name is the name of the Project) in the location entered. If the Project description is long you can use the button to the right of the description field to open an editor. Press the Copy button when you are satisfied with the name, location, and description. You cannot press the Copy button if no name or location is specified. If you change your mind and do not want to create a copy, press the Cancel button or the X button in the upper right to close the window.
The option, Copy DSS data (time-series, paired, grid data), will copy all external DSS records defined in the Project and place the copied records into DSS files in the new Project folder. Internal DSS files are always migrated to the new project directory. External DSS files are only migrated if this box is checked; otherwise, a reference to the old project directory is made. Time-series, paired, and grid data are copied into separate DSS files. All references to these DSS records are automatically updated.
The option, Copy terrain data, will copy all terrain files defined in the Project and place the copied terrain files in the new Project folder. If the copy terrain data option is not selected, a reference to the terrain files in the old project directory is made.
Renaming a Project
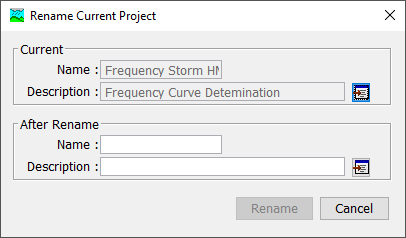
Rename a Project by selecting the File | Rename menu option. After this option is selected, the Rename Current Project window opens. The window shows the current Project name and description and contains a text box for you to enter the new Project name and description. If the Project description is long you can use the button to the right of the description field to open an editor. Press the Rename button when you are satisfied with the name and description. You cannot press the Rename button if no name is specified. If you change your mind and do not want to rename the Project, press the Cancel button or the X button in the upper right to close the window.
Deleting a Project
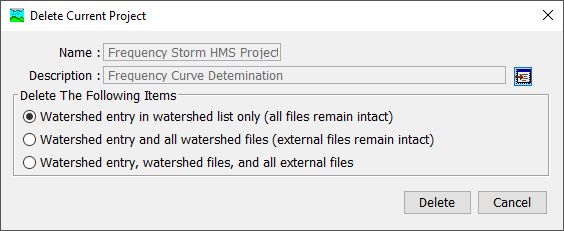
Delete a Project by selecting the File | Delete menu item. The Delete Current Project window will open. This window contains the Project name and description and three choices for deleting the Project. The first option, Watershed entry in watershed list only (all files remain intact), will only delete the Project from the Watershed List. The Watershed List contains all Projects previously opened by the program. No files are deleted when this option is selected. The second option, Watershed entry and all watershed files (external files remain intact), will delete the Project from the Watershed List and delete all Project files. Project files include .hms, *.basin, etc. (refer to the table in Directories and Files for a complete list of Project files). No external files are deleted when this option is selected. External files include DSS, grid cell, and background map layer files. The third option, Watershed entry, watershed files, and all external files, will delete the Project from the Watershed List, all files created by the program for this Project, and all external files referenced by the Project (DSS, grid cell, and background map layer files). It is very important to keep in mind that the third option will delete external files which could be used by other Projects. After the appropriate option is selected, press the Delete button. Once a Project has been deleted it cannot be retrieved or undeleted. If you change your mind and do not want to delete the Project, press the Cancel button or the X button in the upper right to close the window.
Project Properties
Basic properties and settings for the Project are provided in the Component Editor for the Project. Access the Component Editor on any tab of the Watershed Explorer. The highest level folder is labeled with the Project name; click on the Project name to display the Component Editor.
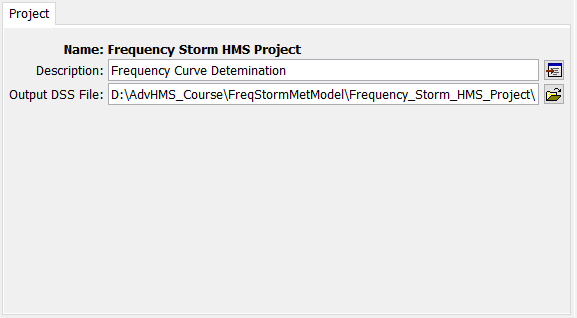
The description can be used to provide internal documentation. It is helpful to include notes and comments within the Project to remind yourself of details at a later time. It also helps with providing information to other users who may work with the Project in the future. If the description is short, you can type it directly into the description field. For long descriptions, you can press the editor button to the right of the description field. The description editor makes it easier to enter and edit long descriptions.
Manual entry time-series gages and paired data are written to the Project DSS File by default. However, you can change the file where results are written. If you wish, you can press the Folder button to the right of the File field to open a File Browser for locating the file. The file browser is set to locate files with the DSS extension. If you change your mind about searching for a different output file, you can press the Cancel button or the X button in the upper right of the browser window. Press the Select button after you locate and highlight the desired file. It is possible to have more than one Project write output results to the same DSS file. However, the separate Projects are not synchronized and extreme care must be taken in naming components in order to avoid conflicts.