Download PDF
Download page 2D Rules.
2D Rules
The Rules capability in HEC-RAS unsteady flow modeling is extremely powerful. This tutorial will walk the user through using the Rules capability within the 2D modeling framework.
Project Files

Overview
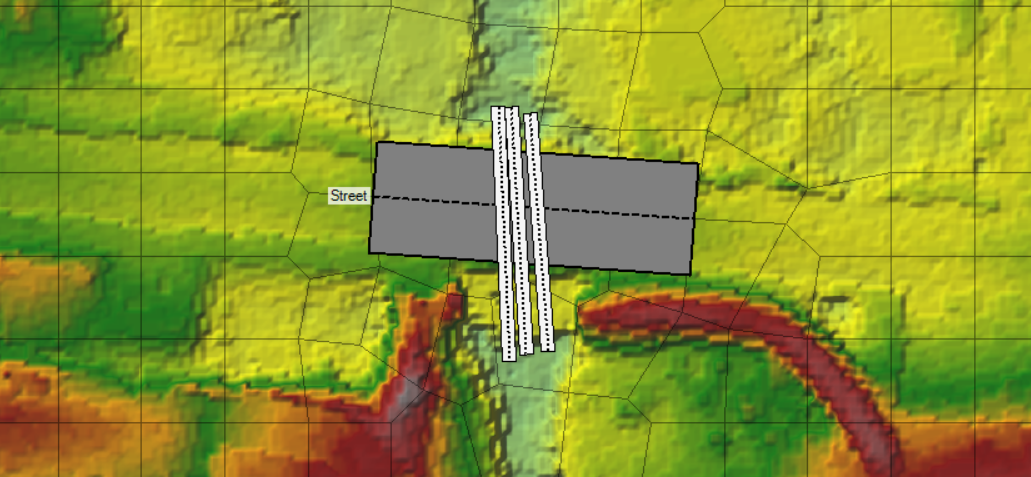
This example will demonstrate the use of the Rules capability to adjust gate settings for a 2D model that has a tidal boundary condition. The river used for the example has flow going from north to south - an inflow hydrograph is used for the Upstream boundary and a tidal stage boundary for the Downstream boundary condition. Gates are used to represent the culvert opening under the road crossing (Street) and is modeled using a 2D Connection. For the simple 2D model shown below, a 2D Flow Area has already been created with the road crossing.
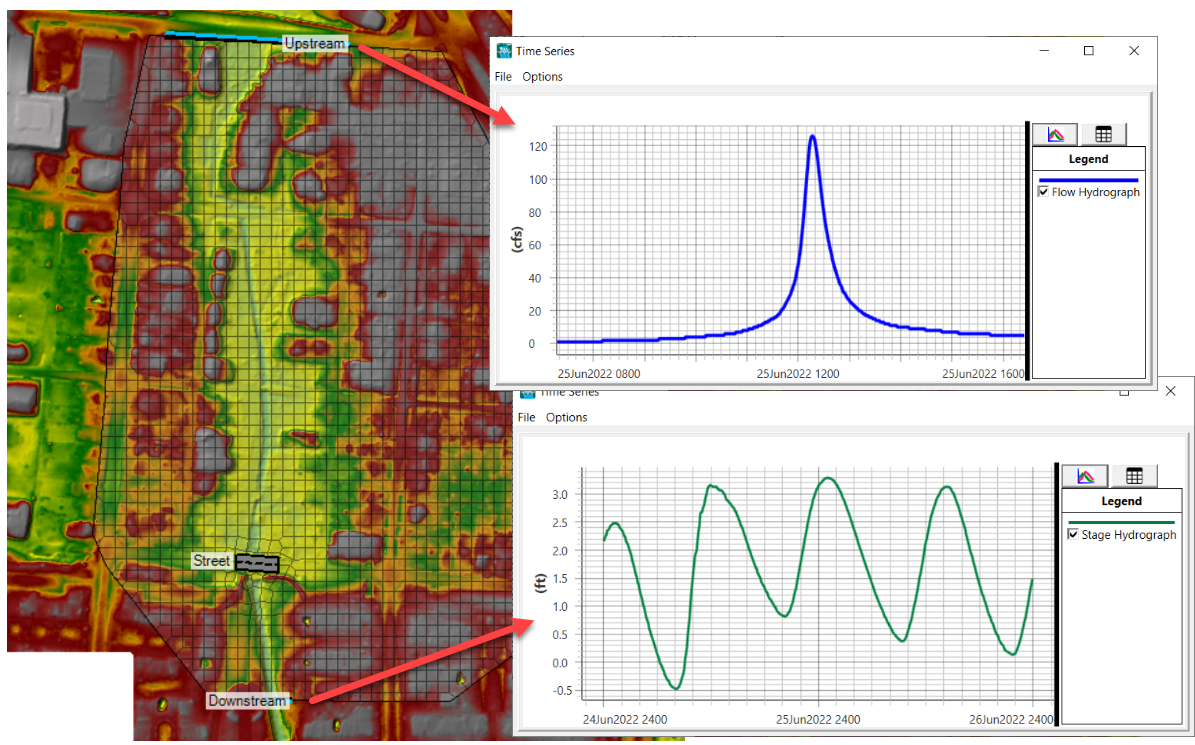
The road crossing is modeled with a 2D Connection with the weir elevation set to the top of road elevation and three sluice gates (5' x 5') used to model the culverts.

The objective of the rule set described below is to hinder the intrusion of brackish water inland. Therefore, for the gates are closed if the downstream water surface elevation is too high and to be open the water surface upstream must be higher than the downstream water level. The (relatively simple) specific Gate Rules are defined below.
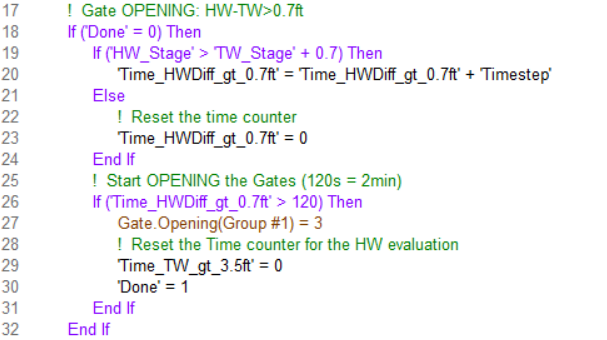
Gate Rules
- Gates OPEN when the Headwater elevation is greater than Tailwater by 0.7ft for more than 2min
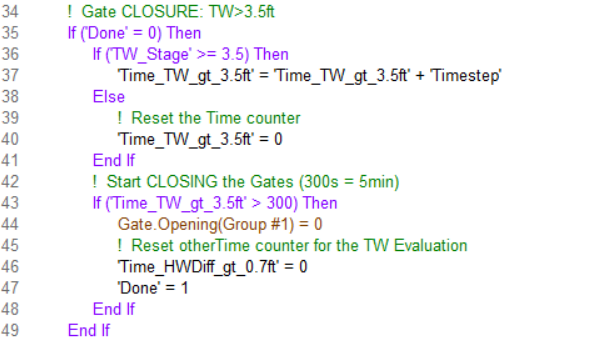
- Gates CLOSE when the Tailwater elevation is greater than 3.5ft for more than 5min.
Reference Locations can be used in RAS to monitor Headwater and Tailwater water surface elevations.
This example will begin will a running model and take you through the process listed below.
- Adding Reference Points
- Entering Rule Operations
- Visualizing Output
- Evaluating Results
Getting Started
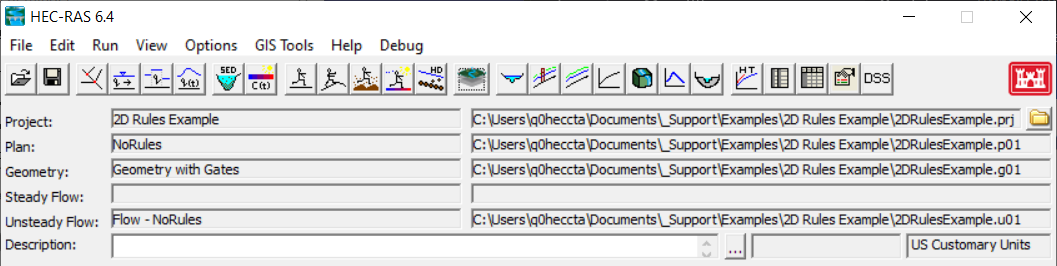
- Open the HEC-RAS project "2DRulesExample"
- Open the Unsteady Flow Analysis Dialog
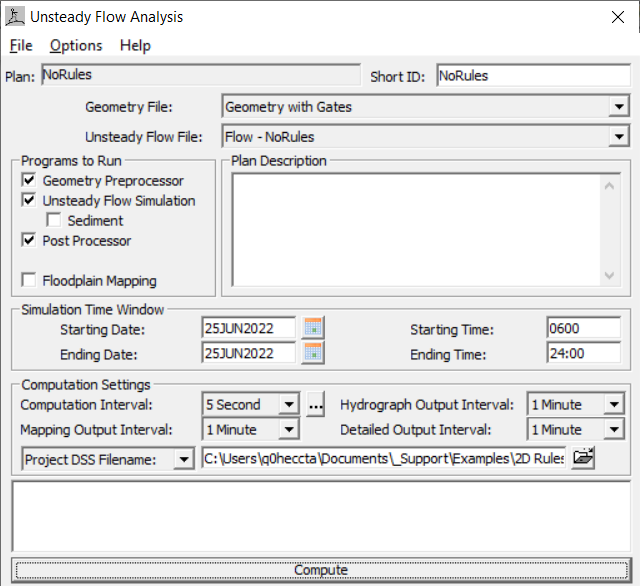
- Compute the NoRules plan. Note that the Tailwater Stage is higher than the headwater on the rising and falling limbs of the flow hydrograph.
Add Reference Points
- Open RAS Mapper - you need to add Reference Locations
- Zoom into the bridge
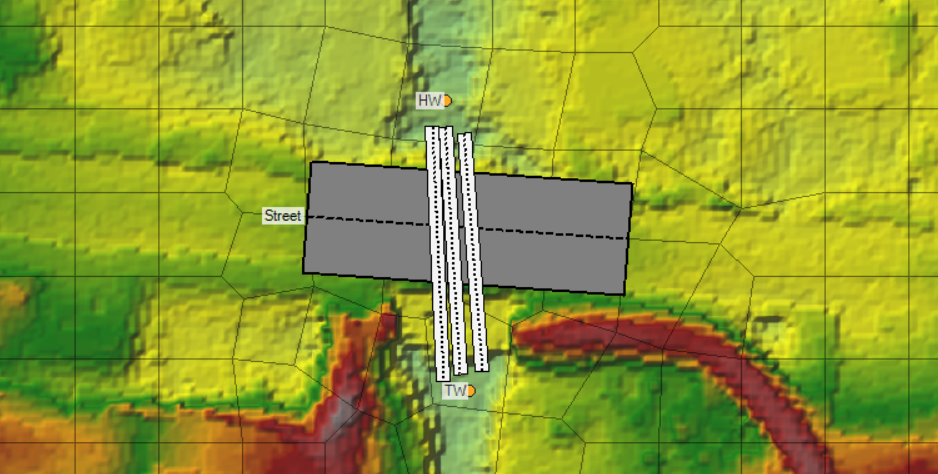
- Start Editing the geometry
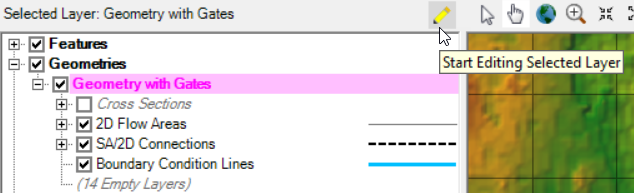
- Select the Reference Points layer
- Add a Reference Point at the Headwater (HW) of the bridge
- Add a Reference Point as the Tailwater (TW) of the bridge
- Stop Editing and Save Edits
- Close RAS Mapper
Rule Operations for Gates
- Open the Unsteady Flow Data dialog
- Save the flow data using the File | Save Unsteady Flow Data As... menu item.
- Provide a new name for the flow file (Flow - Simple Rules)
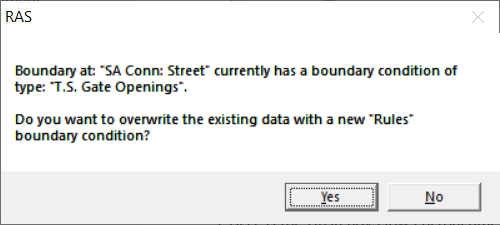
- Change the Boundary Condition for the Bridge (Street) by clicking on the TS Gate Openings and then clicking on the Rules button.
- Choose Yes for the dialog asking if you would like to change the boundary condition.
- The Rule Operations dialog will be displayed.
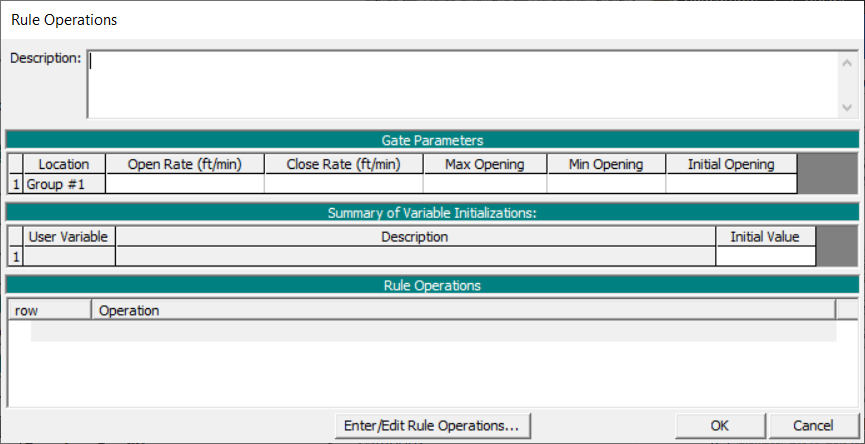
- Type in a general narrative the Description field.

- Provide base Gate Parameter information for how the gates will operate. These gates will Open and Close at a rate of 1ft/min and will open to a maximum height of 3ft. The simulation will begin with the gates closed.

- Click on the Enter/Edit Rule Operations button to edit rules
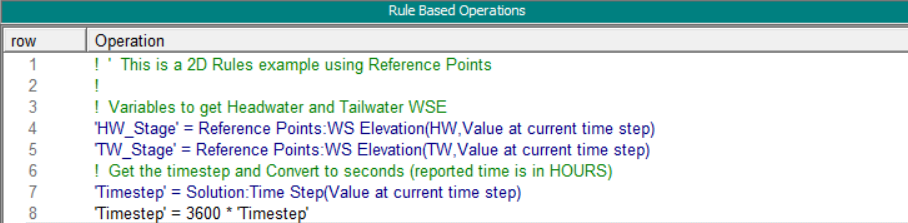
The Operation available are listed near the bottom of the editor
- Press the Comment button to add a comment the rules set. Comments are helpful to remembering what you have done and to share information to other users.
After pressing the comment button, a row will be added the Operations list. Type in your comment in the text box near the bottom of the Editor.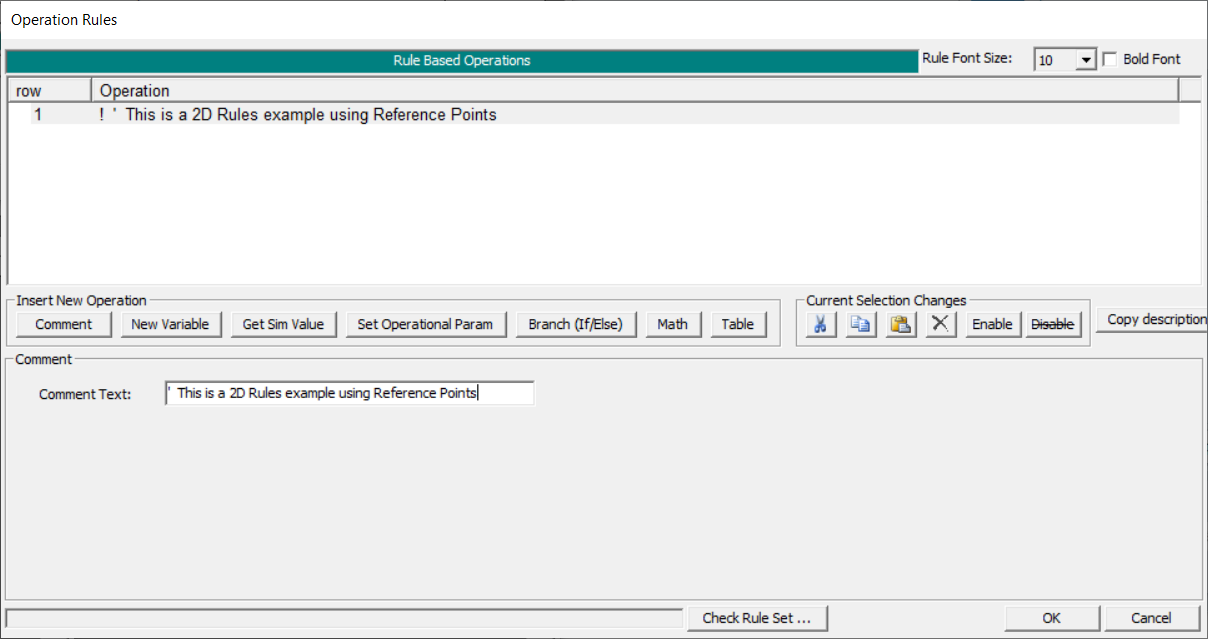
- New operations are added ABOVE the selected line.
- Click the line below to continue.
- Delete will delete the selected line.
- Copy/paste can be used to move/duplicate lines.
- Set up variables to monitor the simulation values. A summary of variables is provided below.
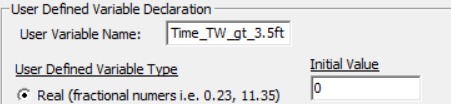
Variable Name Description HW_Stage Stage of Headwater TW_Stage Stage of Tailwater Timestep Current Timestep Time_TW_gt_3.5ft Time that the Tailwater is greater than 3.5ft
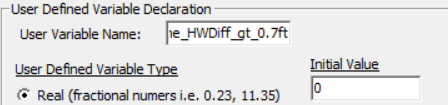
Time_HWDiff_gt_0.7ft Time that the Headwater - Tailwater is greater than 0.7ft
Done Variable to monitor whether we have satisfied a rule (Done=1 is True) - Add the HW_Stage Simulation Variable by pressing the Get Sim Value.
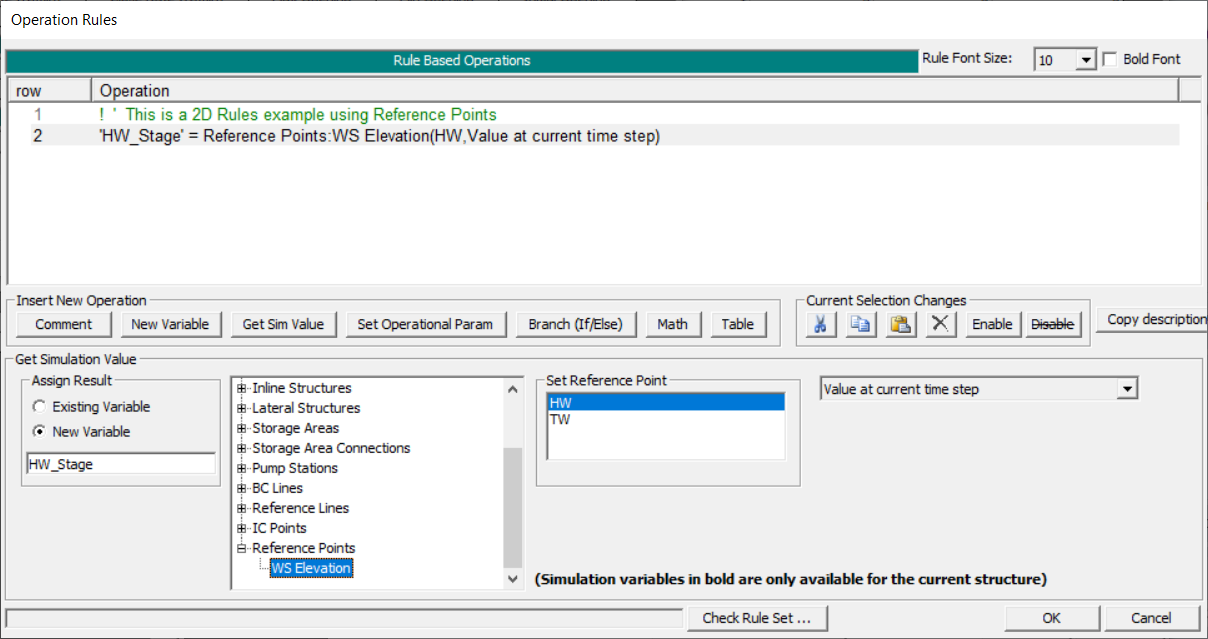
- Enter the New Variable name
- Select the Reference Points | WS Elevation
- Set variable to the Reference Point named HW
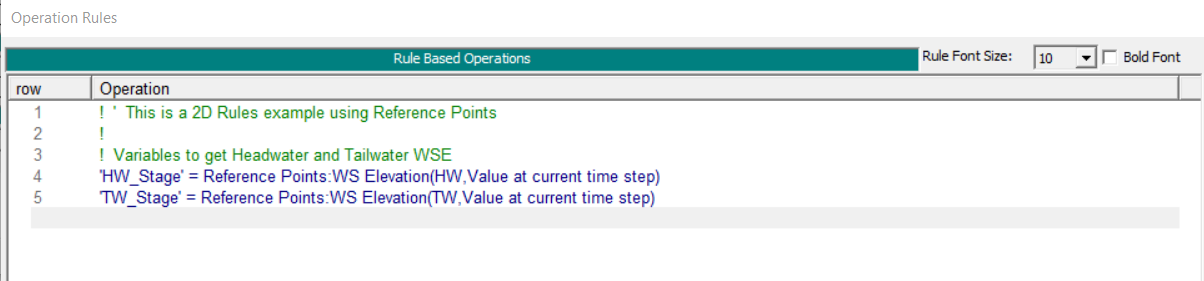
- Click the next row in the list
- Repeat for the TW_Stage
- Provide Comments!
- Add add the Timestep variable by pressing the Get Sim Value
- Set the variable to the Solution | Timestep
- Convert the Timestep to seconds using the Math operation - HEC-RAS keeps track of simulation time in HOURS

- Add the Time_TW_gt_3.5ft to monitor the Tailwater stage using the New Variable operation
- Add the Time_HWDiff_gt_0.7ft to monitor the Headwater/Tailwater difference using the New Variable operation
- Provide Comments for the variables
- Create the Done Integer variable to keep track of the simulation - to know whether we have set a gate instruction and to stop evaluating the remainder of the rules for the current timestep - and
- Set it to 0 using the Math operation

- Set it to 0 using the Math operation
- Create the OPEN GATE operation
- Create the first part of the rule to see if Done is True

- Click on the Branch (If/Else) operation
- Select the If () Then option
- Set the expression to Done = 0
- Set the expression to Done = 0
- Click the next row
- Click the Branch (If/Else) operation
- Select the End If option
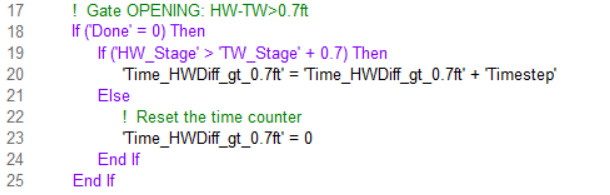
- Evaluate the Headwater/Tailwater difference and set the time counter accordingly
- Select the last End If row
- Click on the Branch (If/Else) operation
- Set the expression to HW_Stage > TW_Stage + 0.7
- Click the Math operation
- Set the expression to Time_HWDiff_gt_0.7ft = Time_HWDiff_gt_0.7ft + Timestep
- Click the next row
- Click the Branch (If/Else) operation
- Select the Else option
- Click the next row
- Click the Math operation
- Set the expression to Time_HWDiff_gt_0.7ft = 0
- Click the next row
- Click the Branch (If/Else) operation
- Select the End If option
- Add the Gate Opening rule based on the Headwater Difference time counter previously evaluated
- Select the last End If row
- Click on the Branch (If/Else) operation
- Set the expression to Time_HWDiff_gt_0.7ft > 120
- Click the Set Operational Parameter operation
- Set the Gate Group
- Set the expression to Gate.Opening = 3
- Click the next row
- Click the Math operation
- Set the expression to Time_TW_gt_3.5ft = 0
- Click the next row
- Click the Math operation
- Set the expression to Done = 1
- Set the expression to Done = 1
- Click the next row
- Click the Branch (If/Else) operation
- Select the End If option
- Create the first part of the rule to see if Done is True
- Create the CLOSE GATE operation (repeat previous steps but evaluating the Tailwater condition)
- Provide Comments in the Rule Operations where needed
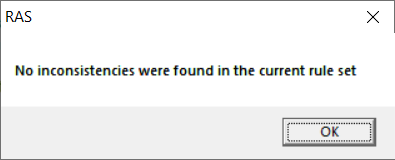
- Press the Check Rule Set button to evaluate the Rules. Hopefully, you there are no syntax error.
- Press OK on the Operation Rules editor
- Save the Unsteady Flow Data
View Output
- Go to the Unsteady Flow Analysis dialog
- Save the Plan, providing a name (Simple Rules). Provide a ShortID for the new plan.
- Compute the Simple Rules plan
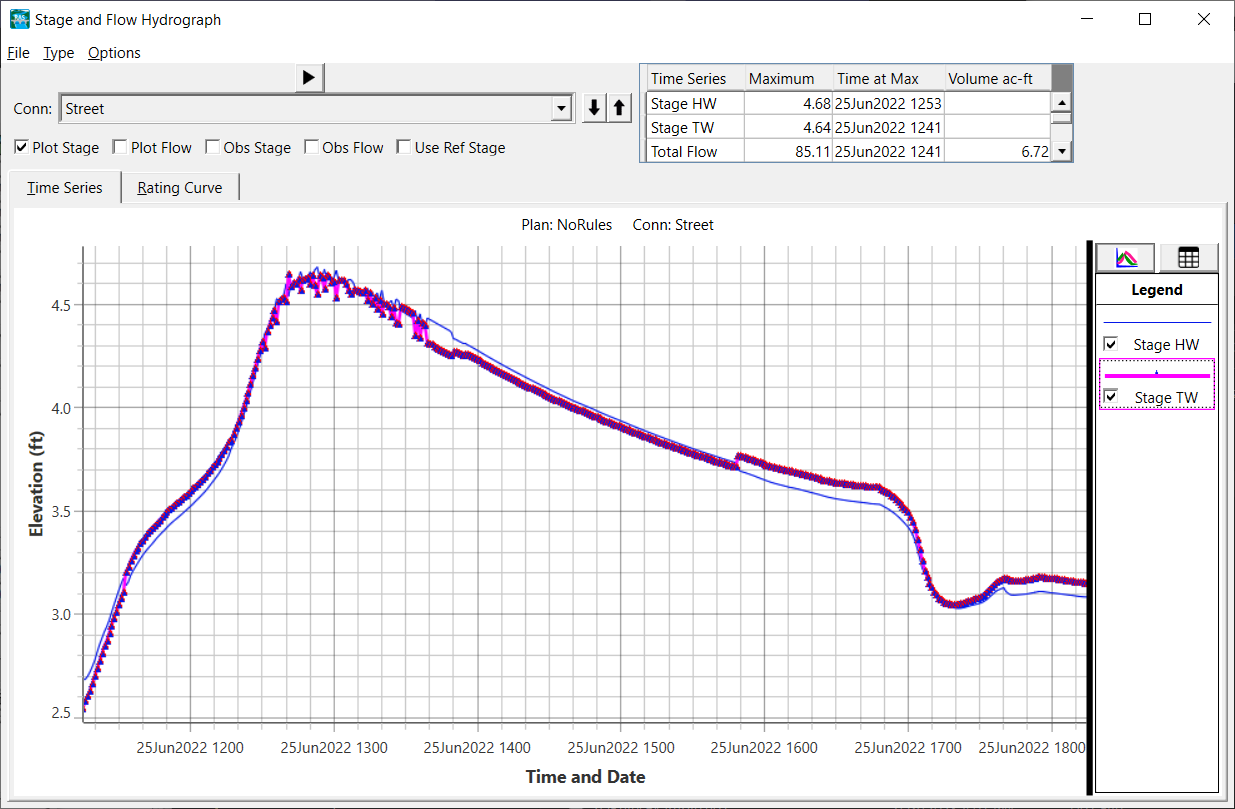
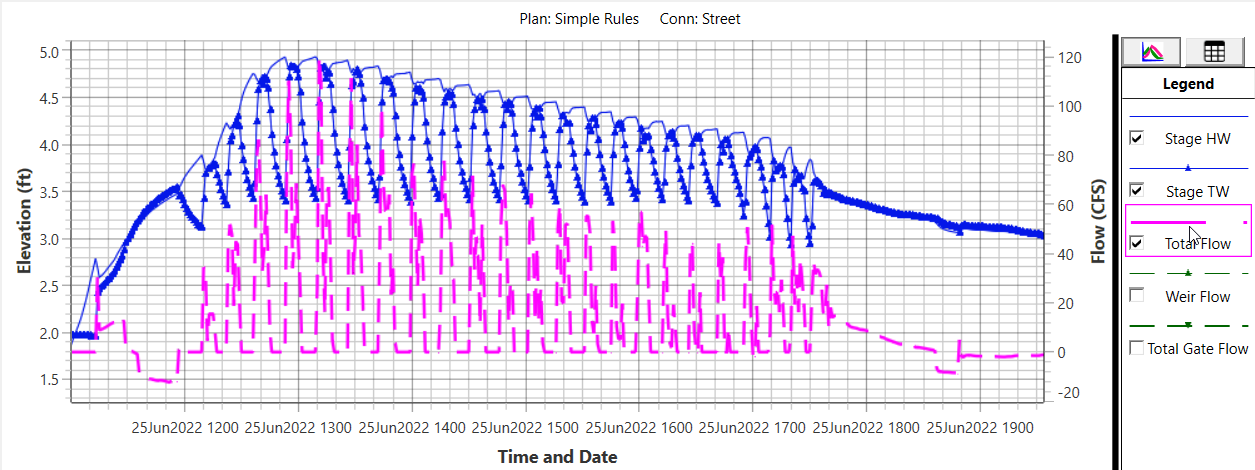
- Evaluate the simulation results using the Hydrograph Plot
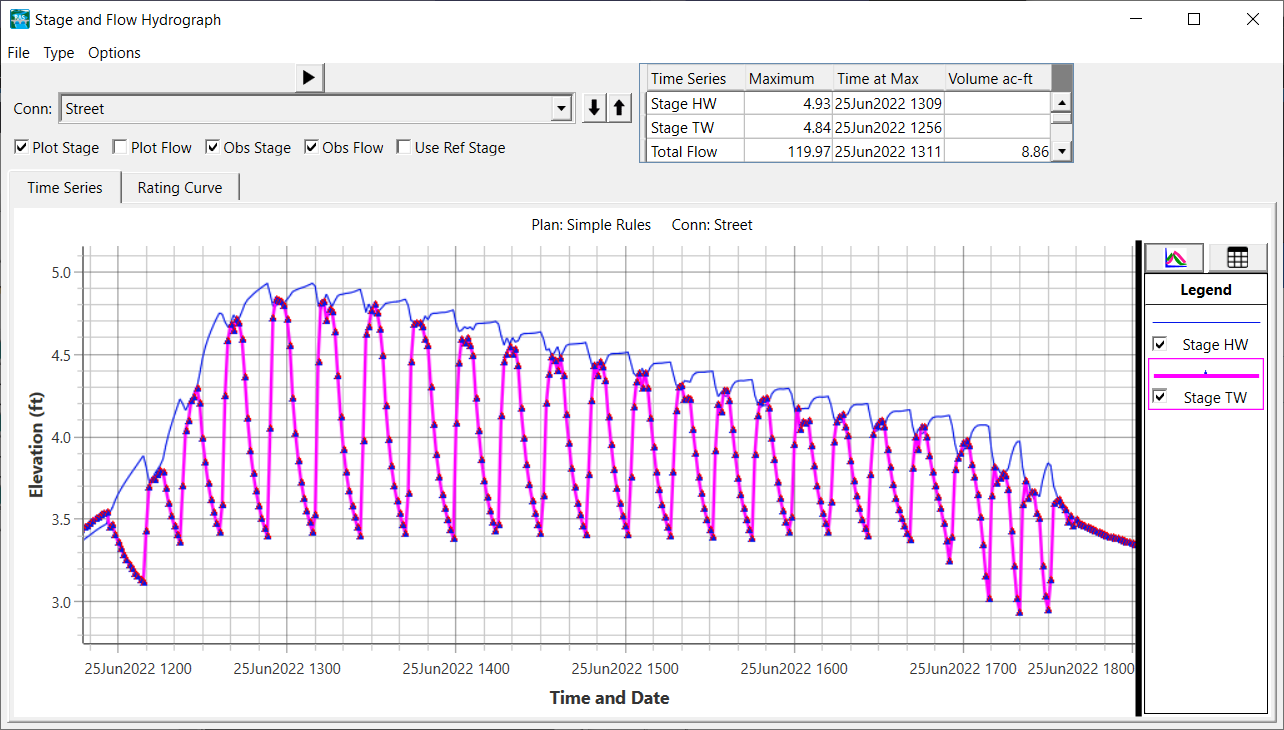
Note that the Tailwater no longer gets higher than the headwater - If you turn on Flow, you can see flow mostly "positive" in the downstream direction. Without the rules there was significant negative flows (flows going upstream based on the high tide).
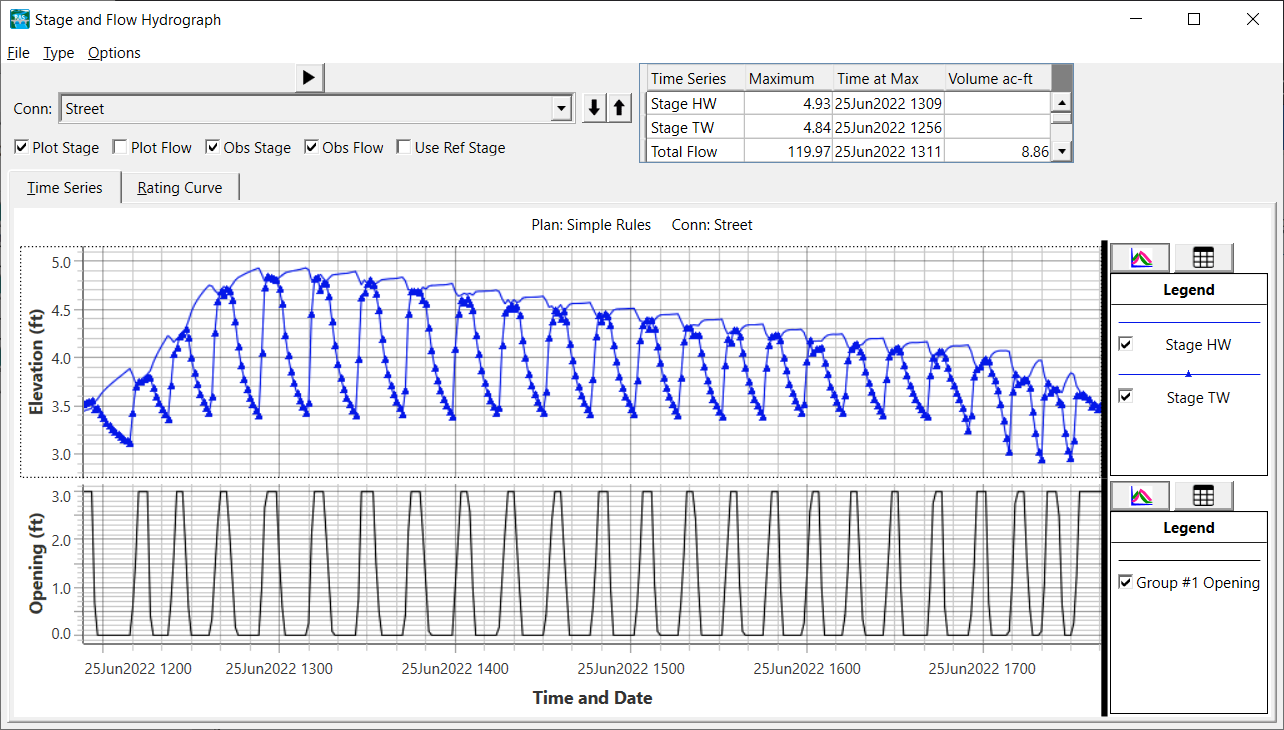
- To see the Gate Operations, choose the Options | Variables menu item
- Select the "Group #1 Opening" variable
- You can follow along and see how the gates are operating
Evaluate Results
- Go to the Unsteady Flow Analysis dialog
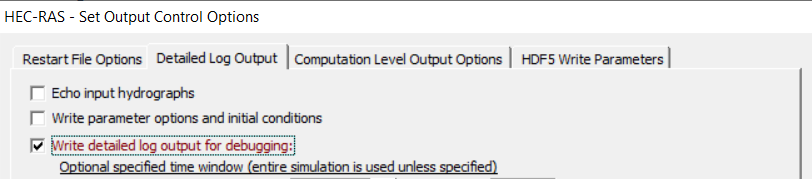
- Choose the Options | Output Options menu item
- Turn on the Computation Level Output
- Re-compute the simulation
- Choose the Options | View Computation Log File menu item
- Evaluate the Rule Operations. You can find where the Rules were evaluated by searching the text file for "Rule Set"
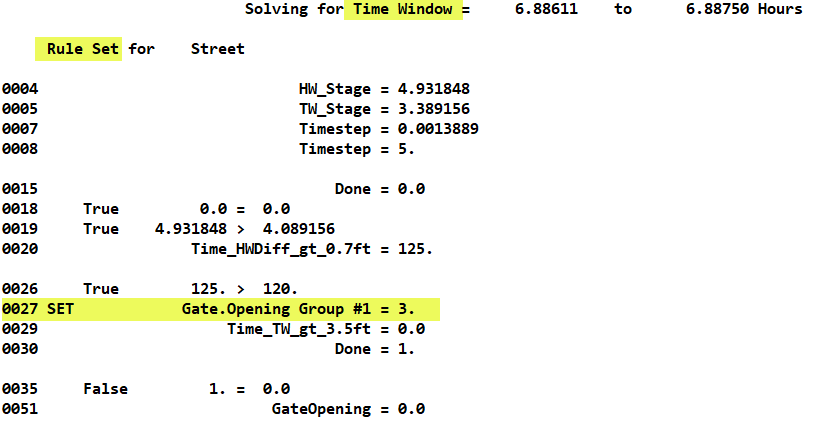
Each line of the Rule Operation is enumerated in the left column. The result of each evaluation is shown in the next column, follow by the evaluation. For the timestep evaluated in the figure above, the Gate evaluation resulted in the decision to set the gate opening to 3ft. The Log File in concert with the Hydrograph Plots allow you visualize how HEC-RAS evaluated the operation during the simulation.
Final Project Files