In this workshop, you will learn how to import land cover data and create vector classification polygons to replace important areas. You will then learn how to assign Manning's n values based on the land cover classification.
Create a Land Cover Layer
This task will take you through the process of importing a NLCD dataset. The NLCD 2016 dataset was downloaded and has been clipped to the study area.
Import the NLCD Dataset
Start HEC-RAS and open the "LC_ManningsN" project.
Open RAS Mapper
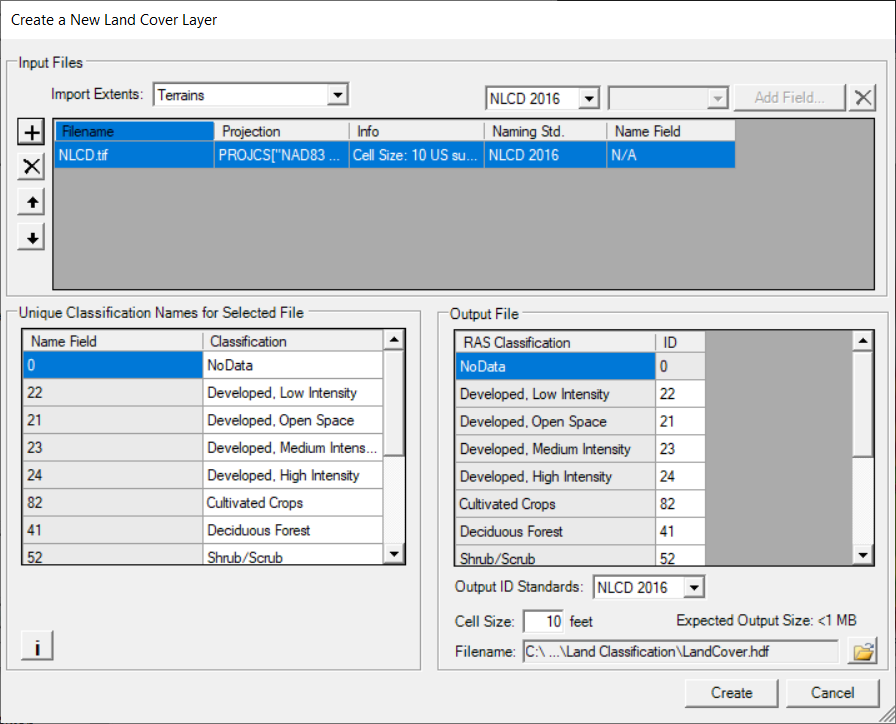
Select the Project | Create a New RAS Layer |Land Cover Layer
Using the add file button, select the "NLCD.tif" stored in the GISData folder.
Inspect the import options.
Press the Create button.
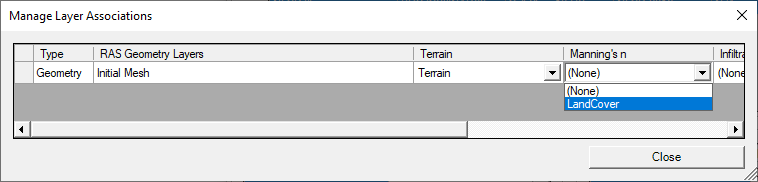
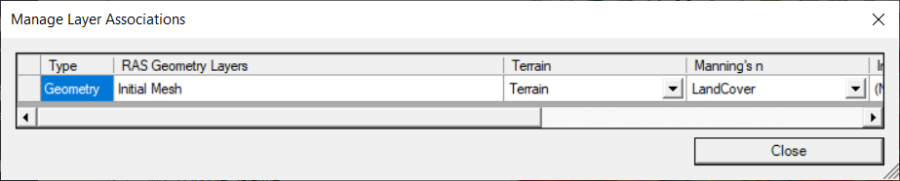
The Manage Layer Associations editor will launch after you create the layer.Under Manning's n select the LandCover layer you just created.
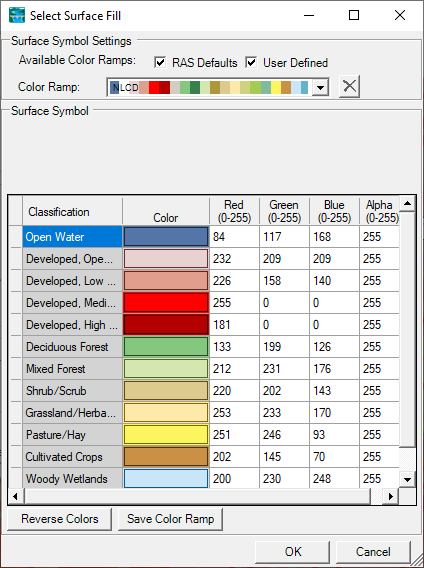
Access the Layer Properties by double clicking LandCover under Map Layers in the layer tree. Change the symbology to the default NLCD color ramp. You can open the menu by clicking Edit in the Surface section of the editor. Various Color Ramps are available from the dropdown.
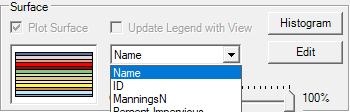
You can change the symbology labels through the interface as well.
Provide Manning's n Values
Right-click on the Land Cover Layer and choose Edit Land Covery Layer Data Table.
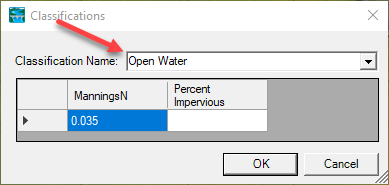
Provide n values in the ManningsN column. Make your best estimates.
Click OK when finished.
Create Classification Polygons
Classification polygons are used to add a new land cover description or to replace an area with a new classification.
Start Editing the Land Cover Layer
Expand the Land Cover node to select Classification Polygons.
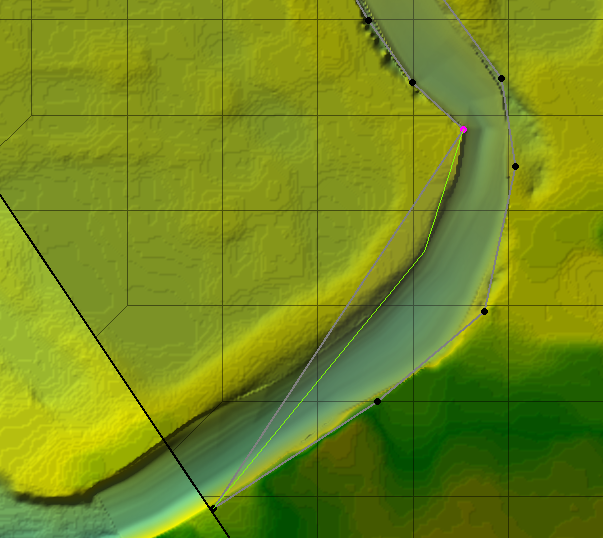
Draw polygons (select drawing tool ) for where water should be and/or other interesting features. Once you finish a polygon, the Classifications window will pop up.
Provide/select a Classification Name for each polygon.
Stop Editing when finished.
Associate the Land Cover Layer
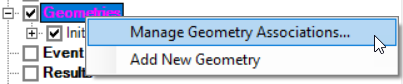
Right-click on the Geometries node and choose Manage Geometry Associations.
Verify the land cover layer has been associated with your geometry.
Compute Hydraulics Tables
In this step, you will verify that the n values that you expect to see are indeed being used.
Expand the "Initial Mesh" geometry and turn on the Final n Values layer.
Select the Final n Values layer. You should see the n values. Adjust the color ramp, if you like.
Right-click on the 2D Flow Areas layer and choose the Compute 2D Flow Areas Hydraulic Tables menu option.
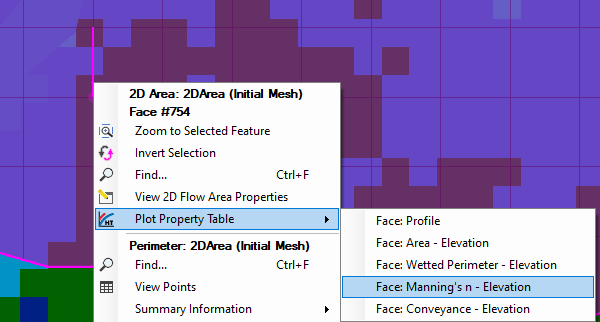
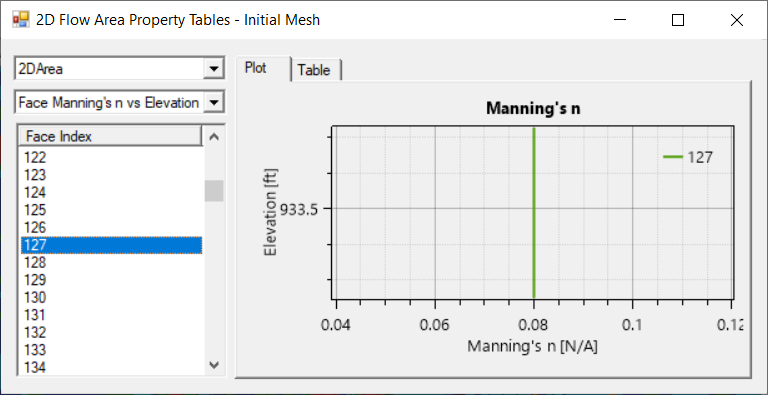
After the processing the tables, inspect the properties of the 2D faces.
Select the 2D Flow Areas layer
Right-click on a 2D cell face
Choose Plot Property Table | Face: Manning's n – Elevation.You will get a rather boring plot….but use this information to verify the correct n values are used
Horizontally Varied Manning's n Values
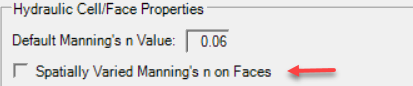
Start Editing the Perimeters layer
Select the Spatially varied Manning's n on face (Beta) option.
Stop Editing
Right-click on the 2D Flow Areas layer and choose the Compute 2D Flow Areas Hydraulic Tables menu option.
Inspect the Manning's n values on a face to verify they are no longer single value.
Modify n Values
Use the Base Override option to override a base n value.
Start Editing the Manning's n value layer
Right-click on the Manning's n value layer and choose the Edit Manning's n Values menu option.
For one of the land use types, enter a value into the Base Override – ManningsN column to override its current value.
Create a Calibration Region and provide a name.
Enter new Manning's n values for the caibration region.