Download PDF
Download page Floodway Encroachment Analysis - 1D Unsteady Flow.
Floodway Encroachment Analysis - 1D Unsteady Flow
This tutorial demonstrates the approach to performing Floodway Encroachment Analysis for a simple 1D HEC-RAS example application.
This is a new feature in HEC-RAS Version 6.4.
Project Files
 Example_1DUnsteadyEncroachments.zip
Overview
HEC-RAS is the primary river hydraulics software used to perform Floodway Encroachment Analysis for FEMA. Floodway encroachment analysis is used to determine guidelines for allowable development withing the floodplain fringe. FEMA guidance dictates that the model analysis be performed using the 100-yr floodplain and limits development within the the floodplain based on the impact to the computed water surface profile. Historically, this capability in HEC-RAS was limited to Steady Flow analysis. Version 6.4 introduces the ability to perform this analysis with Unsteady Flow.
This example utilizes a simple 1D model developed for the Merced River in the Yosemite Valley. Terrain data used in this model was downloaded from the USGS NED and has been resampled. This model is not intended to be used to make floodplain management or engineering decisions, but simply to demonstrate the procedure for performing an encroachment analysis on a 1D model.
This example will take you through the procedure outlined below.
- Create a Calibrated model
- Save the Base plan to an Encroached plan
- Enter data into the Encroachment Table
- Perform the Encroached run
- Analyze results
- Refine the encroachment data
- Perform final model simulation using Method 1 or Encroachment Regions
Steps
- Open the HEC-RAS project "Encroachments_1Dunsteady"
Prior to beginning a Floodway Encroachment Analysis, the river hydraulics model should be calibrated to and validated with observed data. The downstream boundary condition for the model should utilize the Normal Depth boundary condition as it will allow for a changed stage as the flow hydrograph changes due to the encroachment. The model developed for this floodplain will be referred to herein as the Base Plan.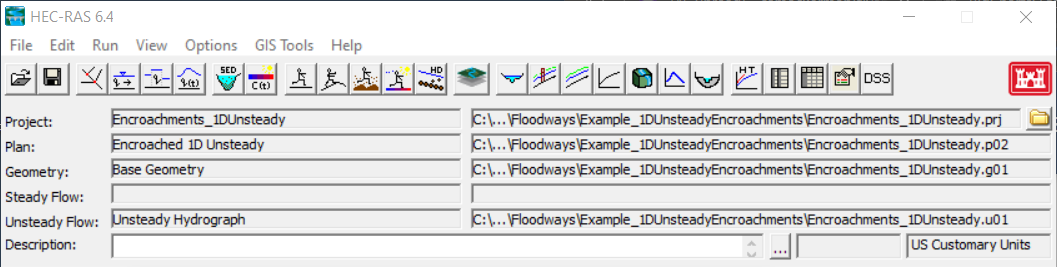
- Open the Unsteady Flow Analysis Dialog
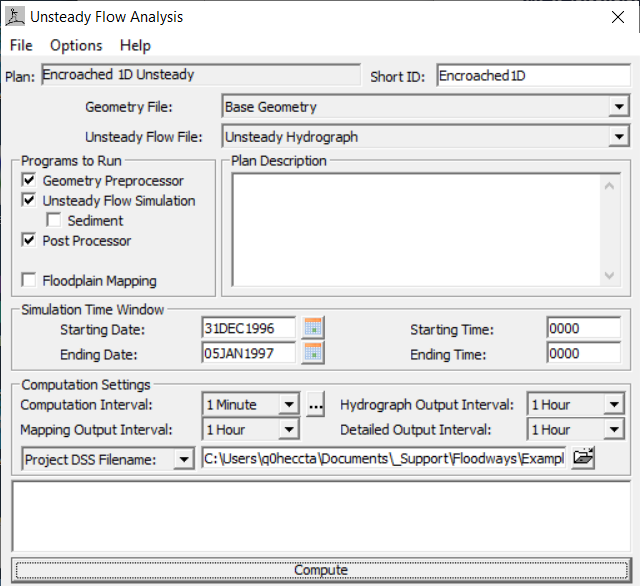
- Compute the Base plan.
Copy the Base plan using the File | Save Plan As menu item on the Unsteady Flow Analysis dialog. Provide a new name for the encroached plan and hit okay, in the dialog. Provide a ShortID for the new plan.
 The Encroached plan must utilize the identical geometry as the Base plan.
Access the Unsteady Flow Encroachment Table from the Unsteady Flow Analysis dialog Options | Unsteady Encroachments menu item.
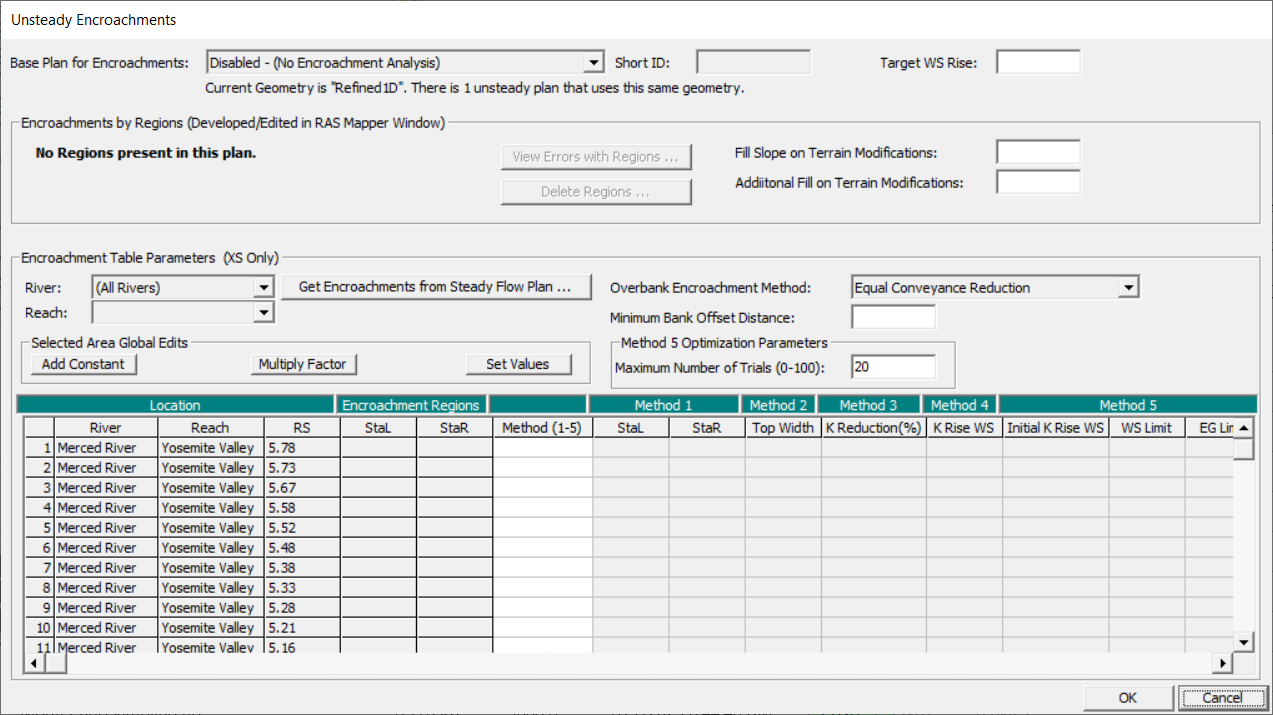
Enable the encroachment analysis by selecting the Base Plan for Encroachments.

Set the Target WS Rise to 1.0ft.

The Target WS Rise is the maximum allowable change to the computed water surface. The National standard is 1.0ft, but may be less than that in based on State, County, or Community regulations. For locations that follow a "no rise" that is equivalent to a Target WS Rise of 0ft and indicates that the computed water surface elevation should not be impacted by the proposed floodplain encroachment.- Set the Fill Slope on Terrain Modifications to 0.001.
- Set the Minimum Bank Offset Distance to 20ft.

The bank offset will provide a buffer to to the channel by not allowing encroachment near the river banks. - Set the Encroachment table to utilize Method 5
- Initial K Rise WS = 0.7 ft
- WS Limit = 1.0 ft
- EG Limit = 1.0 ft

- Set the Maximum Number of Trials to 4.

- Press OK to save the encroachment data.
- Compute the Encroached plan.
As the plan runs, you will be provided status on the the Trials.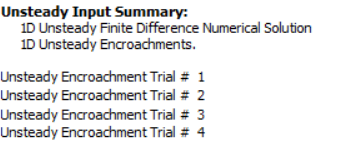
- Open RAS Mapper
- Utilize the capabilities in RAS Mapper to evaluate the encroachment results through profile Plots, Tables and geospatial Mapping.
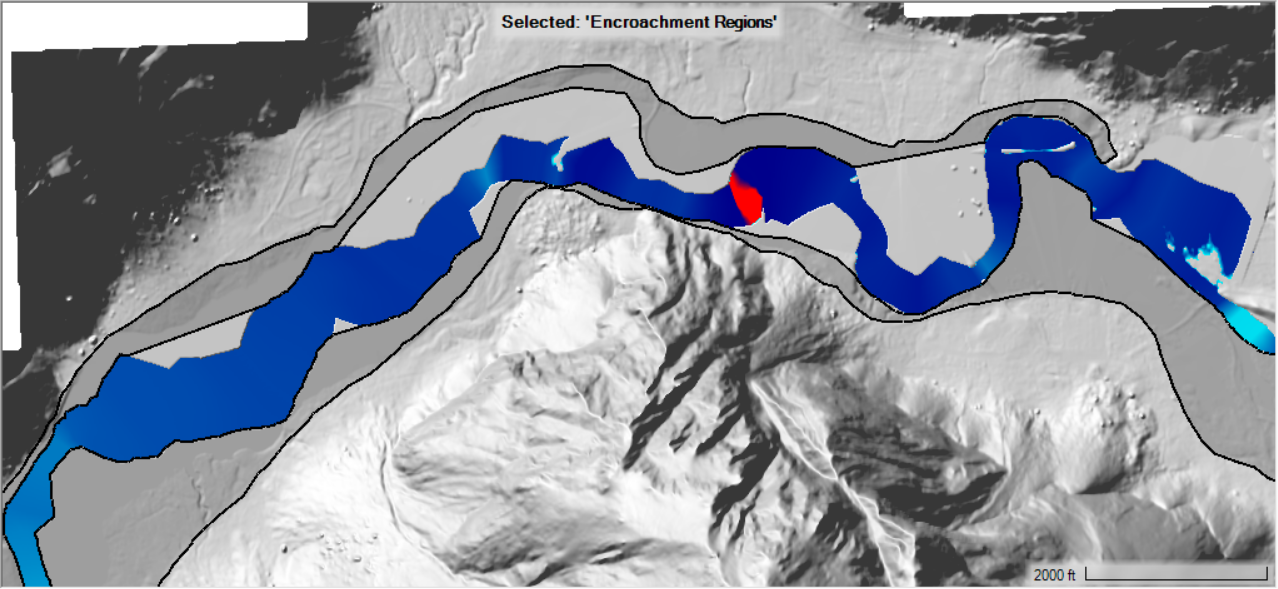
- Encroachment Regions
Encroachment Regions are automatically built for the plan Results and give you a visualization of the Method 5 results.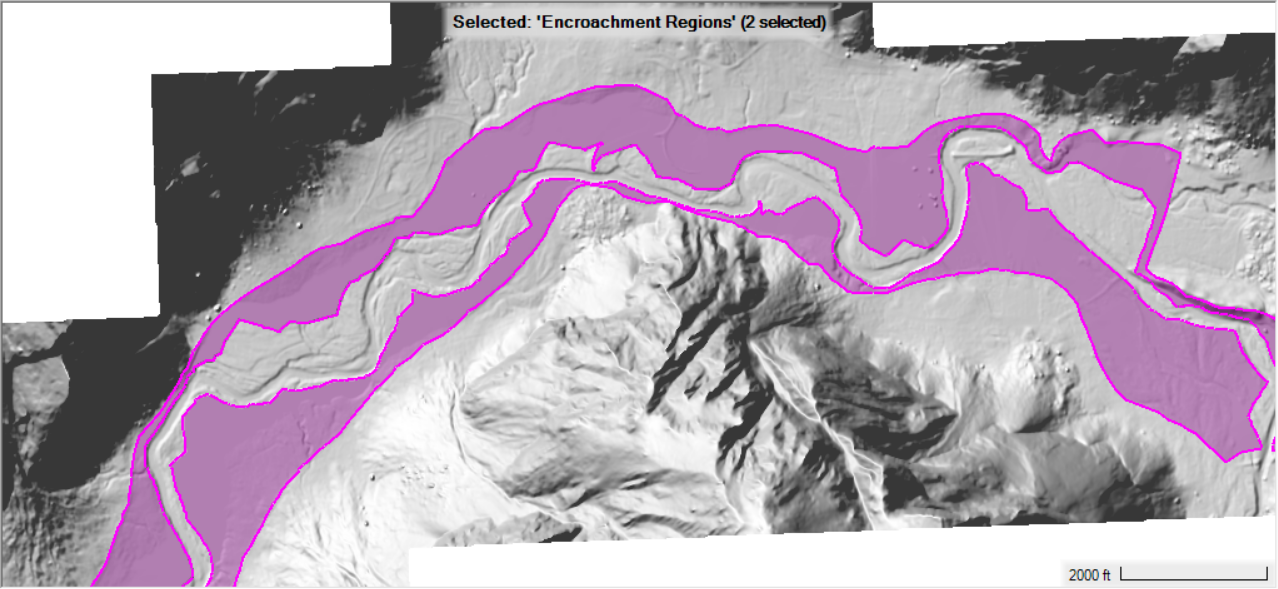
- Profile Plot
The Profile Plot is accessed by choosing the Encroachment Regions Layer Plot Encroachment Results Profile menu item. The Profile Plot shows a comparison of the Base and Encroached water surface profile as well as the difference between the two plots. Further, the Target WS Rise is shown along with the WS difference plot, indicating where areas along the river where refinement is required.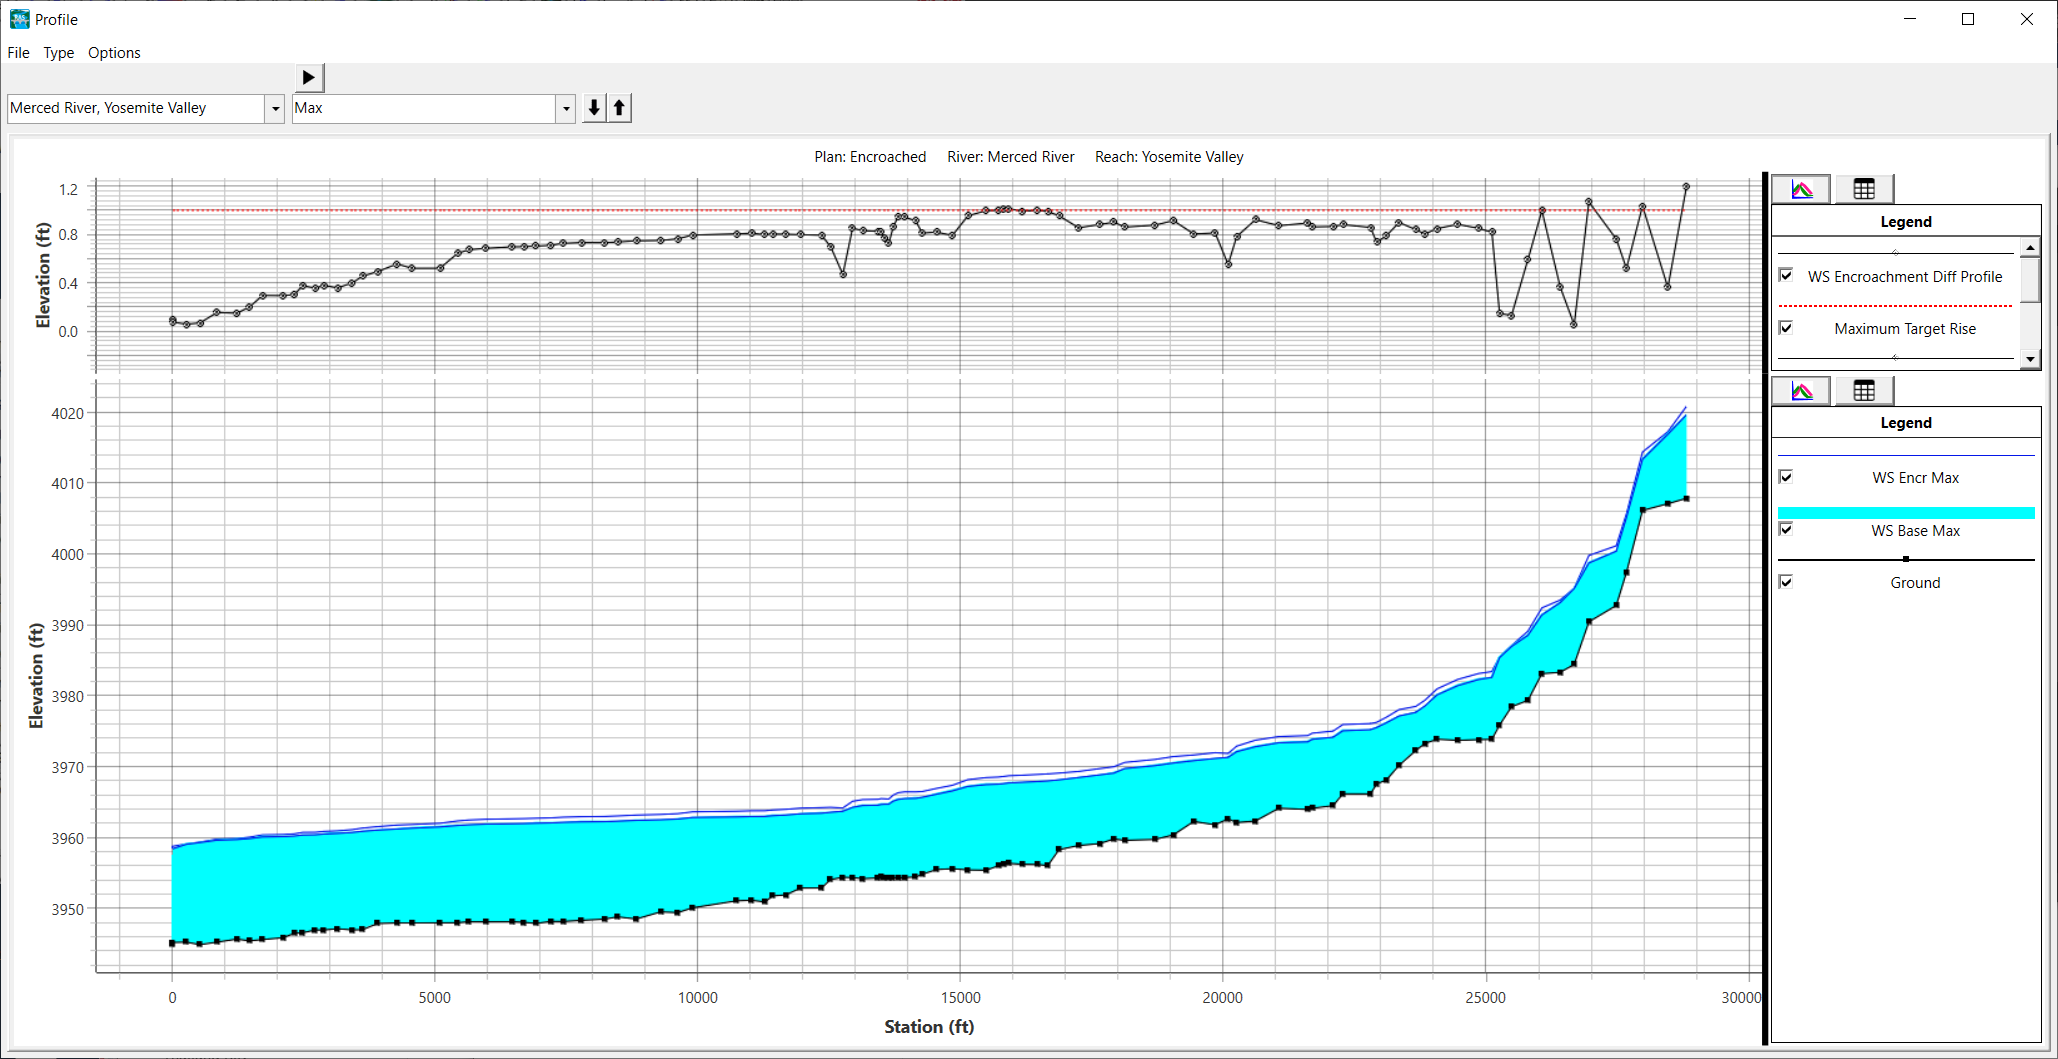
- Encroachment Table
The Encroachment Table is accessed by choosing the Encroachment Regions Layer Show Encroachment Table Results menu item. There are many variables available from the Encroachment Results Table, including the Left and Right Encroachment Stations, Base and Encroached water surface elevations, and difference in water surface elevations. The table is customizable to see the variables of interest.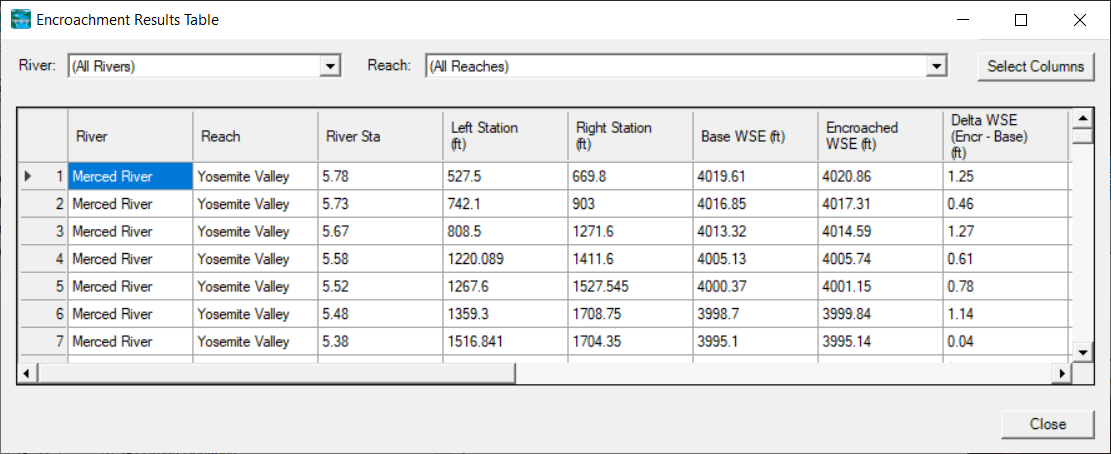
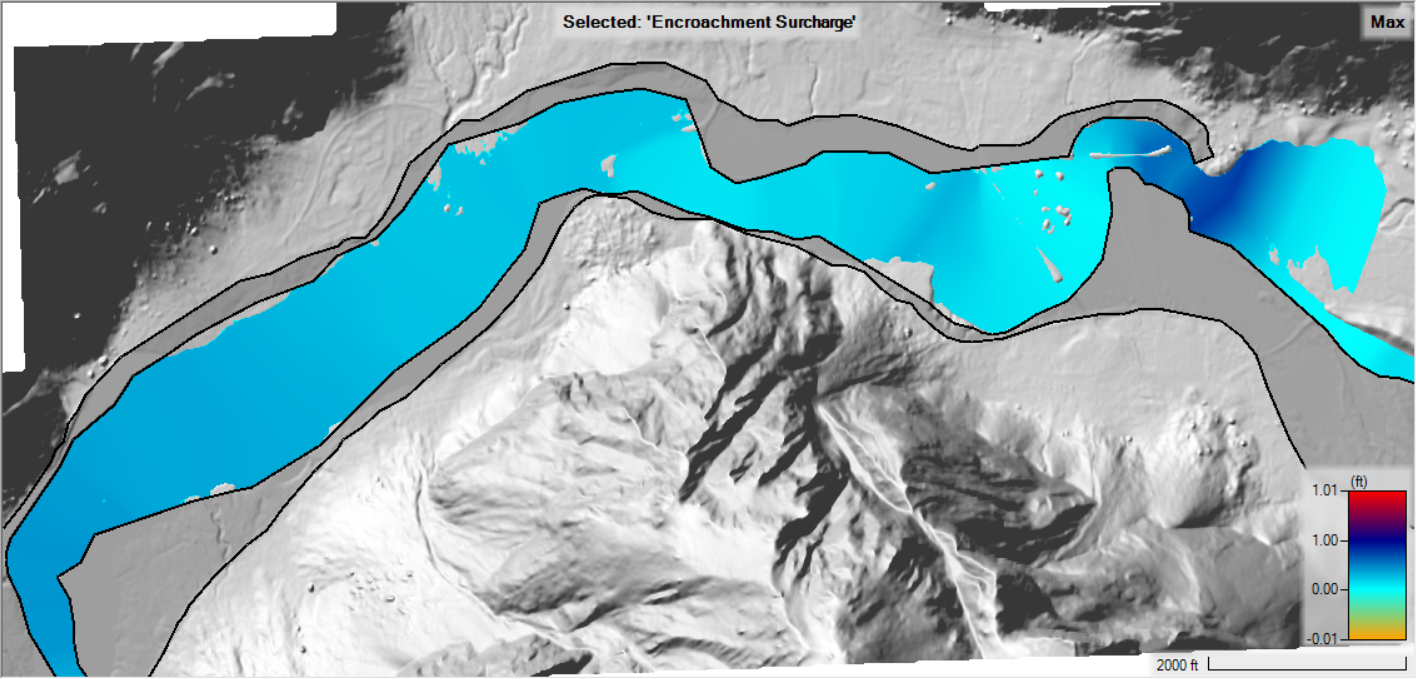
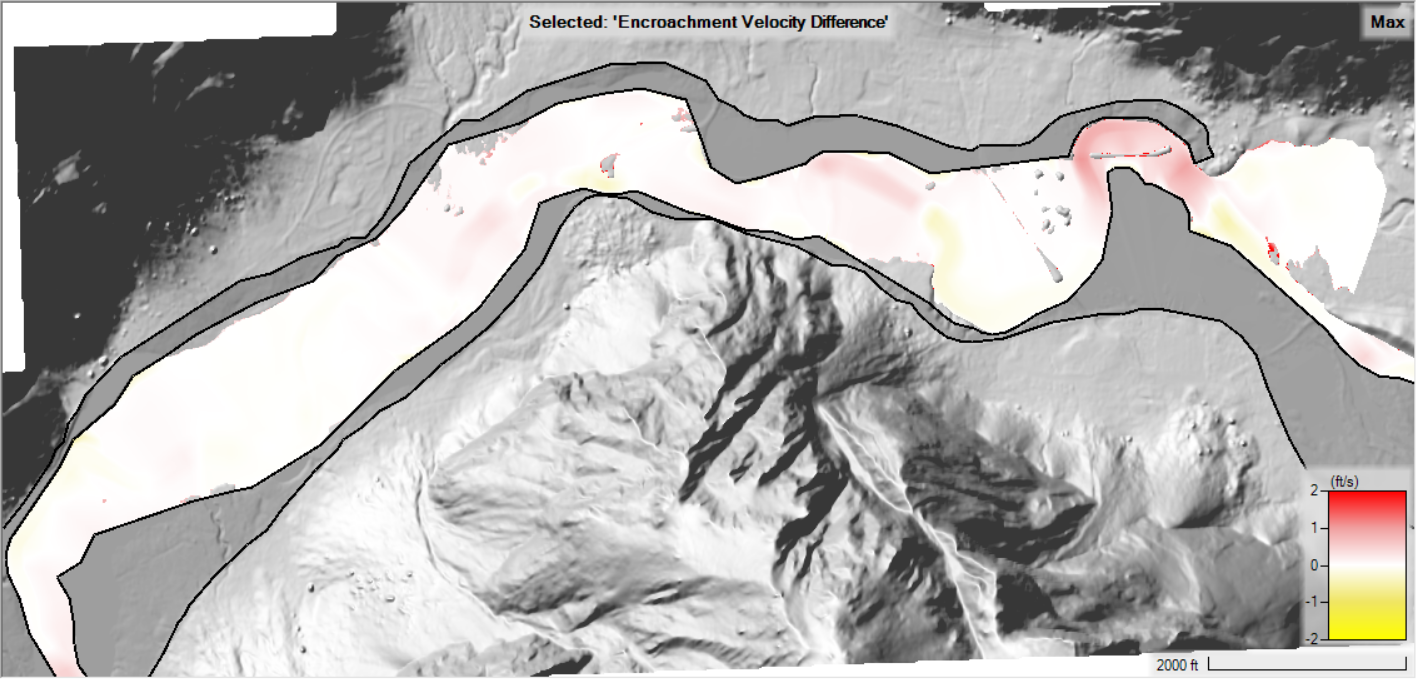
- Encroachment Surcharge
The Encroachment Surcharge map is automatically added to the Encroached simulation results. The surface map allows you to quickly spatially identify locations where the water surface elevations changes more than the allowable (as specified by the Target WS Rise). Analysis of the Surcharge map while editing the Encroachment Regions will allow the user to improve the floodway encroachment boundaries.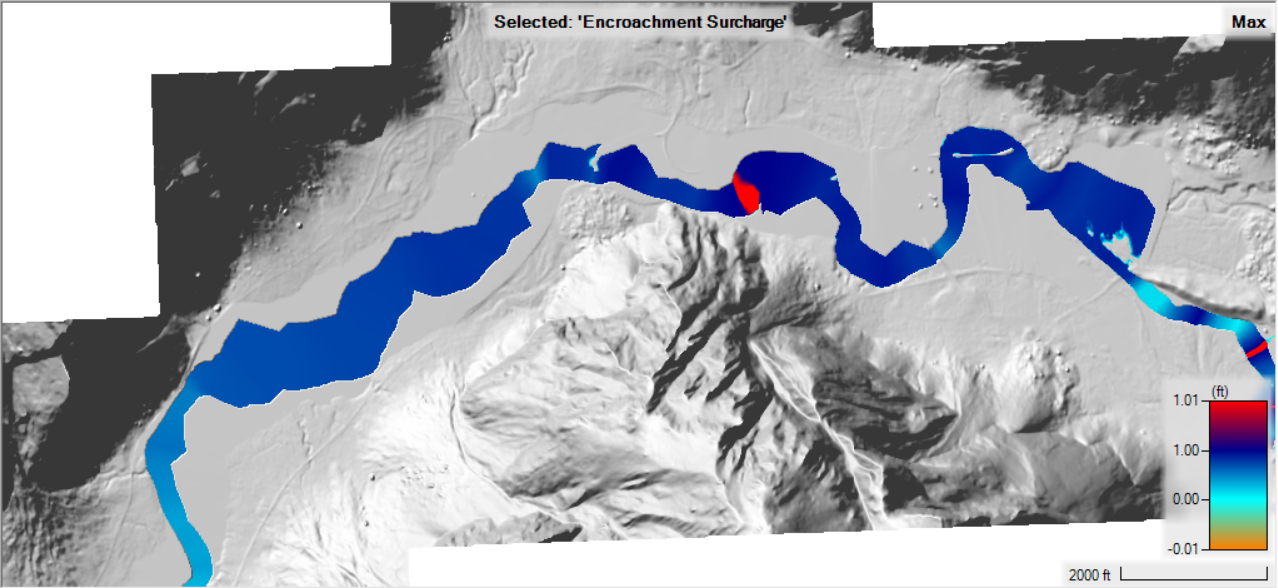
- Terrain
A new Terrain (Terrain_5ft.Encroached1D.Encr) was created and associated with the Encroached plan during the simulation. This Terrain is Clone of the terrain used for the Base plan; however, a Terrain Modification was added based on the determination of the encroachment boundary and the Target WS Rise. This new Terrain shows you what would be filled in, should the floodway fringe be build out.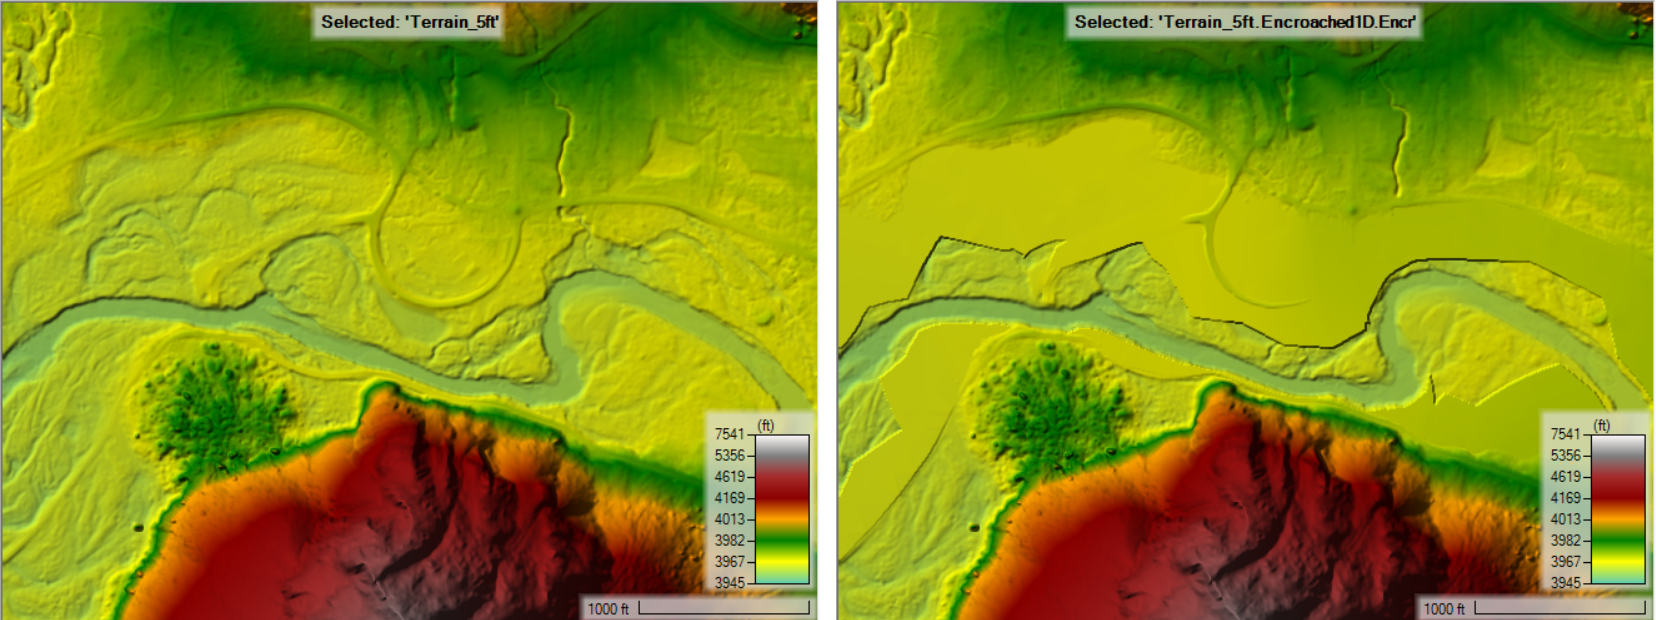
- Encroachment Regions
- In RAS Mapper, expand the Plans group, Encroached plan, and show the Encroachment Regions
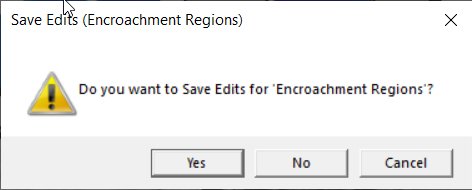
- Start Editing the Encroachment Regions
- Right-Click on the Encroachment Regions layer and choose the Generate Floodway Encroachment Polygons | From 1D Encroachments menu item and select the Encroached plan.
This will create Encroachment Regions based on the simulation results (as shown in the Results/Plan layer). - Use the Encroachment Surcharge map to inform editing the Encroachment Regions.
- When finished editing the Encroachment Regions, Stop Editing.
- Open the Unsteady Encroachment data editor. Make note that the options for the Encroachment Regions is now active and the portion of the table for Method 1-5 is greyed out.

- Compute the Encroachment plan.
- The previous RAS Terrain will be replaced with a new RAS Terrain that reflects the Encroachment Regions
- Evaluate the results in RAS Mapper using the Surcharge map.
- Continue to refine the encroachment polygons in RAS Mapper as desired and re-computing the floodway analysis.