Download PDF
Download page Terrain Modification.
Terrain Modification
Objective
In this tutorial, you will learn how to modify terrain models for use in HEC-RAS. You will learn how to create channel data to merge with overbank data from an existing RAS model and how to use the terrain modification tools.
Background
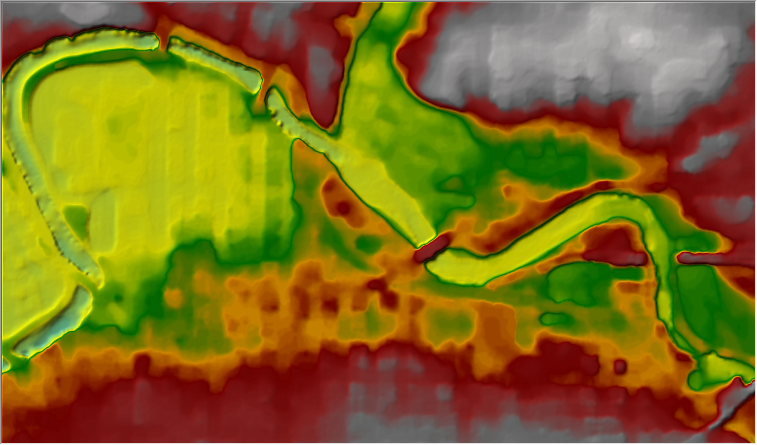
You will be working with terrain data for a section of the White River at Muncie, IN. The data required for the tutorial is provided in the zip file below.

Merging XS Channel Data with Overbank Data
This task will take you through the process of merging channel cross section information with terrain data. This process simulates the situation where you have bathymetric data represented in cross sections to replace overwater elevations gathered using LiDAR.
Create Grid of Channel Data
- Start HEC-RAS and open the project titled "Terrain Modification".
- Open RAS Mapper
- Create a New RAS Terrain using the "base.tif". Note the presence of high ground in the middle of the channel at bridge locations.
- Turn on the Rivers, Bank Lines, and Cross Sections Layers.These are the Layers that are used for creating the Interpolation Surface.
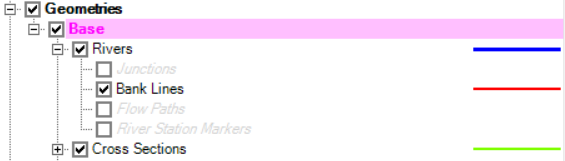
- If the Bank Lines layer is missing. You can create bank lines from the cross section banks stations.
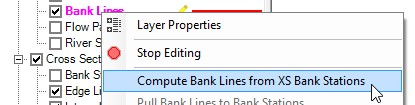
- Start Editing
- Right-click on the Bank Lines Layer and choose Compute Bank Lines from XS Bank Stations.
- Note any problems with the bank lines. Improve the bank lines to do a bettter job representing the channel. For instance, the river line should not intersect the bank lines.
- Right-click on the Interpolation Surface and select Compute XS Interpolation Surface. Turn in on. The Interpolation Surface is used in making the results maps and will be used to create the new channel raster data.
- Stop Editing.
- Right-click on the geometry and choose Export Layer | Create GeoTIFF from XS's (channel only)
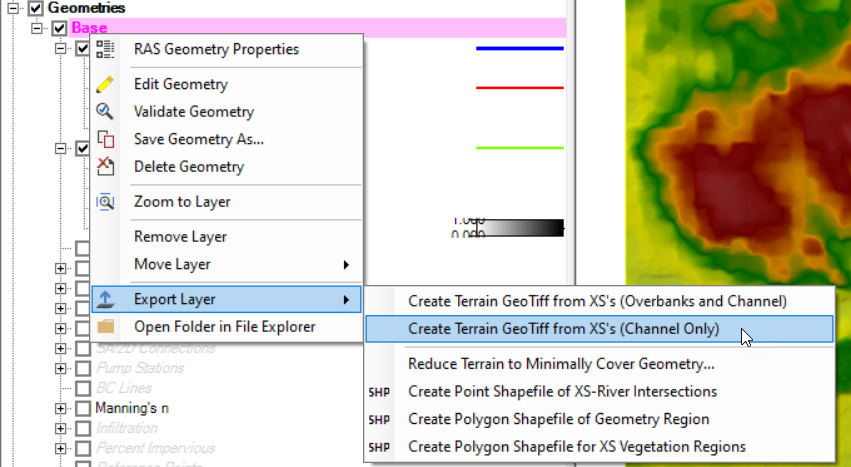
- Provide a filename ("channel") and press Save.
- Enter a raster cell size in the next dialog (this will depend on the size of your channel. Enter 5 (ft).
Merge Terrain Data
- Create a New RAS Terrain.
- You will have to browse to 2 different files. Make sure that the "priority" is set properly.
- Add the "channel.tif"
- Add the "base.tif"
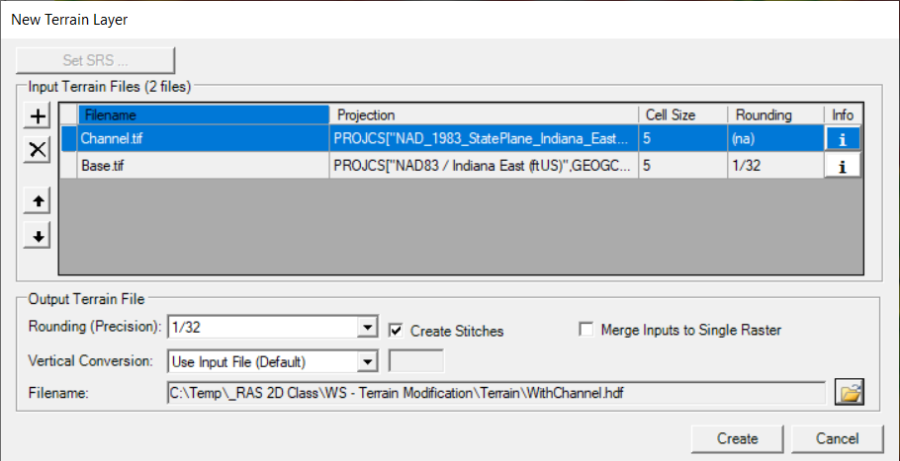
- Change the output filename to "WithChannel".
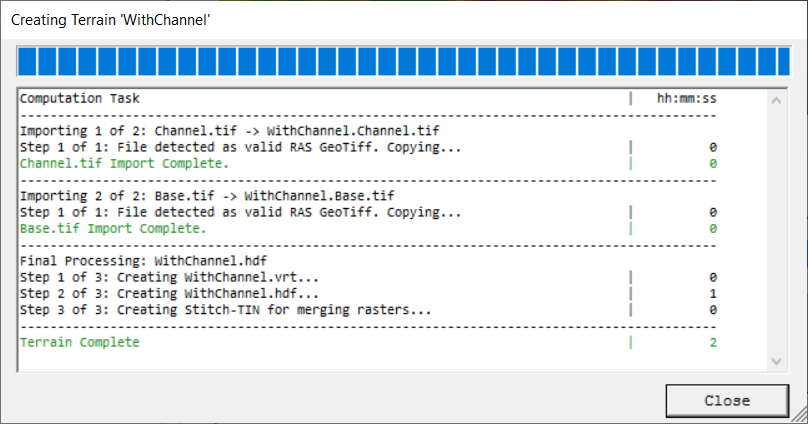
- Press the Create button.
- Change the Layer Properties for the "WithChannel" Terrain.
- Turn on the Plot stitch TIN edges for the "WithChannel" Terrain.
- Investigate the stitching – a TIN which is the interpolation between the in-channel data and the overbank data. Compare with the base Terrain model.
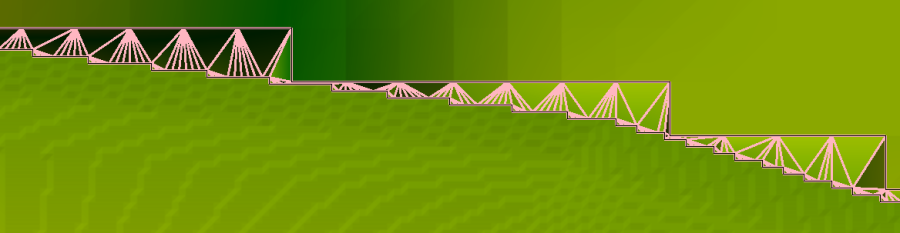
- Compare the two terrain models (with and without bridge elevations).

Channel Modification Tools
This task will take you through the process of cloning a RAS Terrain and using the Channel Modification tools to change the ground surface elevations for modeling.
Clone the RAS Terrain
Cloning the RAS Terrain allows you to reuse datasets. You don't have "make a copy", rather we create a new terrain file for the modifications but point to the base terrain.
- Right-click on the "WithChannel" Terrain and choose "Clone Terrain".
- Provide a name (like "Clone") and press OK.
- Turn on the cloned terrain.
Add Piers
- Zoom into one of the bridge crossings (View = Simple Pier).
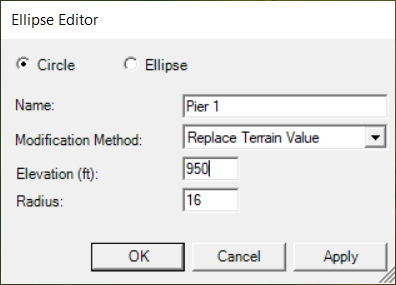
- Right-click on the Clone and choose Add New Modification Layer | Shapes | Circle/Ellipse.
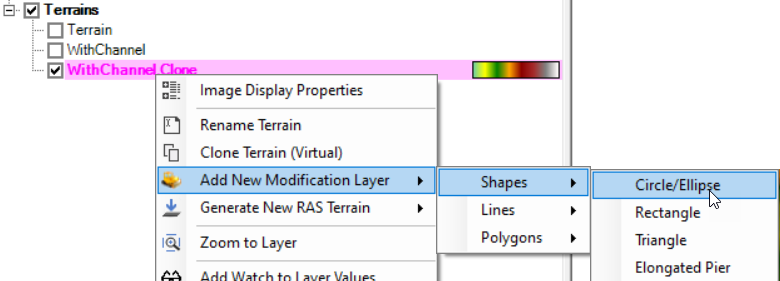
- Add a name for the layer "Simple Piers".
- Add two piers with 16ft radius with a top elevation of 950ft.
Add Elongated Pier
- Zoom into one of the bridge crossings (View = Elongated Pier) .
- Right-click on the Clone and choose Add New Modification Layer | Shapes | Elongated Pier.
- Add a name for the layer "Piers".
- Add a pier 20ft wide, 100ft long, at elevation 955ft. Use round nose with a 10ft radius.
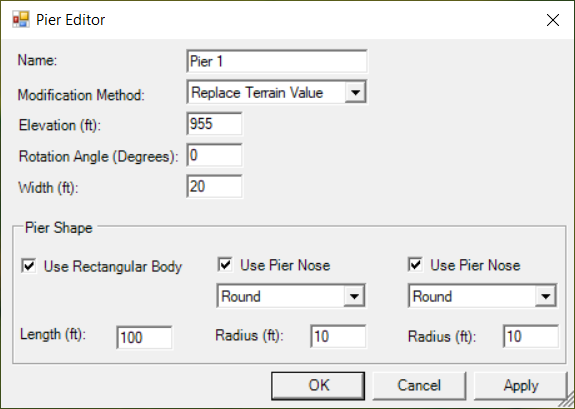
- Use the edit tool to rotate the pier in line with flow.
Add a Levee
- Zoom into one of the levee locations between the two bridges crossings (View = Levee).
- Right-click on the Clone and choose Add New Modification Layer | Lines | High Ground.
- Create a levee/floodwall alignment from the upper bridge to the lower bridge.
- Set up the levee information as show below.
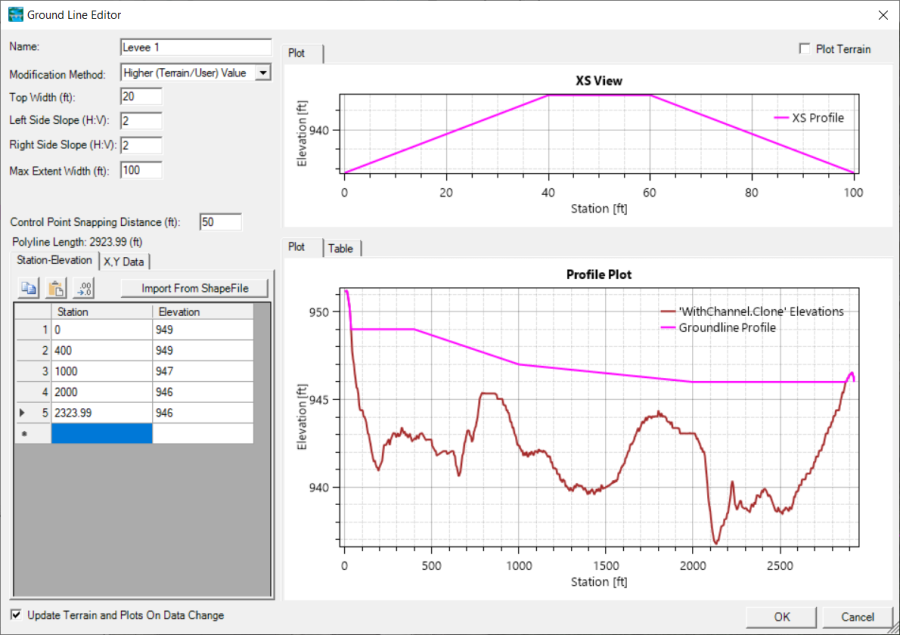
- Press OK to accept the information.
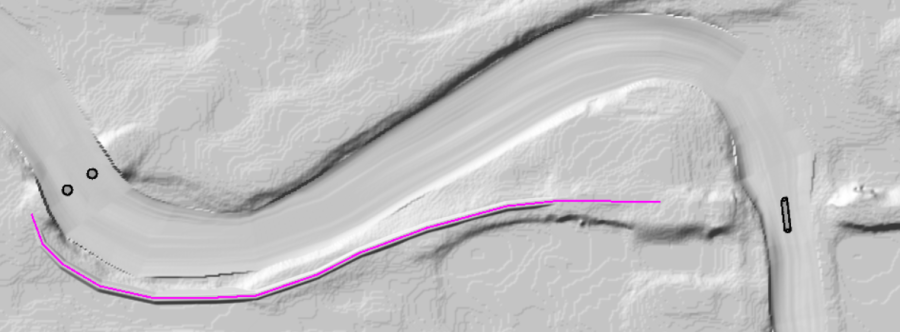
- Evaluate how the terrain has changed.
Add a Detention Pond
- Zoom into one of the levee locations between the two bridges crossings (View = Wetland).
- Right-click on the Clone and choose Add New Modification Layer | Polygons | Multipoint.
- Provide a name like "Wetland"
- Add a polygon – use the "Use Elevations at Boundary from Terrain" option.
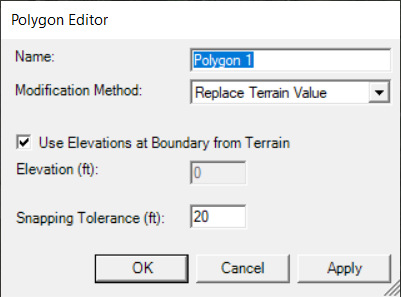
- Note what the terrain model looks like.
- Now add Elevation Control Points to lower the terrain inside the polygon.
- Expand the Wetland modification to see the "Control Points" layer.
- Add control points and enter elevations around 930ft with a low spot on the downstream end of 925ft.
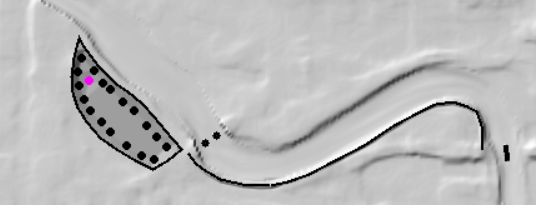
- Evaluate the terrain model.