Download PDF
Download page Creating a RAS Terrain.
Creating a RAS Terrain
Data Files
You will be working with a section of the White River at Muncie, IN. The data for this tutorial is provided in the zip file.
Objective
In this tutorial, you will learn how to create how to create a RAS Terrain from a raster representing ground surface elevations.
Creating a RAS Terrain
- Start HEC-RAS.
- Save the project using File | New Project and providing a project name.
- Launch RAS Mapper
 .
. - Select Project | Set Projection for Project and navigate to the "projection.prj" provided in the "GISData" folder. This sets the coordinate system for all the data you will view in RAS.

- Press OK to accept the file.
- Select the Project | Create New RAS Terrain menu item (or right-click Terrains and choose the Create a New RAS Terrain menu item) to import the terrain model.
- Click the "+" button to add files and navigate to the "Terrain" folder. Select the "base.tif" file.

- Press the Create button.As the Terrain is created, a computation window will inform you of progress.
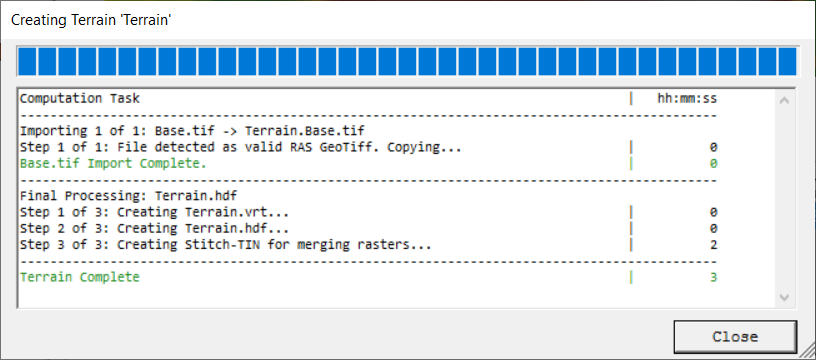
- Double-click on the Terrain Layer to access its Properties.
- Click on the Plot Hillshade option.Play with the Z Factor to find a value you prefer.
- Click on the Plot Contours option. Play with the Interval. Experiment with the option until the terrain looks good to you.
Note the presence of high ground in the middle of the channel at bridge locations.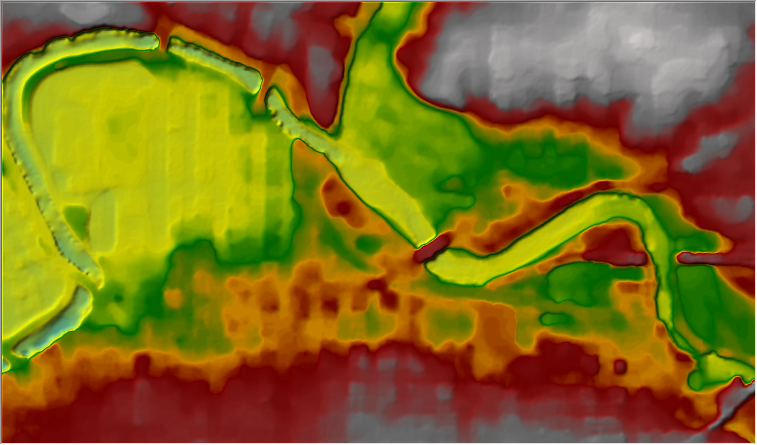
Creating a RAS Terrain from Multiple Datasets
This task will take you through the process of creating a RAS Terrain from 2 different terrain models: channel data and overbank terrain, in order to capture the channel geometry where there is currently high ground at the bridge locations.
Create Channel Bathymetry Layer
- In RAS Mapper, turn on the River and Cross Section layers
- Turn on the Bank Lines layer
- Turn on the Interpolation Surface layer
- Right-click on the Geometry (“Muncie 1D Base”) and Select the Export Layer | Create Terrain GeoTiff from XS’s menu item
- Provide a name for the new file (“myChannel”) and press OK.
- Provide rasterization cell size (5ft) and press OK.
Create Grid of Channel Data
- Open RAS Mapper
- Select the Project | Create New RAS Terrain menu item
- You will have to add to 2 different files. Make sure that the "priority" is set properly. The top layer should be the channel geometry, followed by the overbank. If you add them in the wrong order, you can reprioritize them by highlighting on of them, and clicking the up or down arrows on the left-hand side of the menu.
- Add the "Channel.tif"
- Add the "Base.tif"
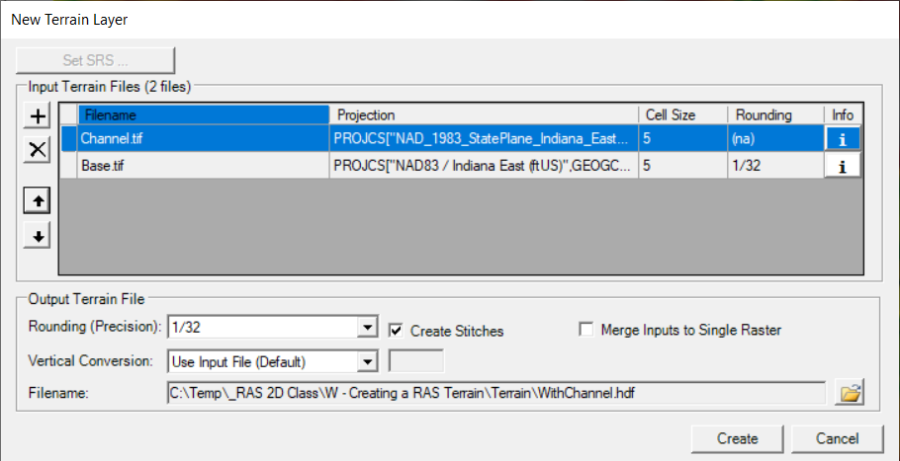
- Change the output filename to "WithChannel" by clicking the open folder icon in the bottom right corner of the menu. Enter the new name, and click save.
- Press the Create button.
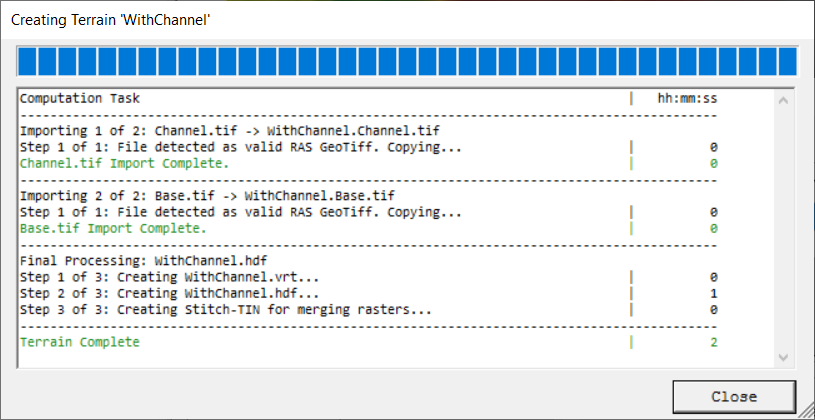
- Change the Layer Properties for the "WithChannel" Terrain.
- Turn on the Plot stitch TIN edges for the "WithChannel" Terrain.

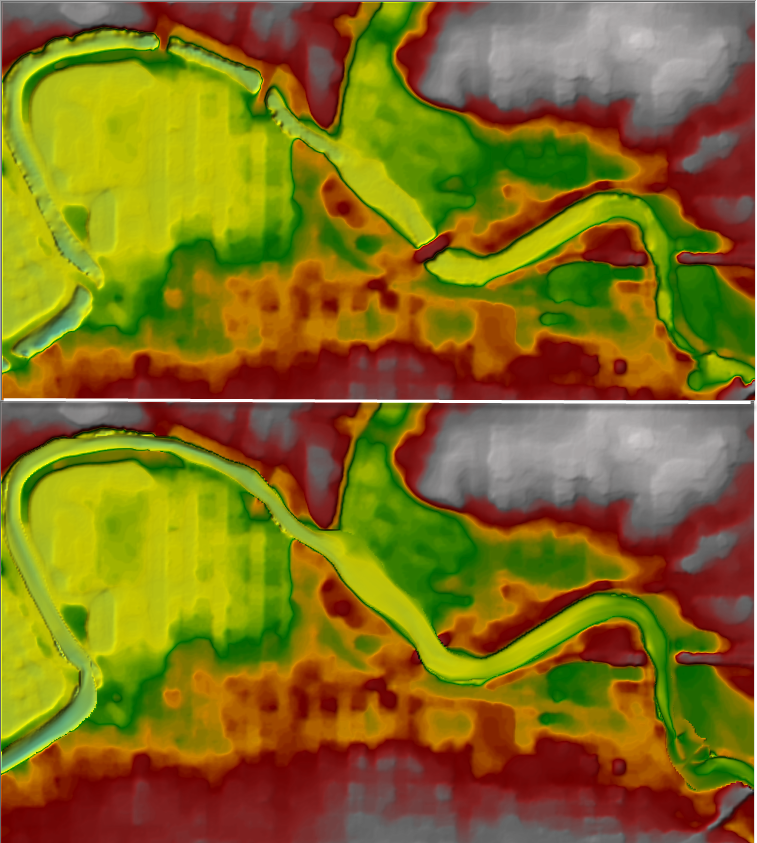
- Investigate the stitching – a TIN which is the interpolation between the in-channel data and the overbank data. Compare with the base Terrain model.
- Compare the two terrain models (with and without bridge elevations).
Create a RAS Terrain from USGS Terrain
This task will take you through the of downloading data from the USGS and creating a terrain model from the data.
Download USGS Data
- In RAS Mapper, select the Project | Download Data | USGS Terrain menu item.
- Press the Query Products button.
- Filter the data to the Original data of 2020.
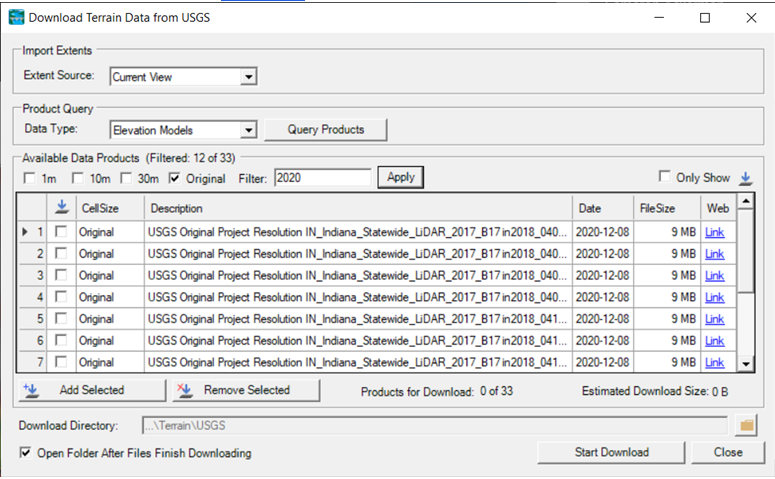
- Using RAS Mapper, Select just the 6 terrain tiles.
- Once selected, press the Add Selected button.
- Press the Start Download button.
- After the data are downloaded, dismiss the dialog.
- Close the Terrain Download tool.
Create the RAS Terrain
- Select the Project | Create New RAS Terrain menu item
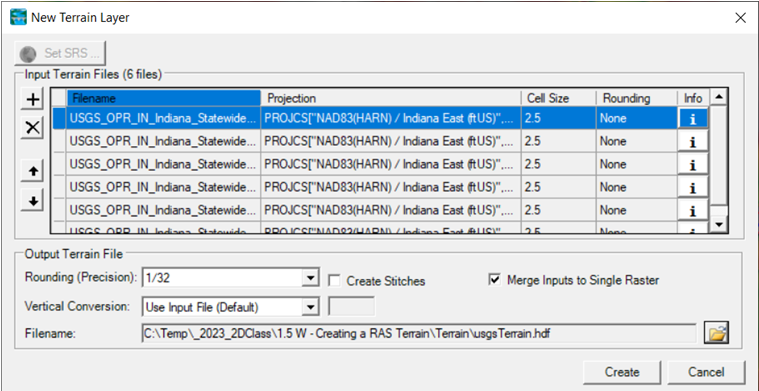
- Add the downloaded tiles from the “../Terrain/USGS” folder
- Provide a new name for the terrain layer.
- Click on the “Merge Inputs to Single Raster” checkbox.
- Press the Create button.
- Evaluate the new terrain model.
Most likely, not. You will need to get a better understanding of the terrain data in the channel and identify whether the data is properly capturing the river bed. Once you understand the accuracy of the data you can draw conclusions as to it's appropriateness for detailed modeling.
