The use of soils data in HEC-RAS is optional. Soils data can be used to define infiltration parameters for rainfall runoff modeling within HEC-RAS. Soils data can also be used to define spatial sediment transport data for 2D sediment transport modeling (see the HEC-RAS Sediment Transport user’s manual for information on soils data).
Importing Data from a Shapefile
Soils data information can be quite complex. Vector (shapefile) data from the Soil Survey Geographic (SSURGO) database can be downloaded from the Natural Resources Conservation Service (NRCS):
https://websoilsurvey.sc.egov.usda.gov/App/WebSoilSurvey.aspx
The data comes as a shapefile with an abbreviated soils name and unique key. Numerous tables are also included. However, to use the tabular data first users need to have an understanding of the tables (metadata and table columns). Information regarding this data can be accessed here: https://www.nrcs.usda.gov/wps/portal/nrcs/detail/soils/survey/geo/?cid=nrcs142p2_05363. The user will need to join the data from the tables using other software like a GIS software such as ArcGIS.
Data are also available in a geodatabase format from the Gridded SSURGO (GSSURGO) database:
https://datagateway.nrcs.usda.gov/GDGOrder.aspx
RAS Mapper has the capability to import the GSSURGO data.
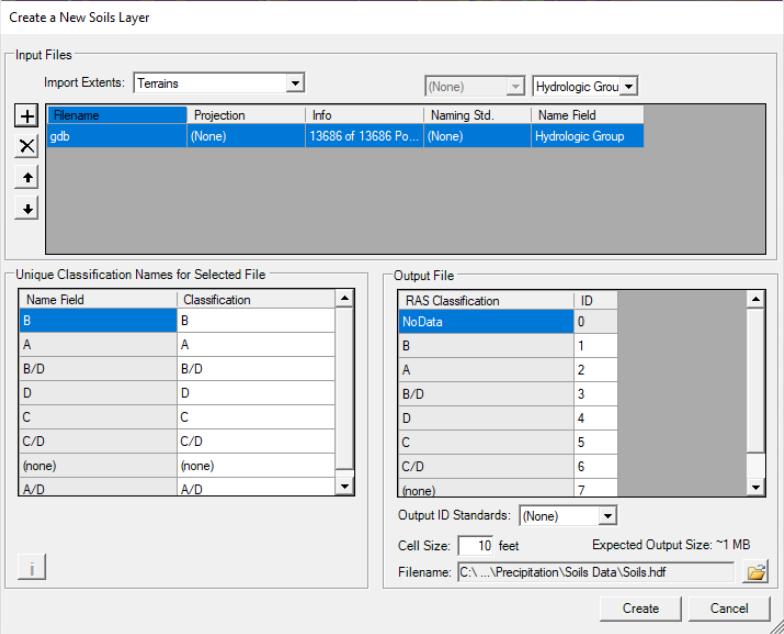
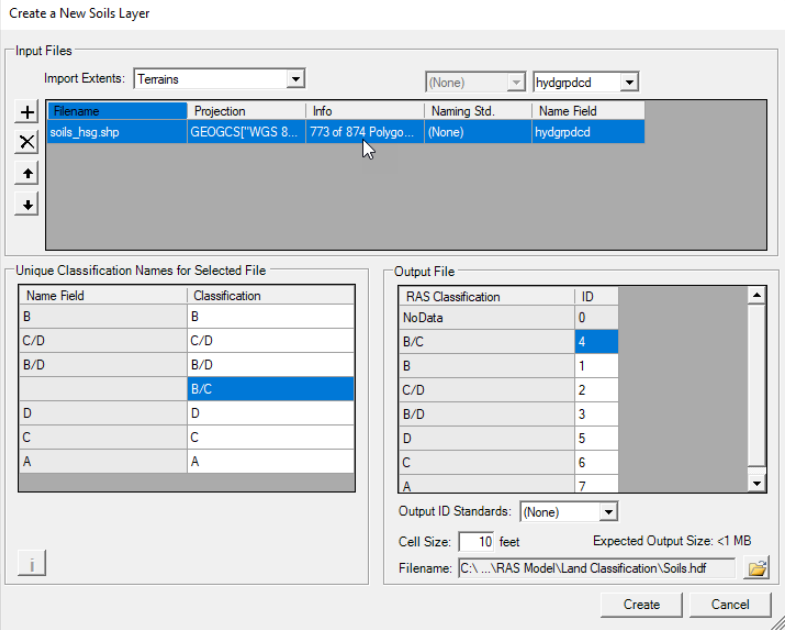
Creating a Soils Layer is similar to the Land Cover Layer. Select the Map Layers | Create New RAS Layer | Soils Layer to open the Create a New Soils Layer dialog (see figure below). Use the Plus button to add the Soils data to the Input Files section. If Soil data is being added in a shapefile format, from the Input File section, from the Name Field, select the field name that provides a unique name convention for the soils layer, such as "Hydrologic Group" or "Texture Class". Adding Soils data from a standard coordinate system will take a moment to load the data as all the polygons must be reprojected to the coordinate system used for the project. If using the GSSURGO geodatabase (discussed in the next section), other field choices will be provided.
Press the Create button, and RAS Mapper will create a “Soils” grid ("Soils.hdf" and "Soils.tif"), using the specified Cell Size.
Importing GSSURGO Data
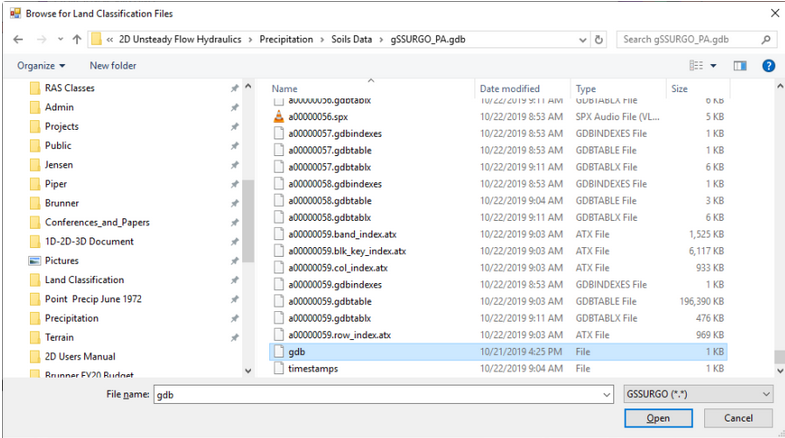
Select the Map Layers | Create New RAS Layer | Soils Layer to open the Create a New Soils Layer dialog shown in the figure below). Use the Plus button to add the Soils data to the Input Files section. When adding GSSURGO data, select the "GSSURGO" name from the file type list. Navigate to the geodatabase (which is a folder). Pick a file inside of the database ("gdb" is a good choice), click the Open button. RAS Mapper will recognize and interpret the database, preparing it for import.
The data will then be imported and projected to the previously defined coordinate system for the RAS Mapper project. A progress bar displays the progression of the import process.
By default, RAS Mapper will choose to classify the data using the "Hydrologic Group" field. Other options include the "Texture Group," "Map Unit Key," "Map Unit Symbol," or a the combination of hydrologic group and texture group "Merged Hydr : Texture." From the Create a New Soils Layer dialog (show below), from the Input Files section, select the Name Field to classify the data. It is likely that some of the GSSURGO data will not be classified; in this case, RAS Mapper will classify those areas with the "none" keyword. It is the user's responsibility to provide a classification for data classified as “none.”
Verify the output file Cell Size and Filename. Press Create to create the soils layer.