Download PDF
Download page Editing Tools.
Editing Tools
The editing capabilities will allow the RAS user to create geospatial 1D and 2D geometry directly in HEC-RAS, based on an underlying Terrain dataset. It is a difficult task to provide editing tools flexible enough to handle the complexities of editing, modifying, and processing all of geospatial data required with a minimalist set of tools. However, every attempt was made to make the editing tools environment as simple and straight forward as possible so that the user can easily find a desired operation. The development of Editing Tools have resulted in two essential tools: the Add New Feature tool and the Select/Edit Feature tool. All operations can be performed by selecting one of the two tools - the user can either add a new feature or right-click on a existing (selected) feature to access editors and perform edits. Access to perform actions on multiple feature are accessible through a right-click on the layer.
The integration of editing tools directly in RAS Mapper should make developing HEC-RAS models more efficient and encourage the development of a more refined hydraulics model. Users will be able to spend more time refining geometry to give accurate model results and spend less time struggling with data development.
Edit Toolbar
To begin editing the Geometry layers, right-click on the Geometry Layer and select Edit Geometry. The Editing Toolbar, shown below, will be added to the Map Display. The standard RAS Mapper toolbar will also be active while during and edit session, so you can switch to the Pan or Zoom tools while editing; however you must click on the  Select Features tool to reactivate the Edit Toolbar.
![]()
The Edit Toolbar is only available if the Select Features tool is active on the main RAS Mapper Toolbar.
| Tool | Description | |
|---|---|---|
Add New |
| Adds a new feature. |
Select/Edit Feature |
| Select features by left-clicking and dragging. Insert a point with a left-click near the line. |
Undo |
| Undo the last edit operation. |
Redo |
| Redo the last edit operation |
Plot Elevations |
| Plot the elevation profile under the selected feature. |
Tools |
| There are many edit operations that will work on the selected set.
|
Help |
| Opens an interactive help dialog to give the user quick tips on the editing options. |
Additional Options |
|


There are user-specified options available to help the user visualize what will happen next within the editor. The Selection Color (magenta, bright pink, is default) is used to indicate that a feature is selected and can be moved, copied, deleted, etc. A selected feature can also be “opened for editing” to edit points on the line or polygon. Once a feature open for editing, the symbology will change from the selection color to the Editor Symbology (grey line with black points). The Action Color (chartreuse, bright green, is default) will indicate that an action will occur if the user clicks. For instance, if the mouse hovers over a point, it will change color to the action color indicating that it will be “grabbed” if the user clicks on it and will remain the action color as it is moved. Further, if dealing with a line or polygon feature, action color lines will indicate that what the feature will look like if a point is inserted.
The tolerance for how close the mouse cursor needs to be to a point to select it is specified by the the “Near Point” tolerance. The tolerance for how close the mouse cursor needs to be to insert a point on a line or polygon is specified by the “Near Line” tolerance. These values can be user-specified from the Tools | Options menu.
Add New 
The Add New tool is used to create new features. Use the left mouse button to add a new feature or extend the selected line. As shown in the figure below, the location of the new point (as well as the new segment that will be created for a polyline or polygon feature) will be shown in the Action color defined in the Editor Options (accessed from the Tools | Options menu item).

When finished with adding the new feature, double-click to end the polyline or polygon (point features do not require a double-click) and "close" it from editing. When finishing a feature, often a dialog will be invoked requesting that you name the feature. For instance, when you finish a river line, the River/Reach naming dialog will be displayed, requesting a name. A unique default name will be provided for you, so you will not be required to provide a name.
Select/Edit Feature
The Select/Edit Feature tool is used to create select existing features and then edit the feature. This tool can be used to modify the entire feature (move, delete, etc.) or modify a portion of the feature. The Selected feature will be drawn in the Selection color. The Selection color may be changed in the General Options (accessed from the Tools | Options menu item).
To select a feature, click the feature or click and drag a selection rectangle, as shown below.

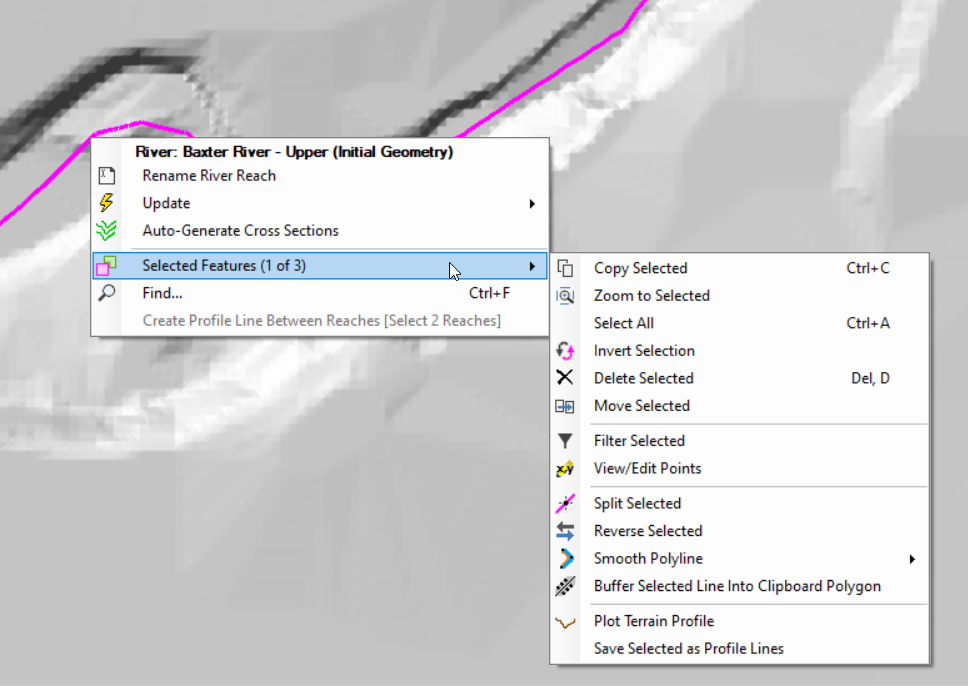
To modify a feature, select it, then perform one of the available options : (1) double-click to edit the feature, (2) left-click to drag it, (3) right-click to get a list of options available for the feature. Shown in the figure below, are the right-click options available for the a River Layer polyline feature.
In order to edit a feature, it must be “open for editing”. This is done by double-clicking the feature. Once the selected feature is opened, the feature will be drawn with the Editor Symbology, defined in the Editor Options (accessed from the Tools | Options menu item). (The default edit symbology is grey lines and black points.) Typical editing operations such as inserting, moving and deleting points can then be performed on the open feature through a left click. To perform operations such as deletion on multiple points, perform a selection using click-drag and then press the Delete key.

To finish editing a feature, double-click off of the feature to close it.
Copy / Paste
Copy and Paste is enabled for all features in HEC-RAS Mapper. Copy and Paste is accomplished by selecting features in the Map Window and choosing from several options to copy the features to the clipboard. Paste will occur for the selected layer, making an copy of the features on the clipboard. Note, if the selected layer has attributes that match the source layer, the attributes will be copied with the feature.
Copy
- Ctrl + C to copy the selected features to the clipboard for the selected layer
- Right-click on the source layer and choose Copy Selected Features
- Right-click on the selected feature in the Map and choose Selected Features | Copy Selected
Paste
- Ctrl + V to paste features from the clipboard to the selected layer
- Shift + Ctrl + V to paste a feature from the clipboard to the Cursor location
Selected Feature Operations
When a feature is selected, there are several geospatial options available for through a right-click on the feature via the Selected Features sub menu. These options are summarized below. Note that that selected feature operations are layer specific (for instance, an Polyline can be reversed, however a Polygon cannot).
| Option | Description |
|---|---|
| Copy | Copies the selected features to the clipboard. |
| Paste | Pastes the selected features to the selected layer including the attributes in common. |
| Delete | Deletes the selected features. |
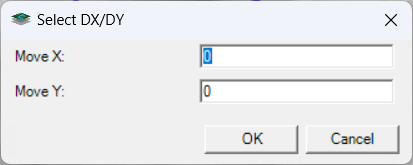
| Move | Translates the selected features by a user-specified amount.
|
| Zoom to Selected | Zooms the map window to encompass the selected set of features. |
| Select All | Selects all features in the layer. |
| Invert Selection | Reverses the selected set. |
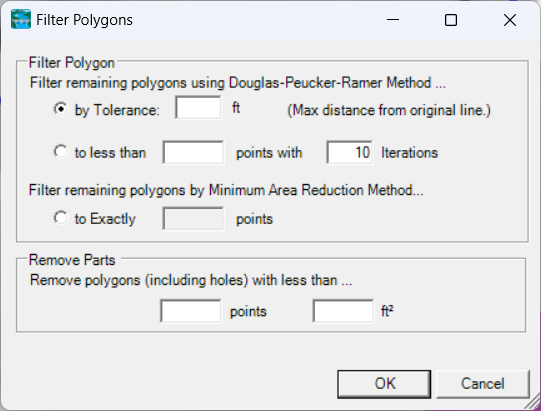
| Filter | Filter the points on a feature given a user tolerance. There are multiple methods implemented with the Filter tool.
|
| Split | Splits a line feature at the selected location. Splits a polygon features based on a drawn line. |
| Reverse | Reverses the order of the points in a line feature. |
| Smooth |
|
| Buffer Line to Clipboard Polygon | Copies a polygon to the clipboard using the user-specified buffer tolerance on the selected line. |
| Plot Terrain Profile | Creates a plot based on the line. |
Save Selected as Profile Line | Save the selected line to the Profile Lines layer. |
Overlapping Polygons |
|
Buffer Polygon | Enlarge (positive value) or shrink (negative value) the selected feature by the buffer value. |