Part 1 - Check on an Existing Model
Part 1.1 - Open the HEC-WAT Study
To open an HEC-WAT:
1. Double-click the HEC-WAT shortcut ![]() icon, the HEC-WAT software will launch. The HEC-WAT splash window opens followed by the HEC-WAT main window (shown below).
icon, the HEC-WAT software will launch. The HEC-WAT splash window opens followed by the HEC-WAT main window (shown below).
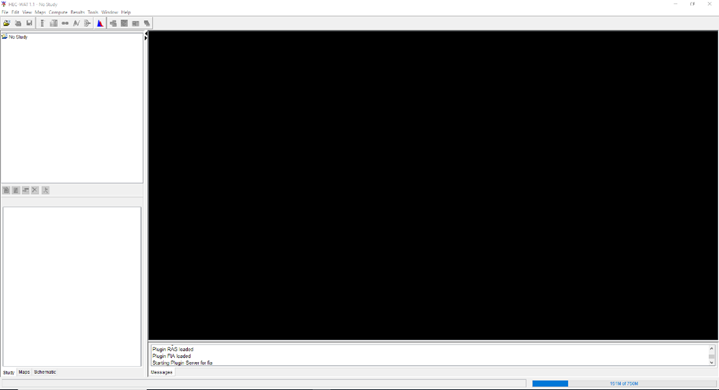
2. From the HEC-WAT main window, click File | Open Study. An Open Study browser will open.
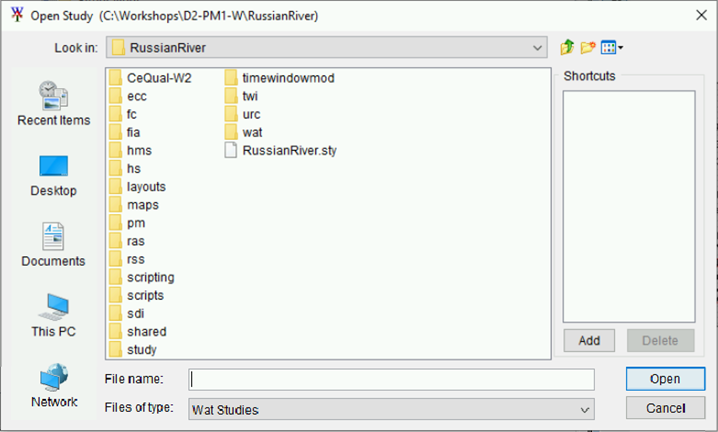
3. Navigate to the HEC-WAT study (*.sty) file location, select RussianRiver.sty, click Open. The Open Study browser will close, and the HEC-WAT study will display in the HEC-WAT main window.
Part 1.2: Adjustment to HEC-HMS Model
The HEC-HMS model that was previously imported only had one method for computing a result. For HEC-WAT deterministic computes, an HEC-HMS Simulation run is necessary.
You will compare the output of this model at a 15-minute time-step and a one-hour time-step to compare compute time to computational accuracy. Changing the time step is only one way to reduce compute time, as you review the model, consider other options that could be taken to improve the compute time while making minimal impacts to the results computed by the model.
Open HEC-HMS
Simulation runs support the evaluation of a rainfall event for a given time window without considering uncertainty in the inputs. This is a common simulation type in HEC-HMS. First, you will create a new simulation run with a one-hour time step.
From the HEC-WAT main window, from the Programs toolbar, click ![]() .
.

The HEC-HMS main window will display.
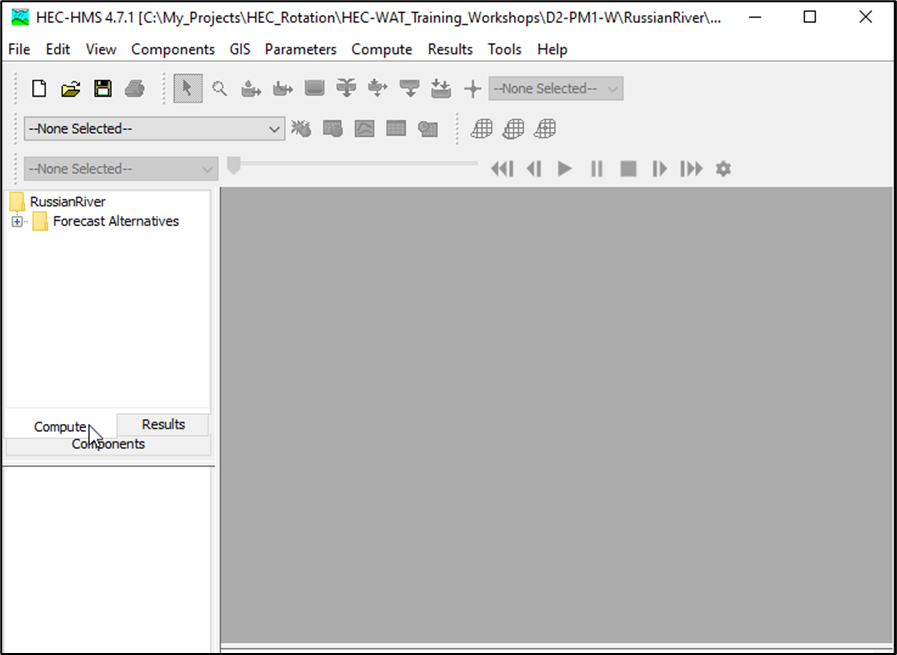
Created: 1-Hour HEC-HMS Simulation Run (Skip)
The following steps have been completed for you – but have been included in the workshop for your reference. (Note: Steps are numbered differently to separate them from the step you must complete).
A new HEC-HMS Control Specification was created for you. A control specification allows the user to define the time window for the simulation and the computational time-step. The Control Specifications Manager provides the capability of creating a new control specification.
I. From the HEC-HMS main window menu, Click Components | Control Specifications Manager. The Control Specifications Manager will open.
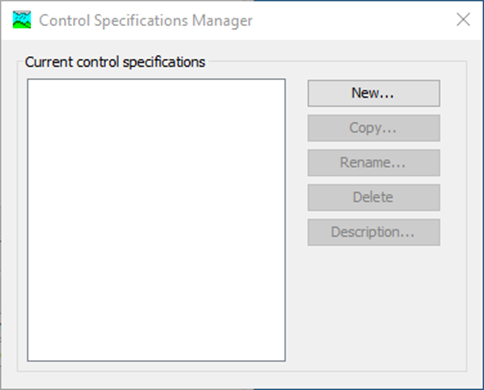
II. Click New, the Create A New Control Specifications dialog box will open. In the Name box there is a default name, Control 1, this name can be replaced. Click Create, the Create A New Control Specifications dialog box will close. The name of the control specification will display in the Current control specifications box of the Control Specifications Manager dialog box. Close the Control Specifications Manager dialog box.
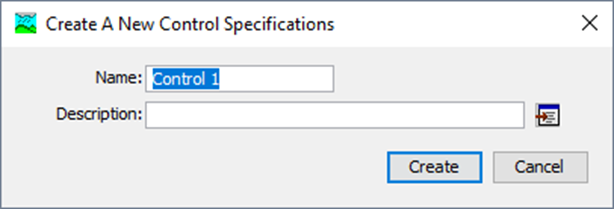
A time window for the control specification was entered for you. Each control specification sets the time window over which an HEC-HMS run will be performed.
III. From the HEC-HMS main window, from the Study Tree on the Components tab, expand the Control Specifications folder. Click on Control 1, information about the control specification displays in the Control Specifications. In the Start Date box, enter 26Dec1996; and in the Start Time box enter 00:00. In the End Date box enter 11Jan1997; and in the End Time box enter 15:00. From the Time Interval list, select 1 Hour.
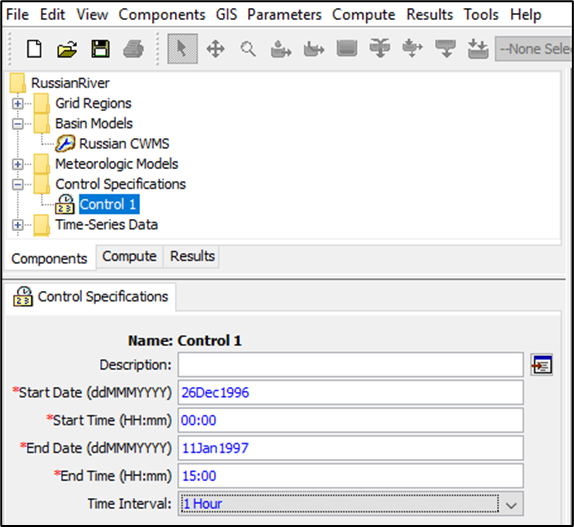
A new HEC-HMS run was created for you that would be recognized by HEC-WAT. Each HEC-HMS simulation run is composed of one meteorologic model, one basin model, and one control specification.
IV. From the HEC-HMS main window menu, click Compute | Create Compute | Simulation Run, and the Create a Simulation Run wizard opens.
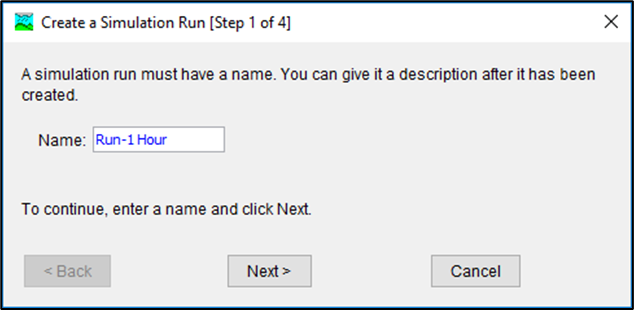
V. On the screen of the Create a Simulation Run [Step 1 of 4] wizard, in the Name box, enter Run-1 Hour, click Next. From screen two [Step 2 of 4], select Russian CWMS, click Next. From screen three [Step 3 of 4], select Interpolated, click Next. From screen four [Step 4 of 4], select Control 1; click Finish.
The last step that was completed for you was the compute of the Run-1 Hour simulation run.
VI. The next step is to compute the Run-1 Hour simulation run. From the HEC-HMS main window, click the Compute tab from the Study Pane, expand the Simulation Runs folder. Right-click on Run 1-Hour, from the shortcut menu, click Compute. A compute progress window will open, the simulation should complete successfully. Close the progress window when the compute is finished.
Create: 15-Min HEC-HMS Simulation Run (Continue Here)
1. You should compare the one-hour time-step results to 15-minute results. Create an HEC-HMS simulation with a 15-minute time-step. From the HEC-HMS main window, from the Components tab on the Study Pane, expand the Control Specifications folder, right-click on Control 1. From the shortcut menu, click Create Copy; the Copy Control Specifications dialog box will open. In the Name box, enter Control 2. Click Copy, the Copy Control Specifications dialog box will close.
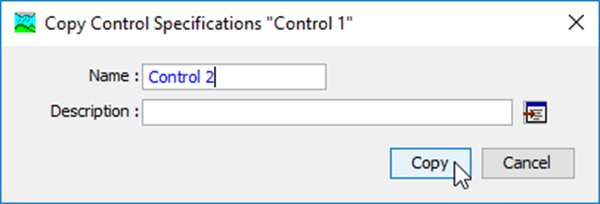
2. Now change the time interval for Control 2 to 15-minute time-step. From the HEC-HMS main window, from the Study Tree, expand the Control Specifications folder. Click on Control 2; from the Control Specifications pane, from the Time Interval list, select 15 Minutes.
3. Next step is to create a copy of an HEC-HMS simulation run. From the HEC-HMS main window, click the Compute tab from the Study Pane, expand Simulation Runs. Right-click on Run-1 Hour, from the shortcut menu, click Create Copy, the Copy Simulation Run dialog box will open. In the Name box, enter Run-15 min, click Copy. The Copy Simulation Run dialog box will close.
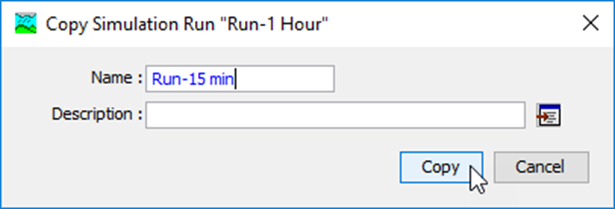
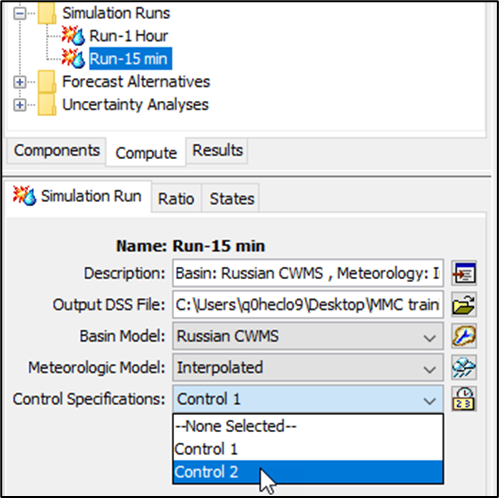
4. The next step is to compute the Run-15 min simulation run. From the HEC-HMS main window, on the Compute tab of the Study Pane, expand the Simulation Runs folder. Select Run-15 min, from the Control Pane, select the Simulation Run tab. From the Control Specifications list, select Control 2.
5. From the Study Tree, right click on Run-15 min, from the shortcut menu, click Compute. A compute progress window will open, the simulation should complete successfully. From the HEC-HMS main window, click ![]() , then close HEC-HMS.
, then close HEC-HMS.
Compare 15 Minute and 1 Hour Time Step Results
1. From the HEC-WAT main window, from the HEC-WAT Toolbar, click ![]() , and HEC-DSSVue Viewer will open.
, and HEC-DSSVue Viewer will open.

From the menu, click File | Open, for the Open HEC-DSS File browser. Browse to ...\RussianRiver\hms\ and select Run_1_Hour.dss. Click Open, the Open HEC-DSS File browser will close.
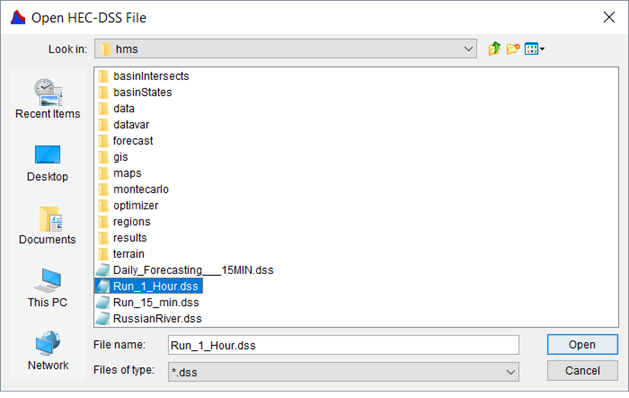
2. From the HEC-DSSVue Viewer, click File | Open, for the Open HEC-DSS File browser. Browse to NWO_Workshop_1.5\NWO_WS_1.5_start\RussianRiver\hms\, select Run_15_min.dss. Click Open, the Open HEC-DSS File browser will close.
3. The HEC-DSSVue Viewer will now display both DSS files. From the By Parts: C list, select Flow, for each DSS file. From the B Part list, select UKIAH GAGE, for each DSS file. For each DSS file, double-click on the UKIAH GAGE record.
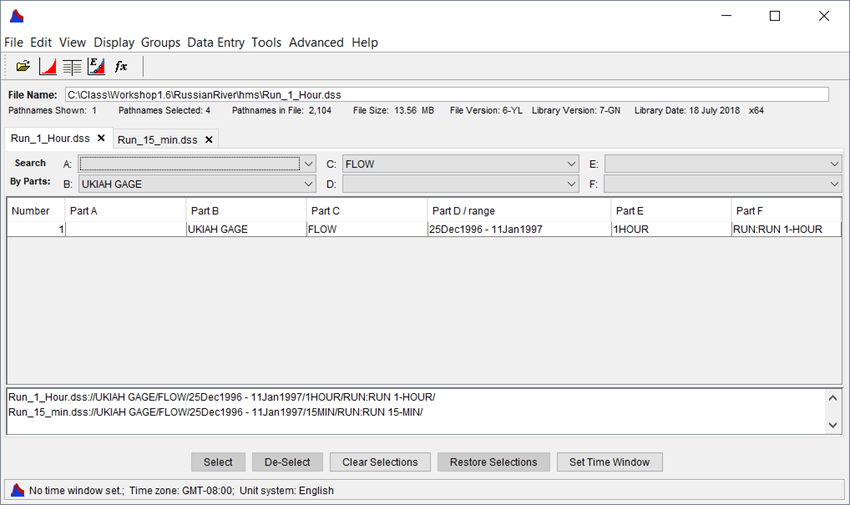
Click ![]() . A Plot dialog box will open which compares results from the two HEC-HMS simulation runs. Note the slight difference between the results.
. A Plot dialog box will open which compares results from the two HEC-HMS simulation runs. Note the slight difference between the results.
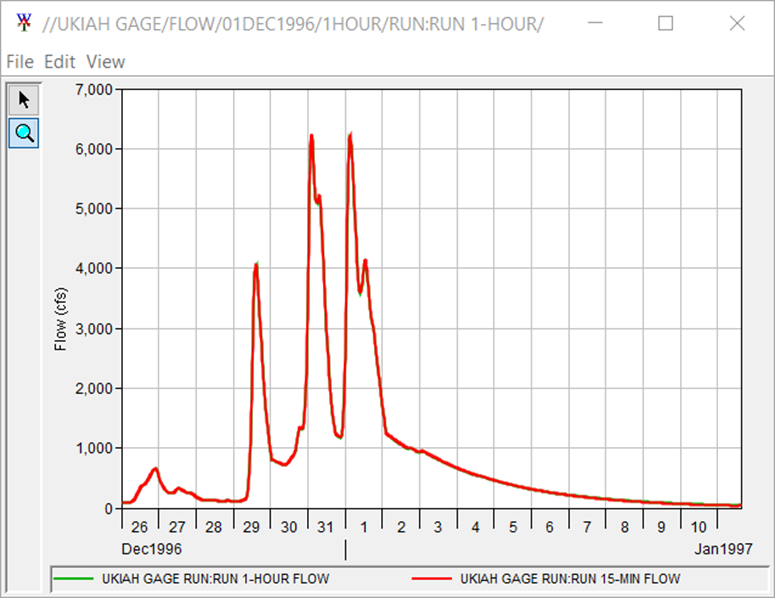
Because the differences between the two HEC-HMS simulation runs are negligible, it is recommended you use the simulation run (Run 1-Hour) with the one-hour time-step since it computes faster the 15-minte time-step simulation run (ten seconds versus five seconds).
4. Close the plot window and close HEC-DSSVue.
Part 1.3 - Adjustments to HEC-ResSim Model
The HEC-ResSim model has not been associated with output from the HEC-HMS model. Since you are now using an HEC-HMS simulation run that has a one-hour time-step, it is necessary to adjust the HEC-ResSim model accordingly. If a model alternative is changed, it is common that other models lower in the computational sequence will need to be adjusted. Other adjustments may require more coordination, but the net impact of these adjustments can be worth the effort.
Open Reservoir Network
1. From the HEC-WAT main window, from the Programs toolbar, click ![]() . The HEC-ResSim main window will display. It is possible the HEC-ResSim main window will open behind HEC-WAT, use Alt+Tab to access the HEC-ResSim main window.
. The HEC-ResSim main window will display. It is possible the HEC-ResSim main window will open behind HEC-WAT, use Alt+Tab to access the HEC-ResSim main window.
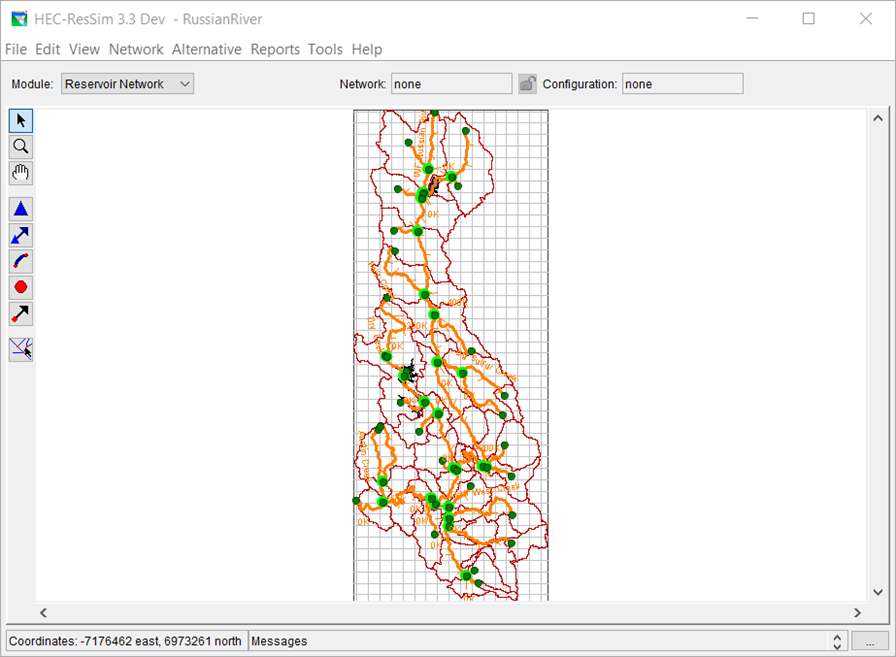
2. From the Module list, select Reservoir Network. From the menu, click Network | Open; the Open Reservoir Network dialog box will open.
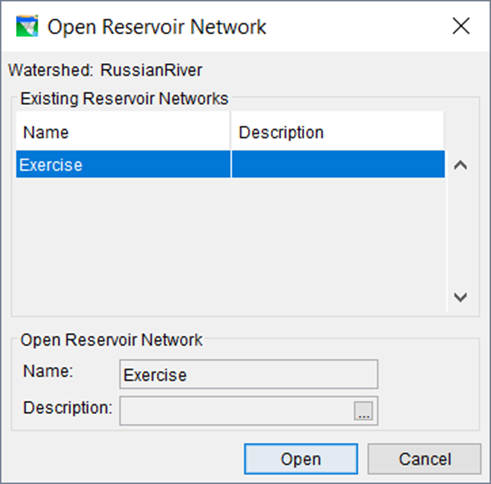
From the Existing Reservoir Networks box, select Exercise. Click Open, the HEC-ResSim schematic in the display area will update.
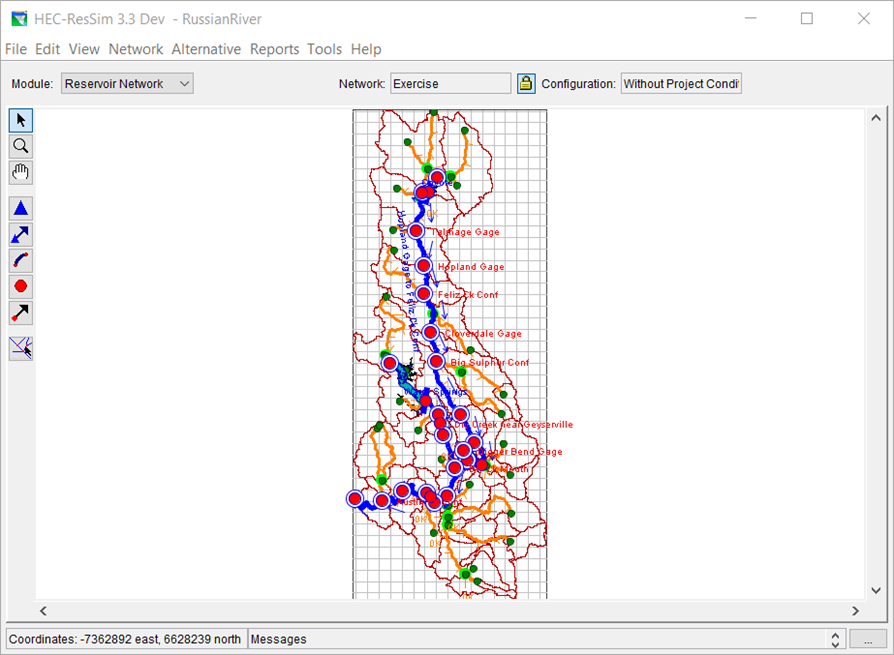
Select and Compute a HEC-ResSim Simulation
1. From the HEC-ResSim main window, from the Module list, select Simulation. A new menu will appear at the top.
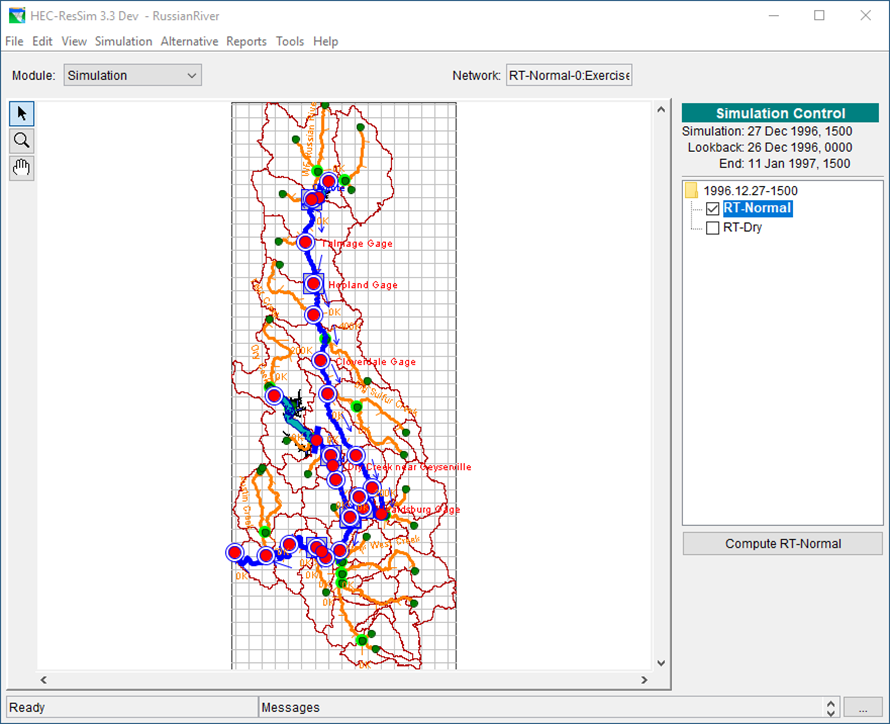
Click Simulation | Open; the Open Simulation dialog box will open. Select the simulation 1996-12.27-1500, click Open, the Open Simulation dialog box will close.
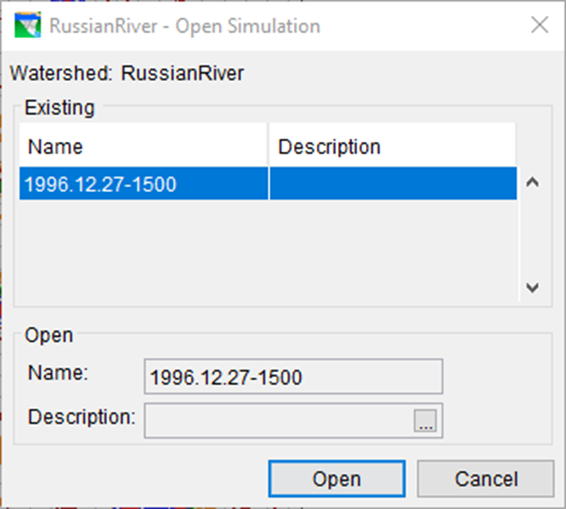
2. From the Simulation Control panel (located to right of the map window), right-click on 1996.12.27-1500, from the shortcut menu, click Edit. The Simulation Period dialog opens.
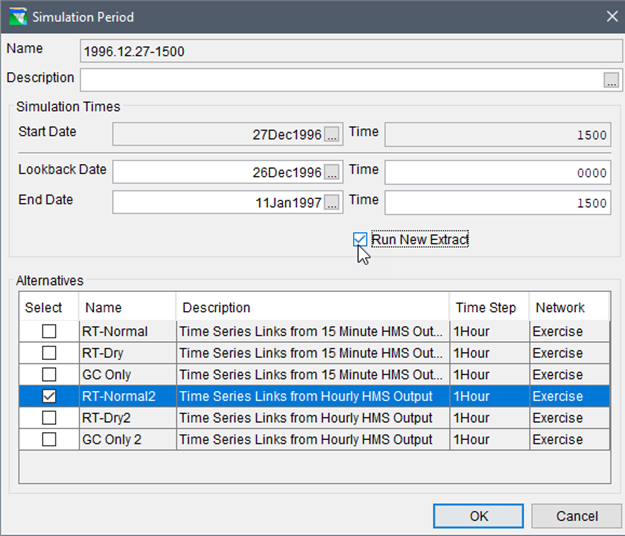
3. Check Run New Extract, and from the Alternatives box, un-check RT-Normal and RT-Dry, then select RT-Normal2, click OK. The Simulation Period dialog closes; the Simulation Control panel will now list RT-Normal2.
4. From the Simulation Control panel, right-click on 1996.12.27-1500 and click Edit from the shortcut menu. From the Simulation Period window, click the checkbox to enable Run New Extract and click OK. From the Simulation Control panel, click Compute RT_Normal2, the Compute Progress dialog box will open. This time the compute should be run successfully. Click Close to close the Compute Progress dialog box.
5. From the Simulation Control panel, right-click on RT-Normal2 and click, Save to Base Directory. The Save Simulation Run Module Parameters to Base Directory dialog opens. Check the checkbox to Copy Data and click OK.
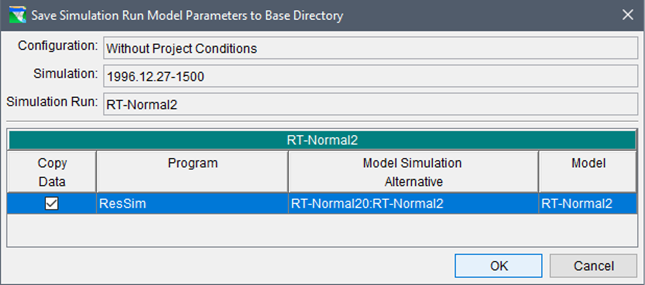
6. From the HEC-ResSim main window, click File | Save Watershed, and then click File | Exit, HEC-ResSim will close.
Part 1.4 - Adjustments to HEC-RAS Model
Like other HEC products, HEC-RAS supports a wide range of project purposes, which requires a tremendous amount of flexibility in user options. These options can translate into substantial changes in the computation time of the simulation and the time required to post process the output into the user requested formats. Understanding the purpose of the study and what is necessary to support the decisions being made can help to reduce output requirements and improve computation speed.
This section of the workshop will explore some of the options that can affect the overall HEC-RAS compute time. Other options might be possible to change that have greater impacts on the computational speed, stability, and accuracy – think about what changes might be able to improve the stability and speed of the HEC-RAS compute as you complete these steps.
Perform Unsteady Flow Calculations
1. From the HEC-WAT main window, from the Programs toolbar, click ![]() . The HEC-RAS main window will display.
. The HEC-RAS main window will display.

2. Click Run | Unsteady Flow Analysis, or click ![]() from the toolbar. The Unsteady Flow Analysis dialog box will open. Check that the HEC-RAS Plan: Russian River Real-Time is being used.
from the toolbar. The Unsteady Flow Analysis dialog box will open. Check that the HEC-RAS Plan: Russian River Real-Time is being used.
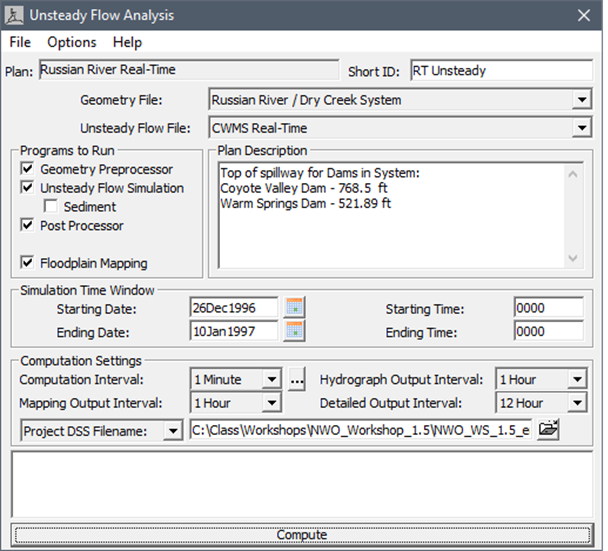
3. To find the best combination for the HEC-RAS unsteady flow computation settings, you will need to try different scenarios. The best combination could be based on compute time and the need for specific outputs. Table 1 provides two different scenarios, which have different compute settings suggested for the unsteady flow computation.
Table 1. Two Compute Scenarios for HEC-RAS Unsteady Flow Computation
Scenarios | DSS for Cross Sections | Hydrograph Output Interval | Detailed Output Interval | Compute Time |
1 | All | 1 min | Max Profile | |
2 | All | 1 hour | Max Profile |
4. There are 3 computation settings commonly adjusted in RAS to adjust computation time, in this workshop you will be adjusting Hydrograph Output Interval:
- Computation Interval: This interval is set to 1 minute in this study and is the same for all scenarios. Adjusting this variable can impact the stability of the model and should only be done in coordination with the hydraulic modeler.
- Hydrograph Output Interval: This is used to define at what interval the computed stage and flow hydrographs will be written to HEC-DSS. This interval should be selected to give an adequate number of points to define the shape of the computed hydrographs without losing information about the peak or volume of the hydrograph.
- Detailed Output Interval: This field allows the user to write out profiles of water surface elevation and flow at a user specified interval during the simulation. Profiles are not written for every computational time step because it would require too much space to store all the information for most jobs. To reduce the amount of post-processing and storage required for a detailed hydraulic output, it is suggested that just Max Profile is written.
Run Scenarios
1. Following the instructions from Table 1 for Scenario 1, on the Unsteady Flow Analysis dialog box, from the Mapping Output Interval list, select 15 Minute. From the Hydrograph Output Interval list, select 1 Minute. From the Detailed Output Interval list, select Max Profile.
2. By default, the unsteady flow analysis computation will save DSS results for cross sections. To turn this option off, in the Unsteady Flow Analysis dialog box, click Options | Stage and Flow Output Locations and the Stage and Flow Output Locations Selector will open.
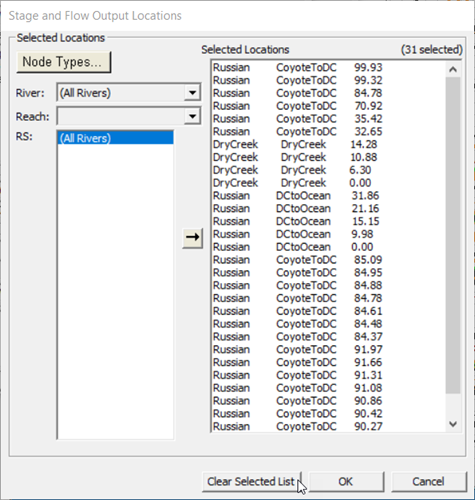
3. For Scenario 1, click Clear Selected List, the Selected Locations box will now be empty. Click OK, the Stage and Flow Output Locations Selector will close.
4. Click Compute, the HEC-RAS Computations dialog box will open. The computation should run to completion, record your "Complete Process" compute time in Table 1.
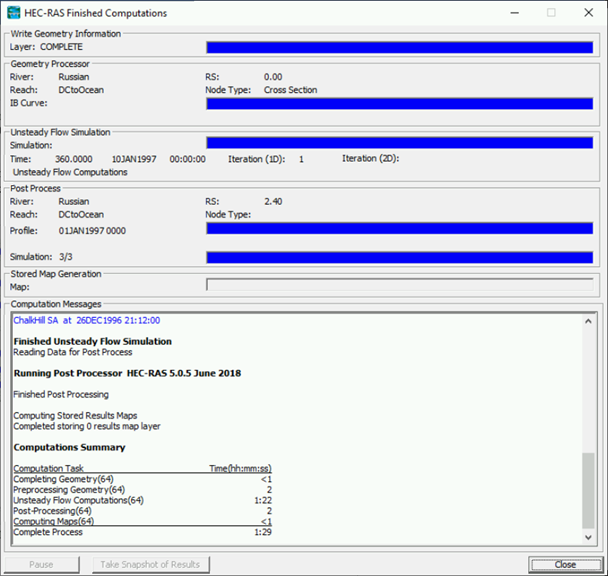
5. For Scenario 2, in the Unsteady Flow Analysis dialog box, change the Hydrograph Output Interval and recompute for 1 Hour time step. The computation should run to completion, record your "Complete Process" compute time in Table 1. Then close the HEC-RAS Computations
6. Keep the Unsteady Flow Analysis dialog open and answer the questions for the two scenarios.
Reviewing the Recorded Compute Times for the Two Scenarios
Now that you have recorded compute times for the scenarios in Table 1, review your results (recorded in Table 1. Two Compute Scenarios for HEC-RAS Unsteady Flow Computation ) with respect to the following questions:
Scenario 2 by a few seconds. The hydrograph output interval doesn't appear to have a significant time saving effect on the simulation. The output time interval can be selected based on the needs of the project or if the RAS output will be passed to another model.