Download PDF
Download page OSI Menu Bar.
OSI Menu Bar
UPDATED IN RESSIM 3.5
The Menu Bar in the OSI is important to the setup and configuration of the OSI. After configuring the OSI, menus will be used less frequently.
File Menu
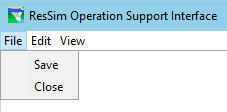
Figure: OSI - File Menu
The File menu ("Figure: OSI - File Menu") has two commands: Save and Close.
The Save command applies to two features:
- The OSI configuration—the OSI configuration should be saved frequently.
- The Variable data—if the user makes changes to the time-series data of one or more of the variables, it will be saved each time the user clicks Compute. If the user wishes to save changes without computing, select Save from the File menu before closing the OSI.
Close—closes the OSI. Closing can also be accomplished by clicking the X in the upper right corner of the window.
You might be wondering why you are NOT given the opportunity to name your OSI configuration nor the OSI allows commands to Rename or SaveAs in the File menu…
It's because the OSI configuration is stored as part of the alternative definition. This fact results in a few hidden truths:
- You can only create one OSI configuration per alternative.
- You must configure the OSI for each alternative independently.
- You can configure the OSI differently for different alternatives.
- And, unfortunately, you cannot easily copy an OSI configuration from one alternative to another. Look for that option in a later version of ResSim. However, if you configure the OSI in an existing Alternative, using SaveAs in the Alternative Editor to create a copy of the existing Alternative will copy the OSI configuration (along with everything else that defines the alternative) to the new alternative.
Edit Menu

Figure: OSI - Edit Menu
The Edit menu ("Figure: OSI - Edit Menu") contains most of the features needed to configure the OSI. Since the OSI is organized around Tabs and Variables, the Edit menu gives the user options needed to configure them.
- Add Tab—adds a tab to the OSI (after prompting the user to enter a name and description). As illustrated in "Figure: Operation Support Interface with a New Tab Added - Annotated", each tab has a Plot Panel and a Table Panel for viewing and editing OSI Variables. Tabs are always appended to the end (right) of the "list" of tabs.
- Rename Tab—allows the user to rename the current (active) tab.
- Order Tabs—opens the List Order Editor with a list of the existing OSI tabs to enable the user to reorder the list. The first entry in the list is the left-most tab in the OSI. Select a tab name in the list then click the Up (^) or Down (v) buttons to move the selected tab left or right with respect to its neighbors.
- Add Variable—adds a variable (column) to the Table Panel of the current tab. Like tabs, variables are always appended to the end of the "list" of variables. When the user creates a variable in the OSI, the user will be asked to give it a name. The name the user give the variable will appear in the header of this variable's column in the Table Panel and in the title of the Plot Panel when the variable is the current (or active) variable.
- Edit Variable—opens the Operations Support Model Variable Editor for configuring the variable and its plot(s).
- Rename Variable—allows the user to rename the current (active) model variable.
- Order Variables—opens the List Order Editor with a list of the existing OSI Model Variables on the current tab to enable the user to reorder the list. The first entry in the list is the left-most variable in the Table Panel of the current tab. Select a variable name in the list then click the Up (^) or Down (v) buttons to move the selected variable left or right with respect to its neighbors.
- Delete Tab—deletes the current tab from the OSI, variables and all. This does not delete the time series associated with the OSI variables from the model, it just deletes the tab configuration from the OSI configuration.
- Delete Variable—deletes the current variable from the current tab. This does not delete the time series associated with the OSI variable from the model, it just deletes the OSI variable from the OSI configuration.
View Menu
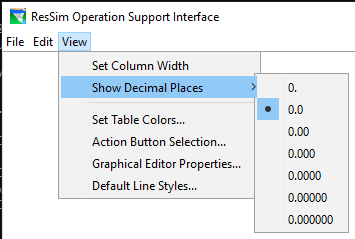
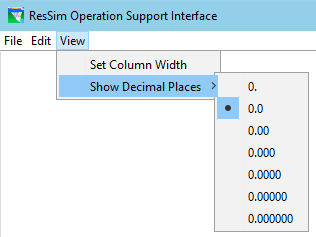
Figure: OSI - View Menu
The View menu ("Figure: OSI - View Menu") provides options for how the Variable columns in the Table Panel will display. These options include:
- Set Column Width—Use this option to specify the width of every column in the Table Panel on every tab. The units are pixels (screen units).
- Show Decimal Places—Use this option to specify how many digits after the decimal to display. The user's options range from 0 to 6 digits after the decimal. Like Set Column Width, Show Decimal Places is also a global setting for this OSI configuration; it applies to all columns on all tabs of this OSI.
- Set Table Colors—Opens the Table Drawing Properties window. This window allows the user to apply conditional formatting to the table cells to make some data more apparent. See Set Table Colors for more information.
- Action Button Selection—Opens the Action Button Selector window. This allows the user to customize action buttons in the OSI. See Action Button Selector for more information.
- Graphical Editor Properties— Opens the graphical editor window. This allows the user to customize how plots display in the OSI. See Graphical Editor Properties for more information.
- Default Line Styles—Opens the Default Line Style Options window. The Default Line Styles in this editor apply to all plots displayed in ResSim. See Default Line Styles for more information.