Creating an HEC-MetVue Project
This tutorial will teach you how to create an HEC-MetVue project for integration into your CWMS watershed.
Create a new HEC-MetVue Project
- Create an HEC-MetVue project directory, similar to the one shown below. Be sure to include a "maps" directory. Copy all sub-basins shapefiles from the watershed/hms/maps directory into the newly created HEC-MetVue/maps directory.

- A new HEC-MetVue project file needs to be created. Open the CAVI and launch HEC-MetVue from the CAVI.

- From the File menu, select New Project File.
- The expected process is to create the project file outside of the watershed directory, and subsequently imported. If the project file is created in the ./watershed/MetVue directory, and the project file name exactly matches the watershed name, HEC-MetVue will import the project file automatically upon opening the CAVI.

- The expected process is to create the project file outside of the watershed directory, and subsequently imported. If the project file is created in the ./watershed/MetVue directory, and the project file name exactly matches the watershed name, HEC-MetVue will import the project file automatically upon opening the CAVI.
- Add the HEC-HMS sub-basin shapefile as the project default basin average map. Right-click on the map node on the Project Defaults node and click Select Maps.
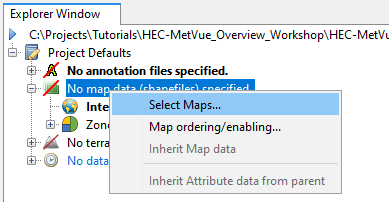
- The Select Maps dialog will open. Click on the Add Maps button.

- The Select Maps explorer will open. Navigate to your maps folder, select the appropriate shapefile, and click Select Map.

- From the Select Maps dialog, check the box under the Basin Avg column for the shapefile you wish HEC-MetVue to use.

- Click OK to exit the Select Maps dialog.
Create HEC-MetVue Sessions
You will need to create HEC-MetVue sessions to replace the MFP alternatives in your CAVI watershed.
- Create a session for each existing MFP alternative. You can also create sessions for other needs (snowmelt modeling, new input datasets, etc.) at this point.

- Within each session, create an observed and forecast map panel for each type of data you need HEC-MetVue to create.
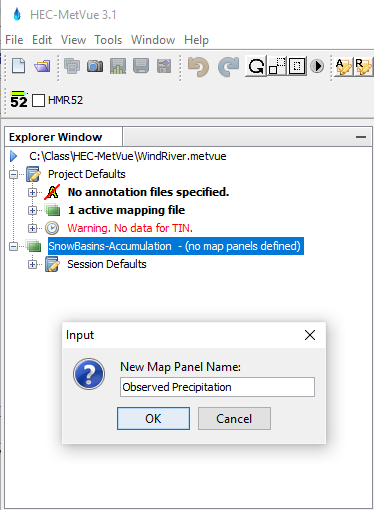
- Observed Precipitation and Forecast Precipitation for non-snowmelt watersheds
- Observed Precipitation, Forecast Precipitation, Observed Temperature and Forecast Temperature for snowmelt watersheds

Clipping Input Data
If you will not be translating or rotating the storm in a forecast, you can speed up HEC-MetVue and HEC-HMS computes by only loading data within the spatial extents of the basin. The following steps will improve performance by clipping the input data to the extents of the basin maps.
Perform the following steps for each map panel:
- Double-click on the map panel node to show the map.
- Right-click in the map window, and select Encompass Data->Maps from the shortcut menu.

- Select the Session's No data. Right-click to select data node, right-click and select Select DSS Paths.

- Expand the Active Read Constraints/Overrides section and select the Constrain Imported TIN to Defined Rectangle option.

- Click the Define Constraint Extents button.

- Click the Map Panel button from the Set Extents From section.

- Click OK.
- To add data, click on the three ellipse button and browse to and select a forecast.dss file with gridded data.

Note: Adding data is an optional step, but it will simplify the process of specifying the input pathname in the CAVI-MetVue Alternative Editor. Note this optional data will be replaced with the extracted data when running HEC-MetVue in the Modeling tab. The example below shows adding HEC-DSS records. - Select the hours you wish to use, and click the Add Sel button, or to add all the files in the DSS file, click Add All.
- The selected data will display in the bottom box.

- The selected data will display in the bottom box.
- Click Ok.
- The final settings for a single alternative should look similar to this:
