Download PDF
Download page Model Directories Tab.
Model Directories Tab
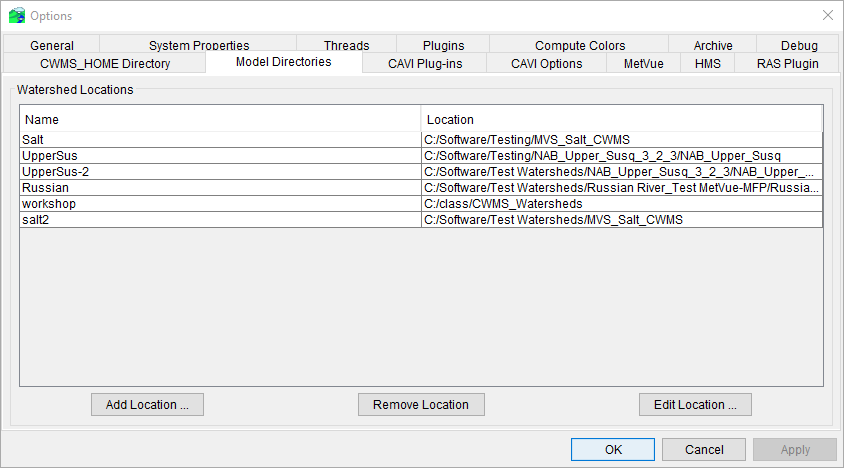
From the Model Directories tab, you can add, remove, and edit watershed locations. You will need to create at least one watershed location, and the defined watershed locations will display in the Open Watershed dialog (Opening an Existing Watershed).

Add Location
To create a new watershed location:
- Click Add Location. The Add Watershed Location dialog will open.

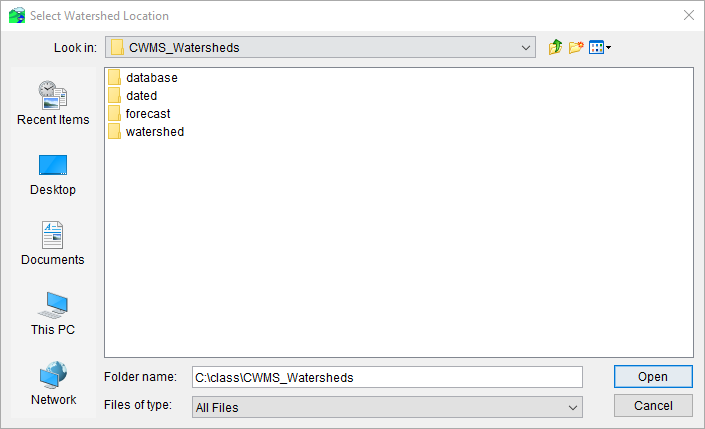
- Enter a name for the watershed location in the Name box. You can either enter the location of the directory in the Location box or click Browse. A Select Watershed Location browser will open.

- Navigate to the directory on your computer or network where the watershed is stored (or where you want to store a new watershed). Click Open, the Select Watershed Location browser closes.
- The selected directory displays in the Location box. Click OK, if the directory does not exist, a Warning window will open asking you if you want to create the directory, click Yes. Both the Warning window and the Add Watershed Location dialog will close. he name and location of the watershed location is displayed in the Watershed Locations table.
In the location folder, C:\class\CWMS_Watersheds, three folders are created – database, forecast, and watershed. When a new watershed is created and a watershed location is selected, the new watershed will be stored under the watershed directory.
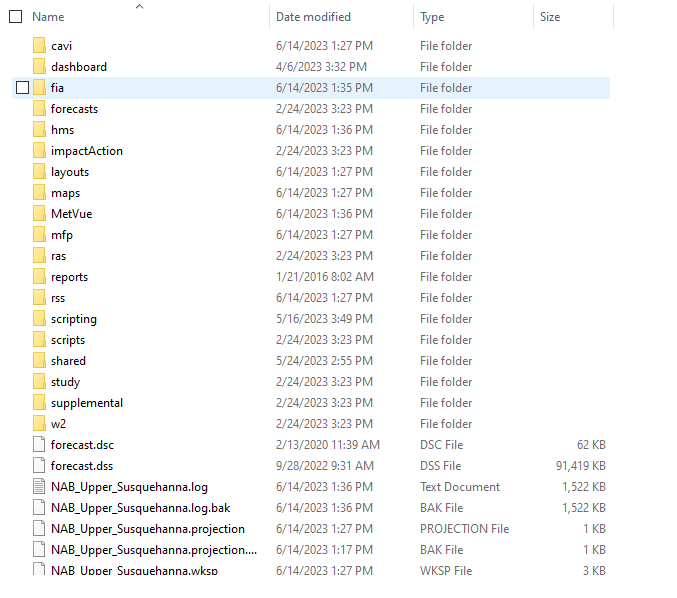
When you create a new watershed, CWMS will generate a directory structure and store all files associated with the watershed inside that structure. The watershed directory is named according to the name you have given the watershed. In the example shown below, the watershed directory is RR_NorthFork. The watershed's directory configuration files and data for the watershed, including maps and model alternative data will be stored within these folders.
Furthermore, when you create a new forecast for a watershed, you will give that forecast a name. Under the forecast directory for the watershed's location, CWMS will create a directory based on the dated forecast name. For example, the directory name 2017.01.18-0400 corresponds to a forecast created for 18 January 2017. Under that directory, CWMS will create a directory based on the watershed's name (RR_NorthFork) and will automatically copy all of the directories and files for your watershed (except for the maps directory) into the dated forecast directory. This facilitates archiving of forecast information and ensures consistency in your model results.
Remove Location
To delete (remove) a watershed location:
- Select a location and click Remove Location. A Confirm Removal window will open, asking you to confirm the removal of the selected location. Click Yes, the Confirm Removal window will close, and the selected location will no longer display in the Watershed Locations table.
- The directory structure for the selected watershed location remains on the hard drive (no files have been deleted), but the link to the location has been removed from the list.
Edit Location
To edit a watershed location:
- Select a location and click Edit Location. The Edit Watershed Location dialog will open.

- You can change the name of the watershed location in the Name box, if you wish.
- You can either change the location of the directory in the Location box or click Browse. A Select Watershed Location browser will open. Navigate to the directory on your computer or network where you want a watershed stored. Click Open, the Select Watershed Location browser closes.
- The selected directory displays in the Location box. Click OK, if the directory does not exist, a Warning window will open asking you if you want to create the directory, click Yes. Both the Warning window and the Edit Watershed Location dialog will close. The edits will be displayed in the Watershed Locations table.