TheSystem Propertiestab allows you to view the system properties values set for the CWMS software. If you have the correct user access, you can edit some or all of these properties. The recommendation is that you only use this information for debugging and viewing purposes. Editing must be done with extreme caution, as any changes you make can directly affect CWMS functionality.
Add a System Property
To add a system property:
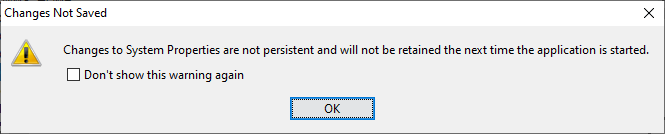
If you have the correct user access levels the New command will be available, allowing you to add system properties. Click New, a Changes Not Saved window will display letting you know that any changes made are not persistent and are not saved permanently.
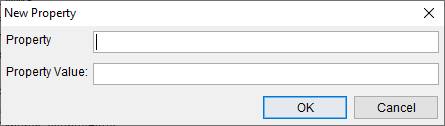
Click OK, the Changes Not Saved window will close, and the New Property dialog will open.
In thePropertycell, enter the name of the new system property. For the parameters of the new system property, enter the parameters in theProperty Valuecell.
Click OK, and the New Property dialog closes. The new system property will display on the SystemPropertiesTab.
Edit a System Property
If you have the correct user access levels theEditcommand will be available, allowing you to edit system properties. From the list, select a system property to edit.
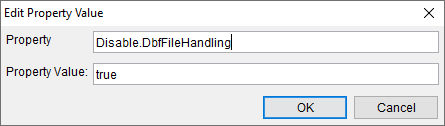
ClickEdit, a Changes Not Saved window will display, letting you know that any changes made are not persistent and are not saved permanently. Click OK, the Changes Not Saved window will close, and the Edit Property Value dialog will open.
In theProperty and PropertyValue boxes, edit the values as needed.
ClickOK, the Edit Property Value dialog closes, and the changed system property will appear on the SystemPropertiesTab.
Delete a System Property
If you have the correct user access levels theDeletecommand will be available, allowing you to delete system properties.
From the list, select the system property you wish to delete.
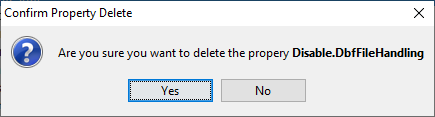
ClickDelete, and a ConfirmPropertyDelete message will open. If you want to delete the selected system property, click Yes. The Confirm Property Delete message will close and the selected system property will be removed from the list.