Download PDF
Download page Managing Forecast Data.
Managing Forecast Data
CWMS facilitates archiving and sharing of forecast data through four different mechanisms, described below.
Saving Changes to the Base Directory
When you edit parameters within a model alternative, your changes apply only to an individual forecast run and are saved in the forecast directory. If you want your changes to be available for subsequent forecasts, you will need to save the changes back to the base directory.
To save model data to the base directory:
- From the Forecast Runs Detail section of the Modeling module, right click on a forecast run name. From the shortcut menu, click Save To Base. The Copy Model Changes dialog opens.
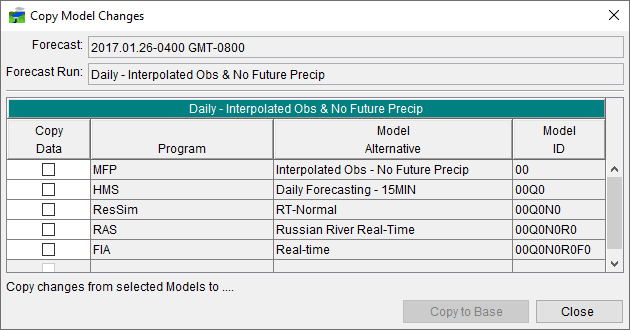
- The Copy Model Changes dialog displays the name of the Forecast and Forecast Run that are active. The table displays the Programs, Model Alternatives, and Model IDs that makeup the active forecast run.
- From the Copy Data column of the table, check the boxes beside the Model Alternative you wish to copy from the forecast directory to the base directory.
- When you have selected the appropriate Model Alternatives, click Copy to Base. CWMS will now save all files associated with the selected model alternative back to the base directory. When CWMS is finished, a confirmation message will appear telling you that all selected model alternatives were successfully saved.
Note that when you have edited model parameters, the Copy Model Changes dialog will also display when you leave the current forecast by exiting CWMS, creating a new watershed, creating a new forecast, opening an existing forecast, or closing the current forecast. If you want your changes to be available for subsequent forecasts, you will need to save the data back to the base directory. If you do not want to save your changes for later forecasts, click Close.
Replacing Data from the Base Directory
If, while editing a model alternative, you need to revert to the original model alternative (or propagate modifications made through to the forecast), you can replace the changed model alternative in your forecast directory with the model alternative from the base directory.
To replace a model alternative with data from the base directory:
- From the Forecast Runs Detail section of the Modeling module, right click on a forecast run name. From the shortcut menu, click Replace from Base, and the Replace From Base dialog opens.
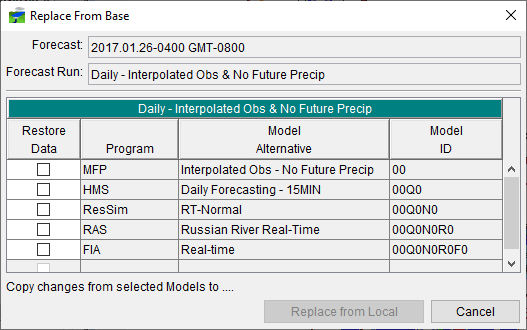
- The Replace From Base dialog displays the name of the Forecast and Forecast Run that are active. The table displays the Programs, Model Alternatives, and Model IDs that makeup the active forecast run.
- From the Restore Data column of the table, check the boxes beside the Model Alternative you wish to restore from the base directory to the forecast directory.
- When you have selected the appropriate Model Alternative, click Replace from Local (or Replace From Server). The program will now restore all files associated with the selected Model Alternative from the base directory to the forecast directory. When CWMS is finished, a confirmation message will appear telling you that all selected CAVI model alternatives were successfully replaced.
Posting Results to the CWMS Database
Once you have computed the forecast runs associated with your forecast and you are satisfied with the results, you may want to post your modeling results to the CWMS database to make them available to other users. You will first need to create post groups, which are detailed in Data Extract and Post Editors. Note: this option is only available if you have a database and have write permissions to the database.
When you are ready to post your forecast runs and the modeling results to the CWMS database:
- From the Modeling module, select Post from the Forecast menu. The Run Post dialog will open.
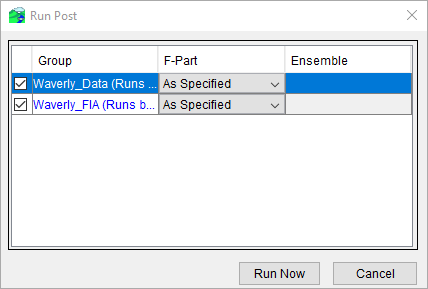
- All of the defined Post Groups associated with the active forecast will appear in the table. In the Group column, select the Post Groups you wish to run.
- Click Run Now, the Message Pane on the Post Forecast Results dialog will notify you that a post action has been sent to the DBI.
- When the data has been successfully posted to the CWMS database, the Message Pane of the CWMS-CAVI main window will contain a new tab – Post. You can review the messages through that tab to ensure that the posting of data was successful.
Archiving a Forecast
Once you have a configured a forecast, you may want to keep an archive of your forecast for future retrieval.
To archive a forecast:
- Close the forecast you want to archive (if open). From the Modeling module, select Close from the Forecast menu.
- From the Forecast menu, click Archive. The Select Forecast to Archive dialog opens.
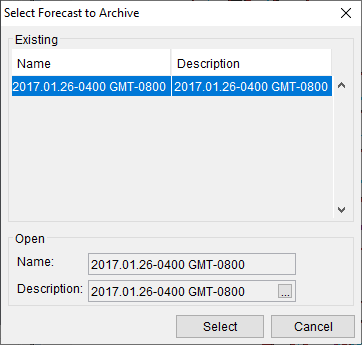
- Select the forecast name you wish to archive from the list in the Existing box, click Select. The Enter Archive Comments dialog opens.
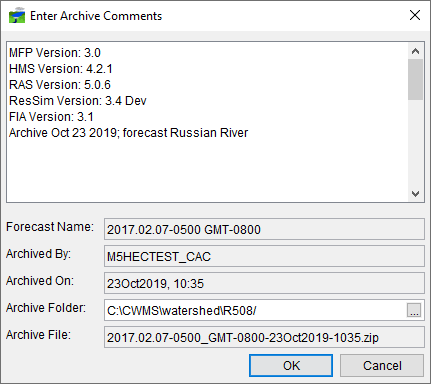
- Enter your comments in the field at the top of the dialog box and from the Archive Folder box, enter a folder to save the archived forecast.
- Click OK, and an Archiving progress window will display while the archiving process is working. When finished, the Archiving progress window will close and an Archive Complete window will display. Click OK, the Archive Complete window will close.

- If the forecast has multiple forecast runs, the Save Models to Base dialog will open. If this dialog opens you must select the model alternatives you wish to include in the archive. Once the model alternatives are selected click Save to Local and the Progress widow will open. The Archiving dialog will display for a short time while the CAVI is archiving the forecast files.