Running a Script
Manually Running a Script
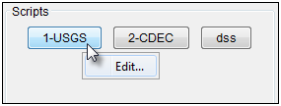
There are three ways to manually run a script: the first way is from the Script Selector (Scripts). From the Script Selector, select the script you wish to run, and click Run.
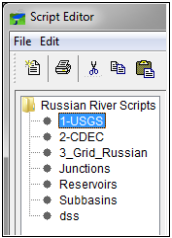
The second way is to manually run a script is from the Script Editor. From the Script Editor, from the Script Context Pane, select a script. From the File menu, click Run, and the script will execute.
The last way to trigger a script is to assign the script to a Time Series Icon and trigger the run through the icon's shortcut menu. See Time Series Icons for more details.
Automatically Running a Script
Running scripts automatically in CWMS is accomplished by scheduling script jobs. From the Script Selector, from the Script menu, click Schedule Script Job. The Schedule Script Job dialog will open (Figure 1). Another way to launch the Schedule Script Job dialog is from the Script Selector dialog: Right-click on a script button, and from the shortcut menu, click Schedule Script Job.

Schedule Script Job Dialog
To schedule a script, the CAVI client must be running and logged in as a valid CWMS user. For the script to run, that valid user must be logged in and running the CAVI. To setup a script to run automatically:
- The Job Name field (Figure 1) contains the name of the job that will run the script. The job name contains the name of the script, and the start date and start time that you will enter. You can change this name, but it is recommended that you do not change this name.
- From the Script name list (Figure 1), you can select the script you wish to run automatically.
- In the Location box (Figure 1), you can schedule a script to run on either the server or the client.
- Enter a starting date in the Start Date cell (i.e., DDMMMYYYY format), and a start time in the Start Time cell (Figure 1). The date and time reference are local time of the computer running the CAVI client (usually your workstation), as indicated the time zone ID next to the Start Time box.
- The script that you are setting up can be run automatically one or be recurring. By default, the job is setup to run once - Single Job (Figure 1) is selected. If you want the job to be recurring, select Recurring Job, and enter the interval you wish the job to recur at in the Recurrent Interval box, and from the list select Minute(s), Hour(s), or Day(s).
- Once everything is setup, click OK, and a confirmation message will open telling you that the script has been scheduled. Click OK, and the confirmation message will close, and the Schedule Script Job dialog will close (Figure 1).
Checking the Status of a Scheduled Script
To check the status of an automatically schedule script, from the Script Selector dialog, from the Script menu, click Status; the Script Job Status dialog will open (Figure 2). The following gives an overview of what information is being provided to you:

- The Job Name column (Figure 2) displays the name assigned to the script job when it was initially scheduled.
- The Script column (Figure 2) displays the name of the script that is executed with the scheduled job runs. A script can be used in more than one script job at a time.
- The User column (Figure 2) displays the name of the valid CWMS user that was logged into the CAVI and scheduled the script.
- The Status column (Figure 2) displays the status of the scheduler (not the script itself). This column will display three states:
- Pending: The scheduler is waiting to start the script job for the first time.
- Successful: The scheduler started the script job successfully.
- Error: The scheduler did not start the script job successfully.
- To see whether the job was a single execution or a recurring execution, the Interval column (Figure 2) displays this information.
- From the Location column (Figure 2) you will know whether the job executed on the client or the server.
- If the job is recurring, the Date/Time column (Figure 2) will display the date and time of the next scheduled execution.
Deleting a Scheduled Script
From the Script Job Status dialog box, from the table, select a schedule script. From the Job menu, click Delete; and a message will open asking you if you really want to delete this scheduled script. Click Yes, and the message will close, and the scheduled script will no longer appear in the table.