Impact Response
Impact response tables allow the user to define an impact and associate it with a stage or flow threshold at a specific hydrograph location. The user can define a threshold using either a ">" (greater than) sign or a "<" (less than) sign. The greater than sign evaluates when the HEC-DSS hydrograph becomes greater than the threshold, thus it is a flood stage threshold. The less than sign evaluates when the HEC-DSS hydrograph is less than the threshold, thus it is a low stage threshold (i.e., navigation can no longer occur). In HEC-FIA, the date and time is recorded each time the flood stage/flow exceeds or drops below a set threshold within the same event.
To create an impact response:
- From the Study Tree, from the Inventory folder, right-click on the Impact Response folder. From the shortcut menu, click New; the New Impact Response dialog box opens.
Provide a name for the impact response rule set in the Name box on the New Impact Response dialog box.
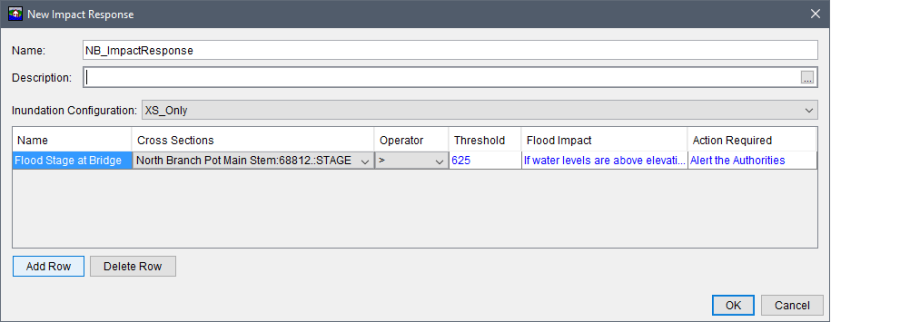
Figure: New Impact Response Dialog Box
- Select a defined inundation configuration from the Inundation Configuration list. Important: The only inundation configurations which can be utilized are ones which are linked to HEC-DSS hydrograph time series: CCPs only, cross sections only, or grids and cross sections. The inundation configuration selection sets the second column of the table to either: CCP, Cross Sections, or Grids and Cross Sections.
- To generate the rules that define the impact response, click Add Row. A blank row appears in the table on the New Impact Response dialog box. Enter a name for the rule (Flood Stage at Bridge) in the Name column. From the second column, select the cross section location where the impact is measured. From the Operator column, select the operator for the rule. Enter the threshold in the Threshold column. Enter the impacts and actions in the Flood Impact and Action Required columns.
- Once everything is defined, click OK. New Impact Response dialog box closes. Under the Impact Response folder in the Study Tree, the name of the impact response (NB_ImpactResponse) appears.
Impact Response Shortcut Menu
Once an impact response has been created there are several ways to manipulate the impact response from a shortcut menu. From the Study Tree, under the Impact Response folder, right-click on the created impact response name (e.g., NB_ImpactResponse). From the shortcut menu the user can edit the impact response; save/save as, rename, delete/remove the impact response from the HEC-FIA study; or review the properties of the impact response file.
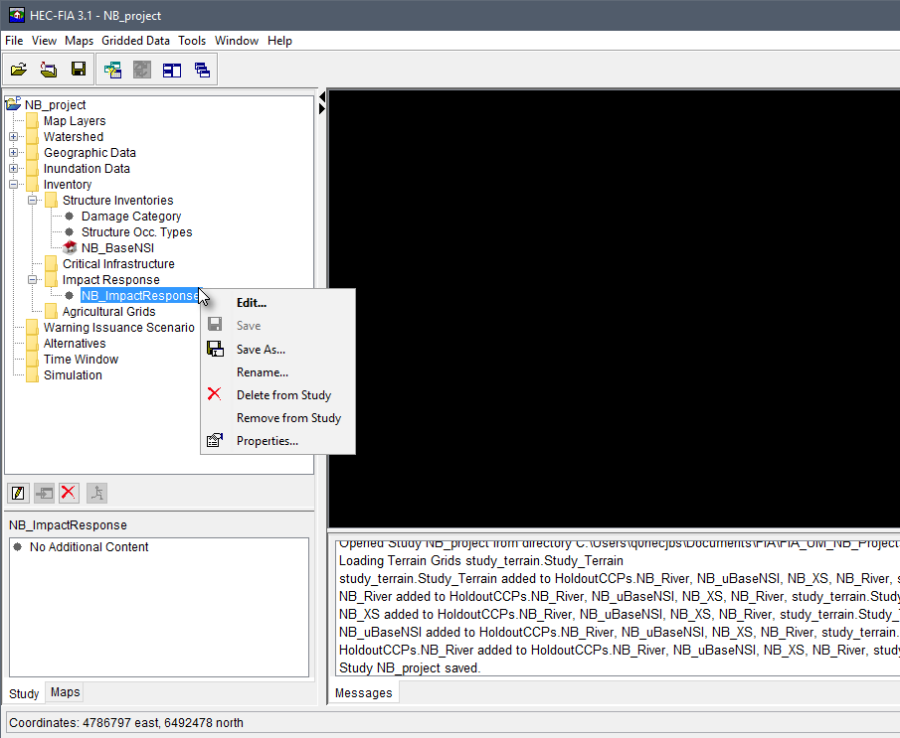
Figure: Impact Response - Study Tree - Shortcut Menu Options
Edit
To edit a defined impact response, from the impact response shortcut menu, click Edit, the Edit Impact Response dialog box opens
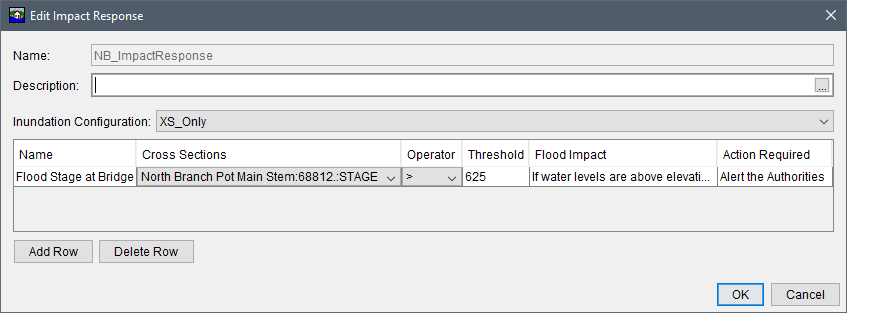
Figure: Edit Impact Response Dialog Box
Save As
To create a copy of a defined impact response, from the impact response shortcut menu, click Save As, the Save Impact Response As dialog box opens. In the Name box enter the name of new impact response. The user can enter a description of the impact response in the Description box. From the Directory box the user can specify the location of the new impact response. Click OK, the Save Impact Response As dialog box closed, and the new impact response is created.
Rename
To rename the impact response, from the impact response shortcut menu, click Rename, the Rename Impact Response dialog box opens. In the Name box enter the new name of the impact response. The user can enter a description of the impact response in the Description box. Click OK, the Rename Impact Response dialog box closes, and the impact response is renamed.
Delete from Study
To delete a defined impact response and its associated files from the HEC-FIA project, from the impact response shortcut menu, click Delete from Study. A Confirm Manager Delete message dialog opens. By clicking Yes, the Confirm Manager Delete message dialog closed, and the impact response and its associated files are deleted from the HEC-FIA project.
Remove from Study
To remove the impact response from the HEC-FIA project (does not delete files), from the impact response shortcut menu, click Remove from Study. A Confirm Removal message dialog opens. By clicking Yes, the Confirm Removal message dialog closed, and the impact response is removed from the HEC-FIA project.