Manually downloading gridded data can be a time-intensive process. This tutorial will guide the user on how to download gridded data through the use of scripts. This gridded data can then be used in Creating Gridded Boundary Conditions for HEC-HMS through the use of the Vortex Importer. This tutorial contains the following sections: Downloading Python, Downloading the Data Retrieval Scripts, and Running the Data Retrieval Scripts.
Downloading Python
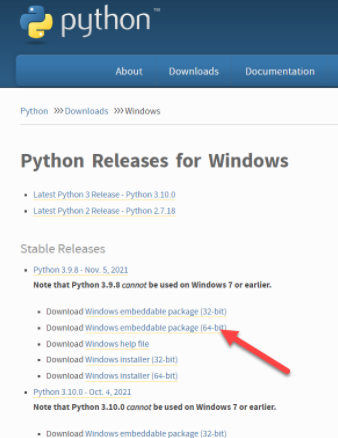
- To run the downloader script, a version of Python is required on your machine. Python can be downloaded here. As of November 2021, the Stable Release 3.9.8 windows embeddable package (64-bit) is recommended for most users, as shown in the figure below.
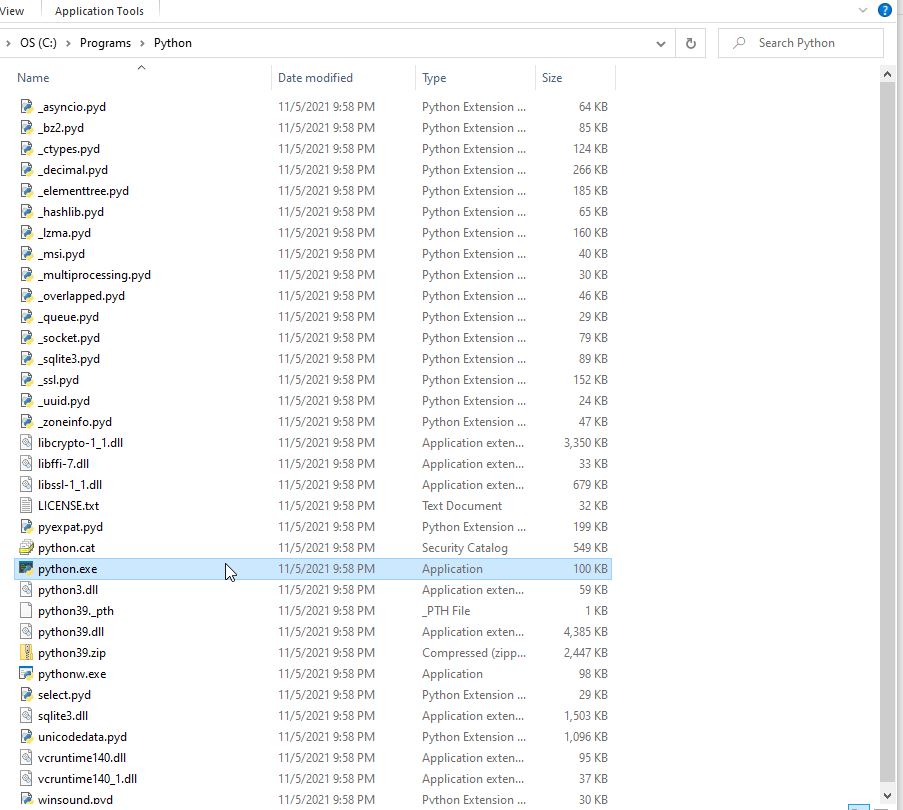
- Once downloaded, Python should be unzipped locally on the user's machine, as shown in the figure below. Make a note of the pathname for the "python.exe" file as this will be needed later in the tutorial.
Downloading the Data Retrieval Scripts
A repository of community-maintained data retrieval scripts can be accessed on HEC's GitHub page or can be downloaded here: data-retrieval-scripts.zip. In either case, these scripts must be downloaded to your machine.
Running the Data Retrieval Scripts
This tutorial will walk through running the script to download gage-corrected QPE ("retrieve_qpe_gagecorr_01h.py"). Before the script can be run, a few parameters must be edited first.
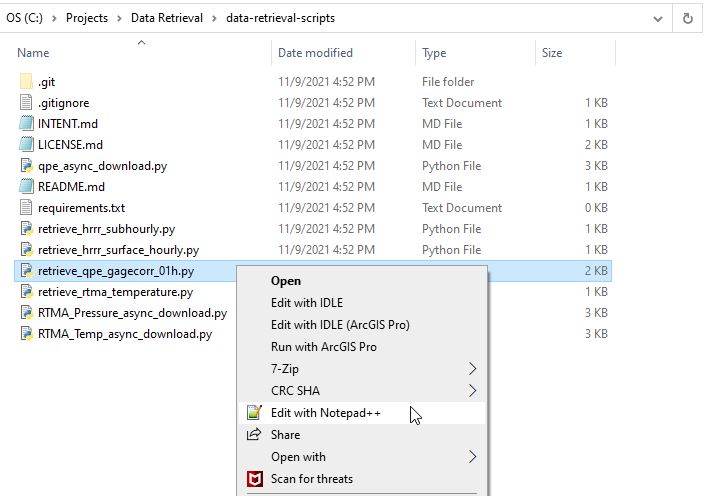
- Navigate to the "retrieve_qpe_gagecorr_01h.py" script and edit with a text editor (Such as Notepad ++ or Notepad), as shown in the following figure.
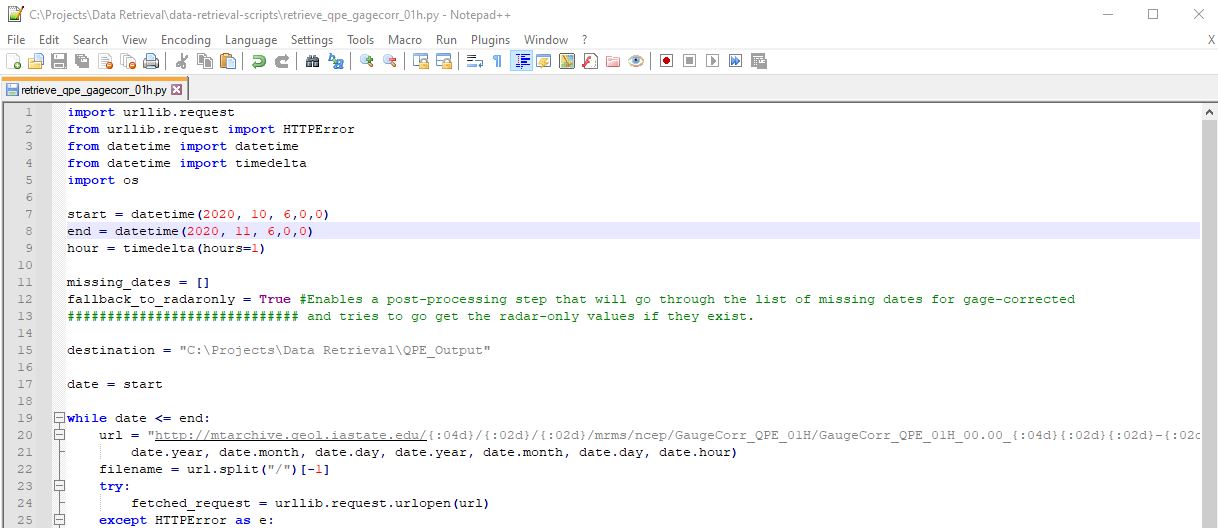
- Within the text editor, adjust the "start" (line 7) and "end" (line 8) variables to the time period of interest.
- The script expects inputs in the format of datetime(Year, Month, Day, hour, minute). For example, a start date of October 6th, 2020 would be entered as:
datetime(2020, 10, 6, 0, 0)
CODE
It is best practice to only choose a short time period (such as a day) when first attempting to run the script
3. Once the script is successfully run and the output reviewed the time period can be extended.
4. Adjust line 15 to an existing folder to store the output.
5. The edited file (adjusted start, end, and destination lines) is shown in the following figure.
6. Save and close the file.
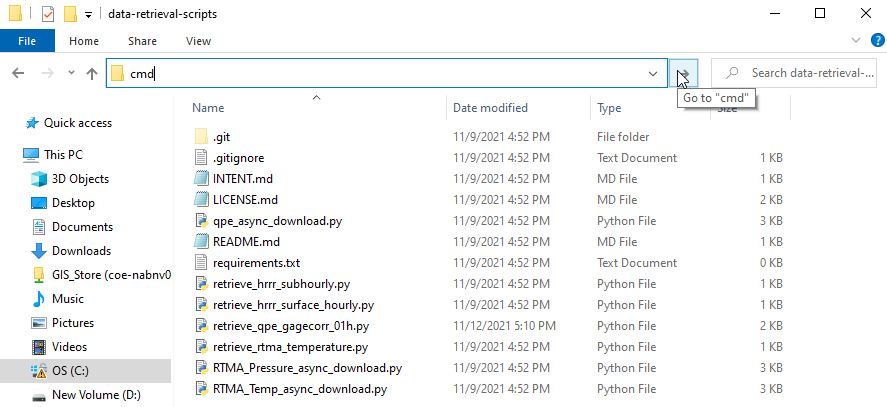
7. Next navigate to the folder that contains the retrieve_qpe_gagecorr_01h.py script.
8. Enter "cmd" in the Address Bar and hit enter to open a Command Prompt at that location as shown in the following figure.
9. In the Command Prompt, enter the full pathname to the previously downloaded "python.exe" file, followed by a space, and followed by retrieve_qpe_gagecorr_01h.py. The syntax is shown within the following code block and figure.
"C:\Programs\Python\python.exe" "retrieve_qpe_gagecorr_01h.py"
CODE

10. Click Enter to run the script.
This step may take some time if a large time period was selected.
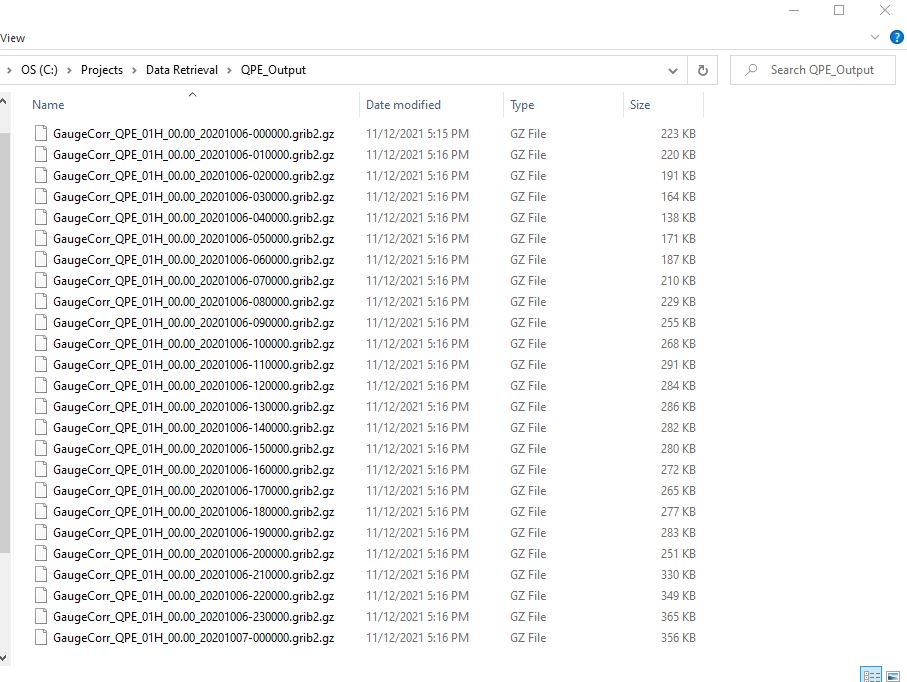
11. To check the output, navigate to the Output folder specified in "retrieve_qpe_gagecorr_01h.py" (line 15). The output will be in .gz format as shown within the following figure (one file per hour of data).
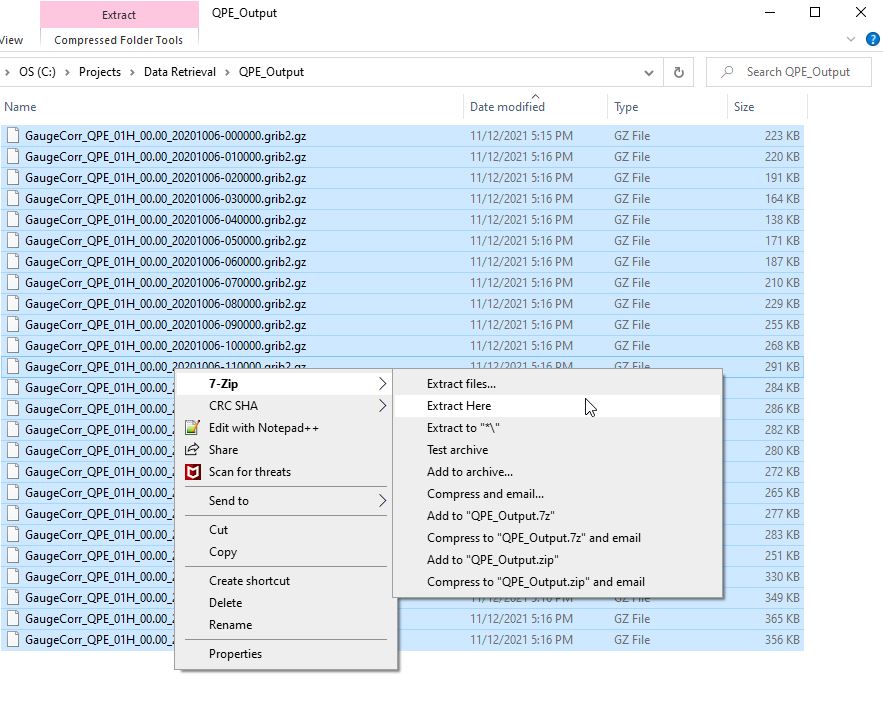
12. The .gz file format is a compressed archive format. To extract to .grib2, select all of the .gz files and click 7-Zip | Extract Here, as shown in the following image.
13. The QPE data is now ready to be used to create HEC-HMS Boundary Conditions using the Vortex Importer utility.