Download PDF
Download page Terrain Data.
Terrain Data
Information about the elevation of the land surface is necessary for delineating a watershed and creating a basin model based on that delineation. Terrain data are used in the delineation process and may also be used to visualize the relief of a watershed as a base map. Each terrain data component stores a single continuous digital elevation model (DEM) and can be linked to multiple basin models.
Creating Terrain Data
Terrain data can be created in two ways, both of which launch the same wizard. The first is to select the Components menu and then Create Component and slide over to Terrain Data..., which will directly launch the wizard (Figure 1).
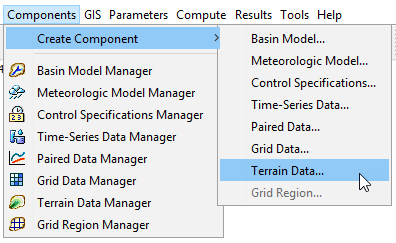
Figure 1. Launching the terrain data creation wizard directly.
The second way is to select the Components menu and then the Terrain Data Manager (Figure 2). Once in the the manager, select the New... button (Figure 3). Other buttons in the manager allow for copying, renaming, deleting or adding the description to a terrain data component.
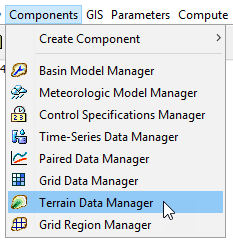
Figure 2. Opening the Terrain Data Manager.
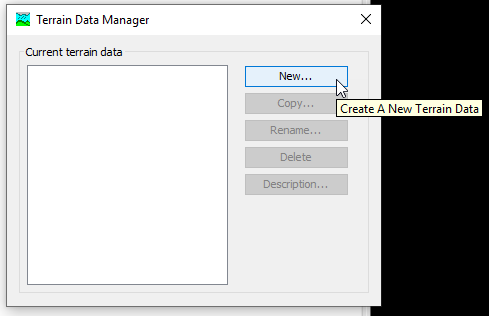
Figure 3. Launching the terrain data creation wizard from the Terrain Data Manager.
Either of the two methods above will launch the Create a Terrain Data wizard. First you must provide a unique name for the terrain data (Figure 4). Pressing Next > will take you to the next step of the process. You can cancel the creation of a terrain data component by pressing Cancel at any time during the wizard.
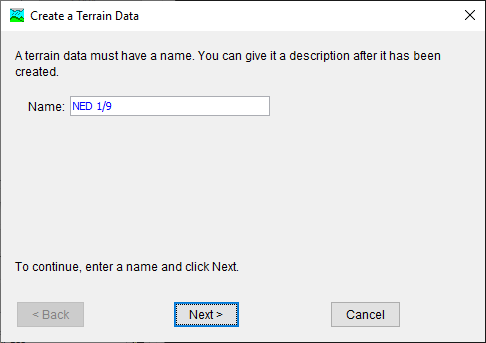
Figure 4. The first step of the terrain data creation wizard.
Next, you must provide the filename of a GIS raster file of elevation data, as well as the vertical units of that elevation dataset (Figure 5). You can browse to the file location of such a dataset using the folder icon button. Units are specified in a drop-down menu and the options are meters and feet. You may return to the first step of the wizard by pressing the < Back button. Selecting Finish will complete the wizard and the terrain data component will be visible in the Watershed Explorer. Selecting Cancel will abort creation of the terrain data component.
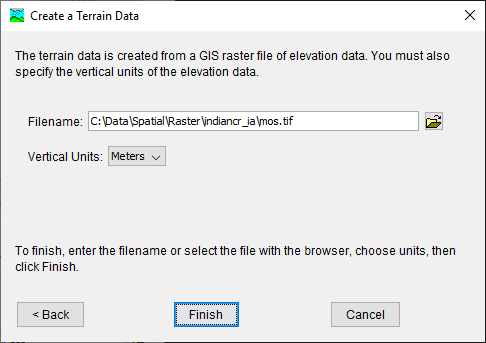
Figure 5. The second and final step of the terrain data creation wizard.
Copying Terrain Data
There are two ways to create a copy of an existing terrain data component. The first is to launch the Terrain Data Manager from the Components menu (Figure 2) and selecting an existing terrain data component in the manager. The Copy... button in the manager will then be available. Selecting the Copy... button (Figure 6) will prompt you to provide a new unique name for the copied terrain data (Figure 7). Pressing Cancel or the X button will cancel the copy process. A name must be specified and the Copy button will not be available if no name is specified or if the name is not unique. Optionally, you may provide a description of the terrain data; if it is long, use the button to the right side to expand the text field.
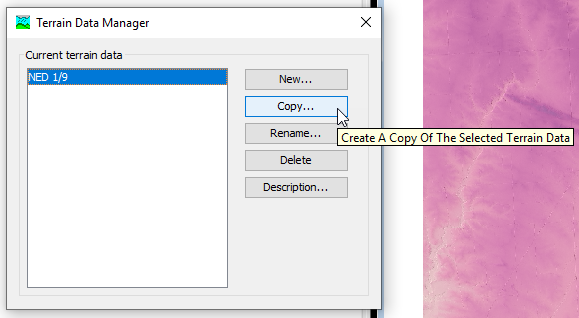
Figure 6. Creating a copy of a terrain data component from the Terrain Data Manager.
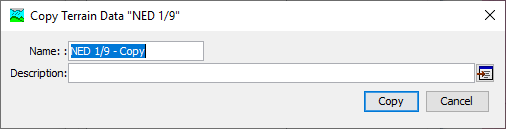
Figure 7. Terrain data copy dialog.
The second way to create a copy of an existing terrain data component is to right-click on a terrain data component in the Watershed Explorer and select Create Copy... (Figure 8). This will also launch the copy terrain data dialog (Figure 7).
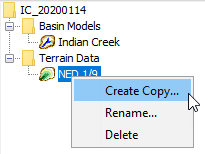
Figure 8. Creating a copy of a terrain data component from the watershed explorer.
Renaming Terrain Data
There are two ways to rename a terrain data component. Both renaming methods will change the terrain data name and update all references that point to the old name, to the new name.
The first way to rename a terrain data component is to launch the Terrain Data Manager through the Components menu (Figure 2). There, you may select a grid region and press the Rename... button (Figure 9), which will allow you to choose a new name for the terrain data (Figure 10). Choosing Cancel or X will abort the renaming process. Choosing Rename will change the name of the terrain data component and update all references from the old name to the new name. The Rename button will not be available if no name is entered.

Figure 9. Renaming a terrain data component from the Terrain Data Manager.
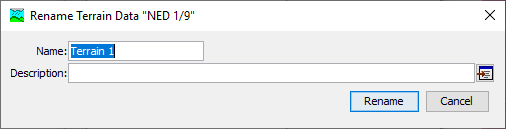
Figure 10. The terrain data renaming dialog.
The second way to rename a terrain data component is to right click on an existing terrain data in the Watershed Explorer and select Rename... (Figure 11). This will allow you to directly edit the name of the terrain data in the Watershed Explorer (Figure 12). Press Enter on the keyboard to accept the new name.
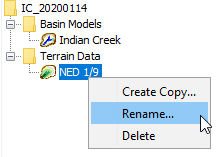
Figure 11. Renaming a terrain data component from the Watershed Explorer.
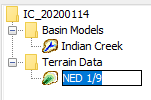
Figure 12. Editing the name of a terrain data component in the Watershed Explorer.
Deleting Terrain Data
There are two ways to delete a terrain data component. Both methods remove it from the project and then update any references pointing to that terrain data component. It does not delete the GIS raster data on disk that was used as the source data to create the terrain data. Once the terrain data component has been deleted, it cannot be retrieved or undeleted. Any references to the deleted terrain data will switch to using no terrain data.
The first way to delete a terrain data component is to use the Terrain Data Manager through the Components menu (Figure 2). There you can select the terrain data you wish to delete by clicking on it, and then pressing the Delete button. You will be prompted to confirm your choice to delete the terrain data (Figure 14.) If you select OK the terrain data will be deleted; if you select Cancel or the X it will remain.
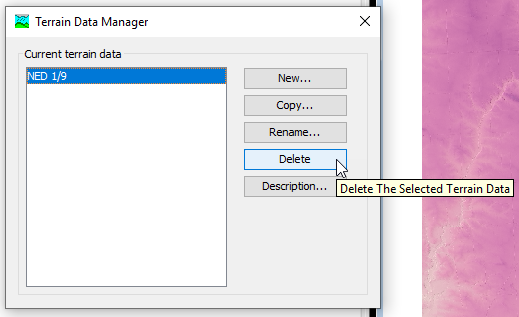
Figure 13. Deleting a terrain data component from the Terrain Data Manager.
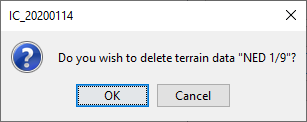
Figure 14. Terrain data deletion confirmation dialog.
The second way to delete a terrain data component is through the Watershed Explorer. If you right-click on a terrain data component and select Delete (Figure 15) you will see the terrain data deletion confirmation dialog (Figure 14). If you select OK the terrain data will be deleted; if you select Cancel or the X it will remain.
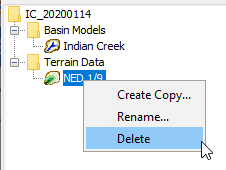
Figure 15. Deleting terrain data from the Watershed Explorer.
Associating Terrain Data with a Basin Model
In order to use a terrain data component in the watershed delineation process, it must be first associated with a basin model. After creating terrain data, create or select a basin model. In the basin model Component Editor, you may choose a terrain data component to assign to the basin model (Figure 16). After selecting a terrain data component, press Save or choose the File menu and select Save, or press Ctrl+S to save the project.
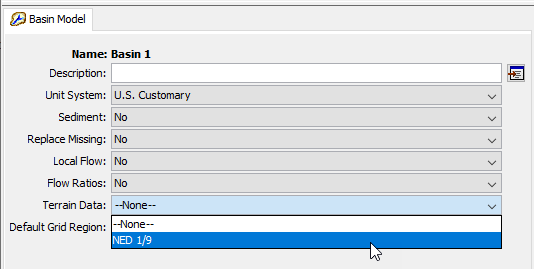
Figure 16. Selecting terrain data to use with a basin model.
If the current basin model does not have a coordinate system, you will then be prompted to choose a basin model coordinate system. Because terrain data are spatially referenced, the basin model must also be spatially referenced. You will be prompted to choose a coordinate system for the spatial referencing of the basin model (Figure 17). If you press Select... you will be allowed to specify a coordinate system for the basin model in a number of ways. If you choose Skip the coordinate system for the basin model will be set based on the coordinate system of the GIS data underlying the terrain data you are trying to associate with the basin model.
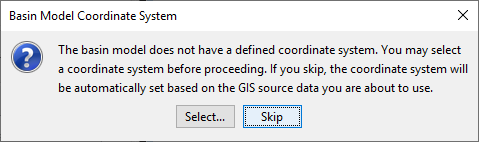
Figure 17. Basin model coordinate system prompt.
If you choose to select a coordinate system for your basin model, see Coordinate System for an overview of the tool for doing so.
Once the basin model coordinate system is set, or if the basin model already has a coordinate system, the basin model map will be updated with a rendering of the elevation data (Figure 18).
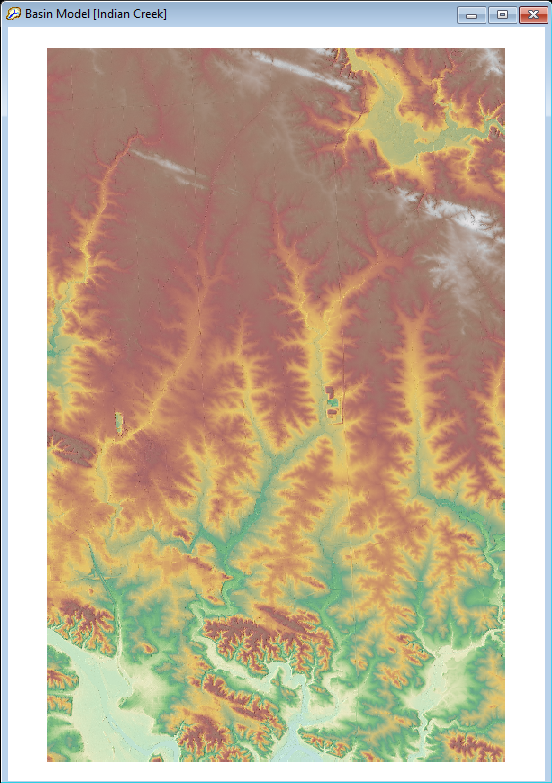
Figure 18. Terrain data viewed in the basin model map window.