Download PDF
Download page Basin Models.
Basin Models
Basin models are one of the main components in a project. Their principle purpose is to convert atmospheric conditions into streamflow at specific locations in the watershed. Hydrologic elements are used to break the watershed into manageable pieces. They are connected together in a dendritic network to form a representation of the stream system. Background maps can be used to aid in placing the elements in a spatial context.
Creating a New Basin Model
A new basin model is created using the Basin Model Manager. To access the manager, click on the Components menu and select the Basin Model Manager command. The manager will open and show all of the basin models currently in the project. The manager can remain open while you manage basin models or while you perform tasks elsewhere in the program. You can close the manager using the X button in the upper right corner. The buttons to the right of the model list can be used to manage existing models or create a new one. To create a new basin model, press the New… button. After you press the button a window (Figure 1) will open where you can name and describe the new basin model that will be created. A default name is provided for the new model; you can use the default or replace it with your own choice. A description can also be entered. If the description is long, you can press the button to the right of the description field to open an editor. The editor makes it easier to enter and edit long descriptions. When you are satisfied with the name and description, press the Create button to finish the process of creating the new basin model. You cannot press the Create button if no name is specified for the new model. If you change your mind and do not want to create a new basin model, press the Cancel button or the X button in the upper right to return to the Basin Model Manager window.

Copying a Basin Model
There are two ways to copy a basin model. Both methods for copying a model create an exact duplicate with a different name. Once the copy has been made it is independent of the original and they do not interact.
The first way to create a copy is to use the Basin Model Manager, which is accessed from the Components menu. Select the basin model you wish to copy by clicking on it in the list of current basin models. The selected model is highlighted after you select it. After you select a model you can press the Copy… button on the right side of the window. A new Copy Basin Model window (Figure 2) will open where you can name and describe the copy that will be created. A default name is provided for the copy; you can use the default or replace it with your own choice. A description can also be entered; if it is long you can use the button to the right of the description field to open an editor. When you are satisfied with the name and description, press the Copy button to finish the process of copying the selected basin model. You cannot press the Copy button if no name is specified. If you change your mind and do not want to copy the selected basin model, press the Cancel button or the X button in the upper right to return to the Basin Model Manager window.
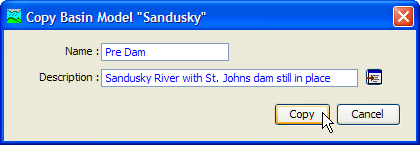
Figure 2. Creating a copy of a basin model.
The second way to copy is from the "Components" tab of the Watershed Explorer. Move the mouse over the basin model you wish to copy, then press the right mouse button (Figure 3). A context menu is displayed that contains several choices including copy. Click the Create Copy… command. A new Copy Basin Model window will open where you can name and describe the copy that will be created. A default name is provided for the copy; you can use the default or replace it with your own choice. A description can also be entered; if it is long you can use the button to the right of the description field to open an editor. When you are satisfied with the name and description, press the Copy button to finish the process of copying the selected basin model. You cannot press the Copy button if no name is specified. If you change your mind and do not want to copy the selected basin model, press the Cancel button or the X button in the upper right of the Copy Basin Model window to return to the Watershed Explorer.
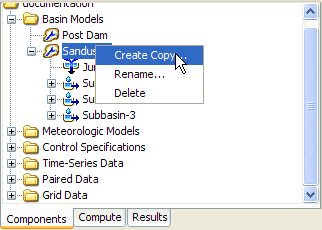
Figure 3. Copying a basin model from the Watershed Explorer. The Copy Basin Model window will appear after the Create Copy… menu command is selected.
Renaming a Basin Model
There are two ways to rename a basin model. Both methods for renaming a model change its name and then all references to the old model name are automatically updated to the new name.
The first way to perform a rename is to use the Basin Model Manager, which you can access from the Components menu. Select the basin model you wish to rename by clicking on it in the list of current basin models. The selected model is highlighted after you select it. After you select a model you can press the Rename… button on the right side of the window. A new Rename Basin Model window (Figure 4) will open where you can provide the new name. If you wish you can also change the description at the same time. If the new description will be long, you can use the button to the right of the description field to open an editor. When you are satisfied with the name and description, press the Rename button to finish the process of renaming the selected basin model. You cannot press the Rename button if no name is specified. If you change your mind and do not want to rename the selected basin model, press the Cancel button or the X button in the upper right of the Rename Basin Model window to return to the Basin Model Manager window.
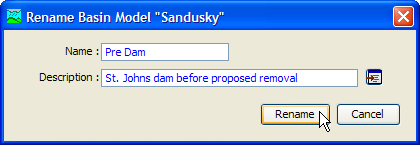
Figure 4. Renaming a basin model. This was accessed from the Basin Model Manager.
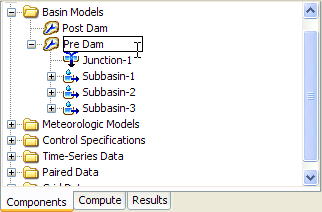
Figure 5. Renaming a basin model in the Watershed Explorer.
The second way to rename is from the "Components" tab of the Watershed Explorer. Select the basin model you wish to rename by clicking on it in the Watershed Explorer; it will become highlighted. Keep the mouse over the selected model and click the left mouse button again. The highlighted name will change to editing mode as shown in Figure 5. You can then move the cursor with the arrow keys on the keyboard or by clicking with the mouse. You can also use the mouse to select some or all of the name. Change the name by typing with the keyboard. When you have finished changing the name, press the Enter key to finalize your choice. You can also finalize your choice by clicking elsewhere on the "Components" tab. If you change your mind while in editing mode and do not want to rename the selected basin model, press the Escape key.
Renaming Basin Model Elements
You can also rename individual or multiple hydrologic elements from the Rename Basin Elements window. To access the window, right-click on the basin name in the Components tab of the Watershed Explorer and click on the Rename Basin Elements option. Once renamed, all the properties of the original element are updated to the new name. However, the results of any previous simulation runs involving the renamed elements are deleted, and you will need to rerun the simulations.
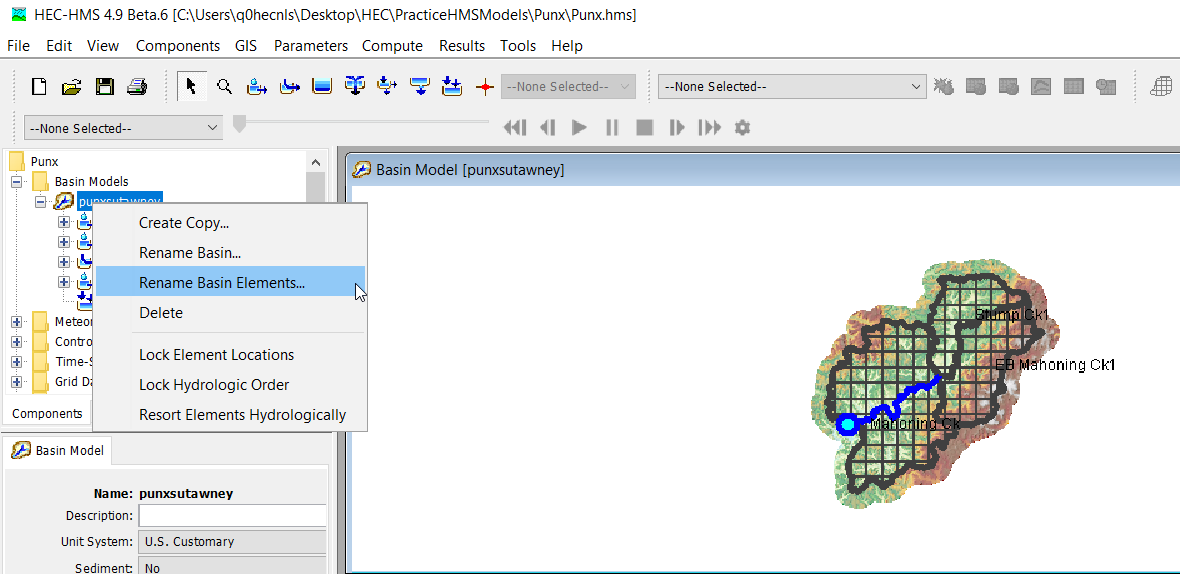
Clicking the Rename Basin Elements menu option opens the window with a table, where elements can be renamed by double-clicking on an element's name in the last column of the table and typing in a new name, as shown in the following figure. Once all the changes are entered, click the Apply button to apply the changes and leave the window open, OK button to apply the changes and close the window, or click Cancel or X to close and discard the changes.
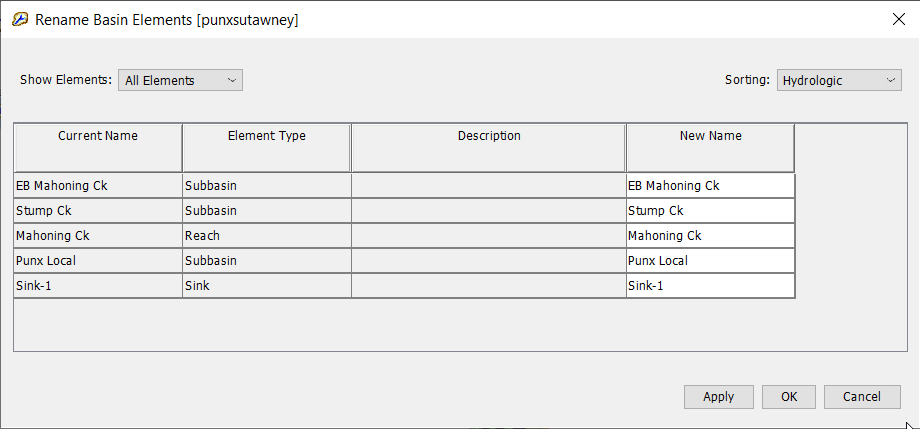
You can also sort and filter the hydrologic elements in the table. To filter elements by type (e.g. Subbasin, Junction, etc.), click the down arrow in the Show Elements drop down menu in the top left portion of the window and select the desired element type, as shown in the following figure. Only the elements of the selected type will be displayed in the table.
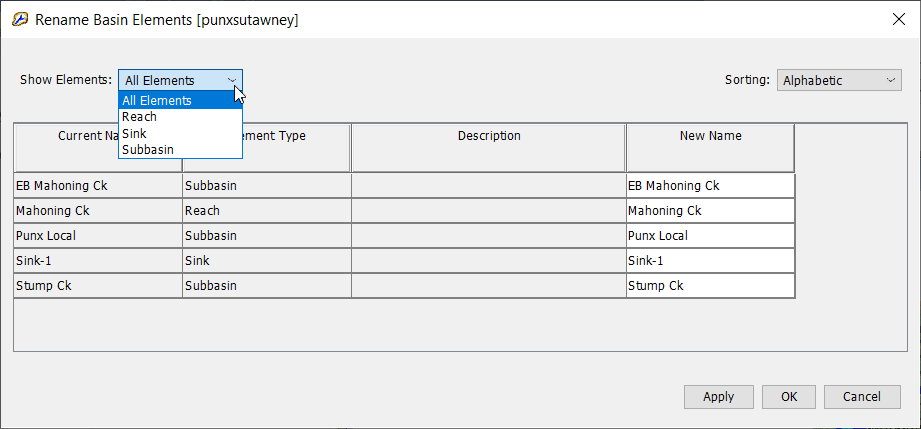
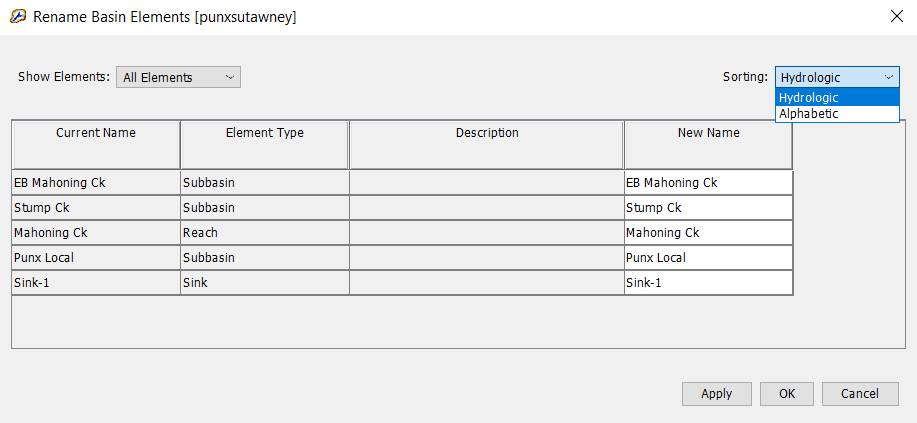
To sort elements in hydrologic or alphabetical order, press the down arrow and select the corresponding option from the Sorting drop down menu in the top right portion of the window, as shown in the following figure.
A demonstration of this new feature can be found here:
Deleting a Basin Model
There are two ways to delete a basin model. Both methods for deleting a model remove it from the project and then automatically update all references to that model. Once a model has been deleted it cannot be retrieved or undeleted. Any references to the deleted model will switch to using no basin model, which is usually not a valid choice during a simulation. At a later time you will have to go to those components and manually select a different basin model.
The first way to perform a deletion is to use the Basin Model Manager, which you can access from the Components menu. Select the basin model you wish to delete by clicking on it in the list of current basin models. The selected model is highlighted after you select it. After you select a model you can press the Delete button on the right side of the window. A window will open where you must confirm that you wish to delete the selected model as shown in Figure 6. Press the OK button to delete the model. If you change your mind and do not want to delete the selected basin model, press the Cancel button or the X button in the upper right to return to the Basin Model Manager window.
The second way to delete is from the "Components" tab of the Watershed Explorer. Select the basin model you wish to delete by clicking on it in the Watershed Explorer; it will become highlighted. Keep the mouse over the selected model and click the right mouse button (Figure 7). A context menu is displayed that contains several choices including delete. Click the Delete command. A window will open where you must confirm that you wish to delete the selected model. Press the OK button to delete the model. If you change your mind and do not want to delete the selected basin model, press the Cancel button or the X button in the upper right to return to the Watershed Explorer.
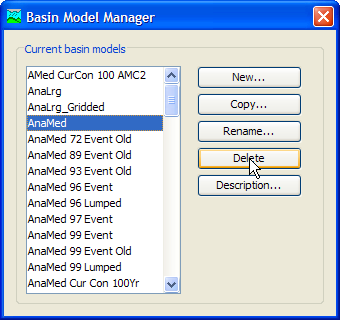
Figure 6. Preparing to delete a basin model from the Basin Model Manager. A confirmation will be required after pressing the Delete button.
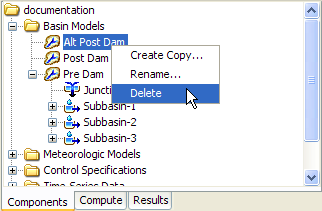
Figure 7. Deleting a basin model in the Watershed Explorer.
Importing a Basin Model
You can import a basin model from another project into the current project. The model must have been created previously and stored on your computer or an accessible network location. Click the Tools menu and select the File Import Basin Model… command. A file browser will open that you can use to find the model you wish to import. The browser will only allow you to select basin model files which end with the BASIN extension. When you click on a basin model file in the browser, the description of the model is shown on the right side of the browser. Once you have located and selected the desired basin model, press the Select button. If you change your mind, you can press the Cancel button or the X button in the upper right to return to the main program window without importing a model. After you make your selection, the basin model will be checked for dependent data such as time-series gages. The user is given the opportunity to also import any required data. The program automatically copies the selected file and any additional data into the project folder and adds the various components to the project.