Download PDF
Download page Reservoirs.
Reservoirs
Drawing a Reservoir Element
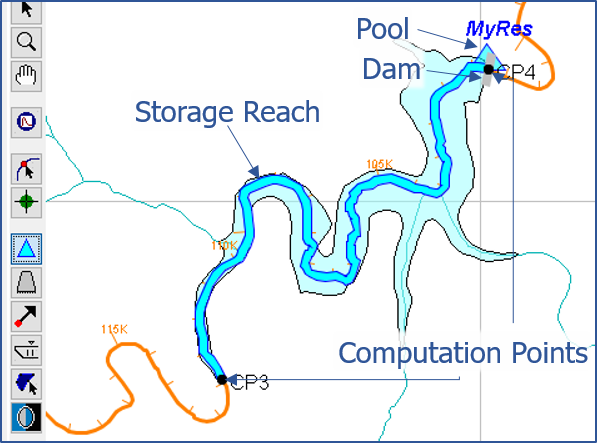
Figure: Basic Reservoir Element
A reservoir is created by using the Reservoir Tool ![]() to draw it from upstream to downstream on the stream alignment. As soon as a reservoir has been drawn, several visual elements will appear that represent the reservoir ("Figure: Basic Reservoir Element"). These elements include:
to draw it from upstream to downstream on the stream alignment. As soon as a reservoir has been drawn, several visual elements will appear that represent the reservoir ("Figure: Basic Reservoir Element"). These elements include:
- a storage reach (cyan),
- a pool (cyan triangle),
- a dam (small gray rectangle),
- and 2 or more computation points (black dots) at the upstream and downstream end of the reservoir on the stream alignment.
To add a reservoir to the watershed:
- Select the Reservoir Tool

- Press the Ctrl key and click on the stream alignment at the upstream extent of the reservoir pool. If more than one stream flows into the reservoir pool, continue pressing the Ctrl key and click at each location of inflow into the reservoir on each inflowing stream.
- Release the Ctrl key and click on the stream alignment where the dam is located. This is the downstream extent of the reservoir. Note: When drawing a reservoir, do not overlap or encompass existing computation points.
The Name New Reservoir dialog will appear ("Figure: Name New Reservoir").
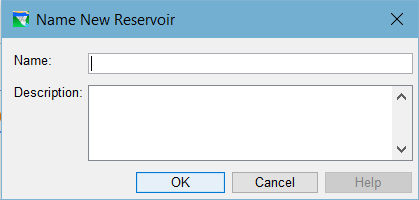
Figure: Name New Reservoir
Name the Reservoir by entering a name in the Name field. Optionally, you can also enter a Description for the Reservoir. Click OK when you are done. The new Reservoir will appear in the Map Display as illustrated in "Figure: Basic Reservoir Element".
Reshaping a Reservoir's Pool
The pool of a reservoir is represented by the storage reach as well as the triangle that is drawn near the dam. The storage reach follows the stream alignment so it cannot be reshaped without reshaping the stream alignment. However, the triangle is simply a polygon attached to the downstream end of the storage reach. The triangle can be reshaped to reflect the shape of the reservoir pool if you desire or it can be stretched to encompass a larger area so that it can be easily seen and selected when the Map Display is zoomed-out.
To enlarge the reservoir triangle:
Using the Reservoir Tool
, double-click on the reservoir's storage reach or triangle. The storage reach and triangle will highlight (turn yellow) and the vertices that define the triangle will display as blue dots as show in "Figure: Reservoir Ready for Reshaping".
Figure: Reservoir Ready for Reshaping
- The yellow dot at the apex of the triangle is the label handle for the Reservoir. Move the label handle away from the triangle.
- Drag one of the blue dots that define the triangle away from its current position. Repeat this for each corner dot of the triangle in order to enlarge the triangle.
If you would like to reshape the triangle so that it follows the outline of the reservoir, you will need to add additional points or vertices to the triangle polygon. To add points to the pool (triangle) polygon:
- Hold down the Ctrl key while clicking along one of the sides of the triangle. A new blue dot (point) will appear where you clicked.
- Add several new points to the polygon then drag the points around on the Map Display to form an outline of the lake.
You may end up adding more points to the polygon that you need. To delete points from the pool polygon:
- Hold down both the Ctrl and Shift keys while clicking on a point you want to delete from the polygon. The point will disappear.
Drawing a Reservoir with two or more dams
In "Drawing a Reservoir Element", you saw how to create a reservoir with one dam and one or more inflow points. Those are the typical reservoirs you are likely to need, but every once in a while, you may encounter a situation in which the reservoir has multiple rivers it can release water into. By drawing the reservoir across two or more streams that flow away from the inflow(s), a dam will be created at each outflow junction of the reservoir. "Figure: Creating a Reservoir with Two Dams" illustrates how to create a reservoir with two dams. In this example, an L-shaped dam was constructed upstream of the confluence of two streams, but outlets were included that could release water into both streams. This dam is treated as two dams in ResSim due to the need to produces releases to the two separate streams.

Figure: Creating a Reservoir with Two Dams
Editing Reservoir Data (Watershed Setup)
Physical and operational data of a reservoir belong to the reservoir model element and is entered in the Reservoir Network module. However, to edit configuration data related to the reservoir:
- Using the Reservoir Tool or the Pointer Tool
 , right-click on the reservoir.
 - From the context menu, select Edit Reservoir to open the Reservoir Properties Editor.
The fields of the Reservoir Properties Editor ("Figure: Reservoir Properties Editor") include:
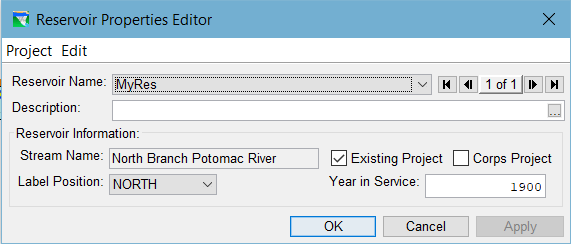
Figure: Reservoir Properties Editor
Name: For a reservoir schematic element, the only data that you need to specify is its Name which you took care of when you created it. The name field in the Reservoir Properties Editor is really a selector so that you can switch from one reservoir to another to review its configuration element properties.
Label Position: Select where to draw the reservoir name label relative to the reservoir's label handle. The label handle can be found by double-clicking on the reservoir using the Reservoir Tool ![]() ; it will appear as a yellow dot (on the top of the reservoir triangle, if you haven't already moved it).
; it will appear as a yellow dot (on the top of the reservoir triangle, if you haven't already moved it).
Existing Project: If the reservoir currently exists, this box should be checked so that the reservoir will be added automatically to any new configurations. This is a useful option if you are creating multiple configurations that use the same set of reservoirs. See "Removing a Reservoir from a Configuration" for removing a reservoir from a configuration.
Corp Project: Certain modeling software needs to know if the project is owned or operated by the Corps. For example, FIA needs to know in order to compute project benefits, therefore, use the Corps Project checkbox to indicate if the reservoir is a Corps Project. (This field is not used by ResSim.)
Year in Service: this field is optional and is used by some modeling software in planning studies. You do not need to specify a year in service when defining projects for real-time studies. (This field is not used by ResSim.)
Renaming a Reservoir
To rename a Reservoir:
- Using the Reservoir Tool or the Pointer Tool , right-click on the reservoir.
From the context menu, select Rename Reservoir. This opens the Rename Reservoir dialog ("Figure: Rename Reservoir Dialog").
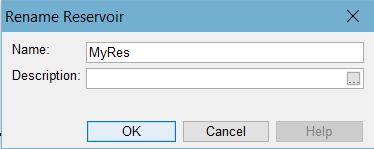
Figure: Rename Reservoir Dialog
- Enter a Name and an optional Description, then click OK.
An “are you sure…?” message ("Figure: Rename Reservoir Query") will appear asking you to confirm that you really want to rename the reservoir. Choose:
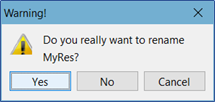
Figure: Rename Reservoir Query
- Yes to complete the rename process.
- No to abort the rename process.
- Cancel to return to the Rename Reservoir dialog.
Removing a Reservoir from a Configuration
To remove a Reservoir from the current Configuration,
- Using the Reservoir Tool or the Pointer Tool , right-click on the reservoir.
- From the context menu, select Remove from Configuration. This removes the reservoir from the current or active Configuration (the configuration that is currently displayed in the Configuration box on the Module bar).
A Confirm Removal dialog will appear ("Figure: Confirm Removal of Reservoir"). Click Yes to confirm.
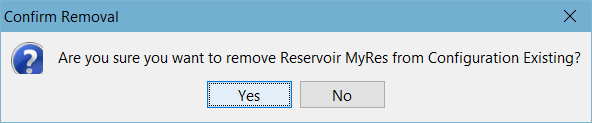
Figure: Confirm Removal of Reservoir
You can also remove a Reservoir from a Configuration by opening the Configuration Editor, then selecting Edit Project List… from the Project menu.
Deleting a Reservoir
To delete a reservoir configuration element and all data associated with it from the watershed:
- Using the Reservoir or Pointer Tool, right-click on the reservoir.
- From the context menu, select Delete Reservoir.
A Confirm Deletion dialog will appear ("Figure: Confirm Deletion of Reservoir"). Click Yes to confirm.

Figure: Confirm Deletion of Reservoir
A Confirm Removal dialog will appear next, asking if you also want to remove (delete) the computation points that were created when the reservoir was created. Click Yes to confirm deletion of the computation points. Click No to keep the computation points; the reservoir will still be deleted.
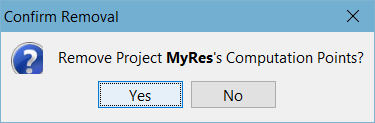
Figure: Confirm Removal of the Deleted Reservoir's Computation Points
Adding Configuration Notes for a Reservoir
Although ResSim does not use Configuration Notes, other models that share the watershed may. To open the Configuration Notes editor for a reservoir:
- Using the Reservoir or Pointer Tool, right-click on the reservoir.
- From the context menu, select Configuration Notes.
In the Configuration Notes textbox of the Notes editor ("Figure: Configuration Notes for Reservoir"), enter information about the selected reservoir relevant to the current configuration.
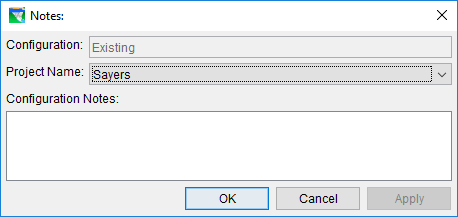
Figure: Configuration Notes for Reservoir
You can also access the configuration Notes editor by selecting Notes… from Edit menu of the Reservoir Properties Editor.