Task 1: HEC-RAS Mapper Setup
The first step in this workshop is to verify that HEC-RAS Mapper is configured properly to compute and display HEC-RAS output from a forecast run. You will verify that the projection is set correctly and that the model has a terrain file loaded and associated with the geometry file.
- Launch the CAVI (log into the Local server) and open the watershed Workshop_HEC_RussianRiver.
- From the Setup module, open the HEC-RAS model. By opening the model from the Setup module, you gain access to the Base Model. Any changes you make to the base model will be carried over into subsequent forecast runs.
- Click on the HEC-RAS model icon from the Main Toolbar to launch the program.

- Notice that the file location for the HEC-RAS model is in the main watershed directory. This verifies we are making edits to the Base Model.

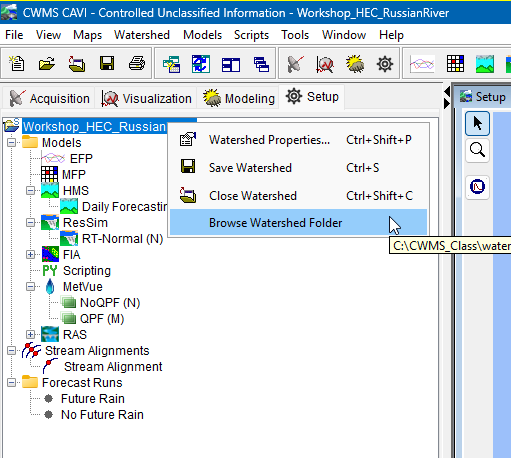
TIP: You can quickly navigate to the watershed's base directory by right-clicking on the name of the watershed in the model tree and selecting Browse Watershed Folder, as shown below.

- Click on the HEC-RAS model icon from the Main Toolbar to launch the program.
- Launch HEC-RAS Mapper from the HEC-RAS toolbar.

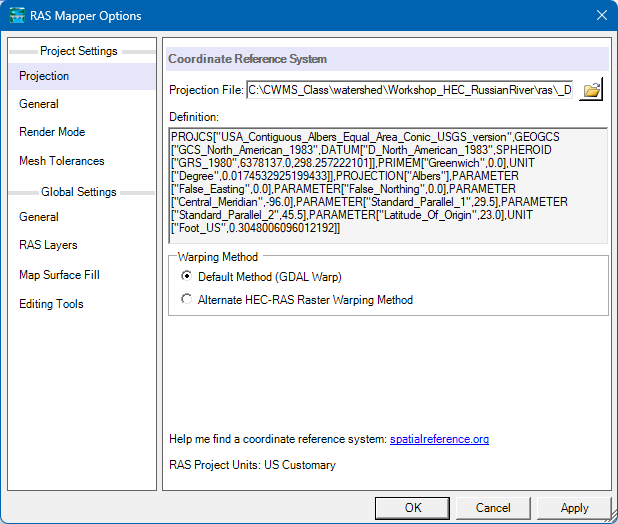
- First, verify that HEC-RAS Mapper has the correct horizontal projection set for the model. Select Set Projection from the Project menu. This will open the RAS Mapper Options dialog.

- Verify that the Projection Definition is set to "USA_Contiguous_Albers_Equal_Area_Conic_USGS_Version"
- Select some of the other options from the menu, such as General under the Global Settings options, to see what settings you can customize within HEC-RAS Mapper.
- Click OK to exit the RAS Mapper Options Dialog.
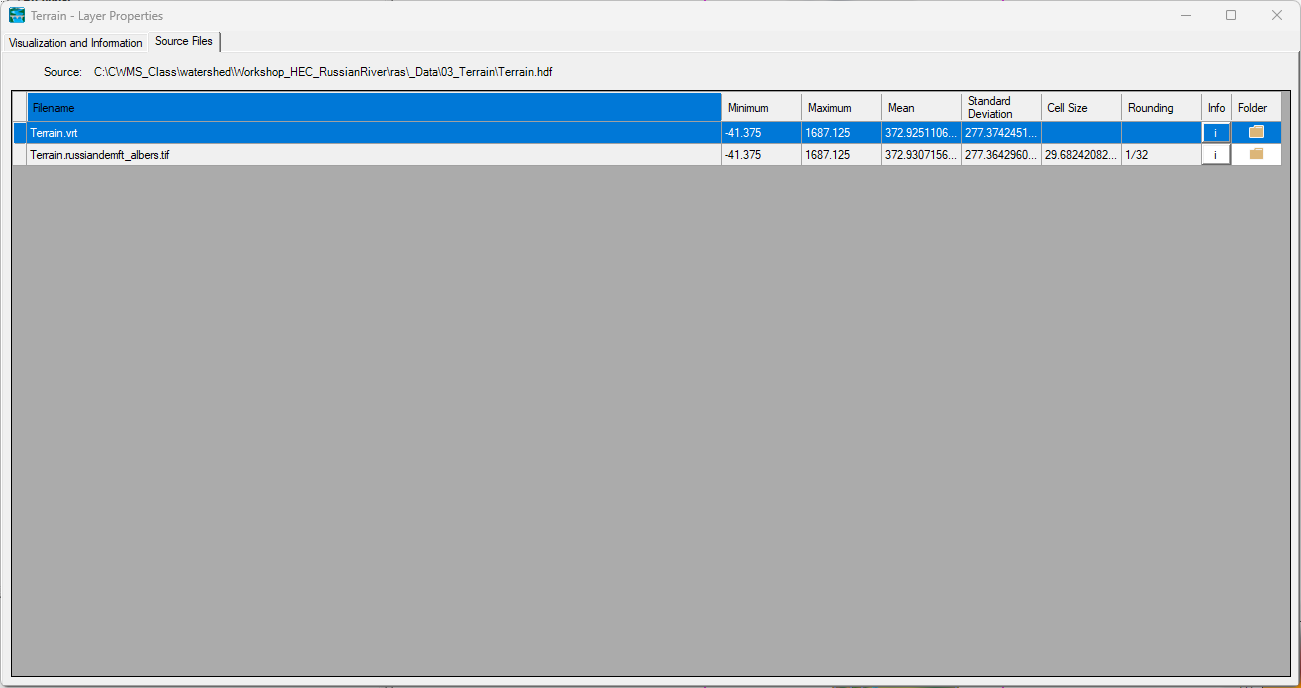
- Identify the location of the terrain by right-clicking on the Terrain and selecting Image Display Properties. Then click on the Source Files Tab to see the path name.

- If there is a problem with the terrain HEC-RAS Mapper will indicate it by placing a red asterisk next to the name of the file in the layer tree. This means the terrain has not been successfully loaded. An example image is included below for your reference.

- If there is a problem with the terrain HEC-RAS Mapper will indicate it by placing a red asterisk next to the name of the file in the layer tree. This means the terrain has not been successfully loaded. An example image is included below for your reference.
- Next, confirm that the terrain is correctly associated with the geometry file. HEC-RAS Mapper has the flexibility to store multiple geometry files and multiple terrain files, allowing you to "mix and match" if you need variability within your model.
- Right-click on Geometries from the layer tree and select Manage Geometry Associations.

- From the Manage Layer Associations dialog, verify that Terrain is selected in the Terrain column for all of the options (Geometries and Results). HEC-RAS Mapper should automatically associate the terrain file with all of our layers, but it is best to verify this is true before running the model. If needed, select the correct file from the drop-down list for each item in the table.

- Click Close to exit out of the dialog window.
- Close the standalone HEC-RAS model.
Can you think of any reasons why you may need or want multiple terrain files in one HEC-RAS model?You may need a terrain with a small grid cell size (5 feet, for example) to develop your model and execute model runs, especially if you have 2-D flow areas. You can also use a terrain with a larger grid cell size (30 feet, for example) to generate depth grids. The smaller grid cell terrain ensures you have an answer that is accurate, but the larger grid cell terrain reduces file sizes when generating the output depth grids.
You may also need multiple terrains if you are running a study model that is looking at various alternatives for a project (with- and without-levees, channel modifications for habitat renewal projects, etc.).
- Right-click on Geometries from the layer tree and select Manage Geometry Associations.
You have verified the projection and terrain are set correctly. Now we will open and compute the forecast in the next task.
Prior Task(s):
Current Task: