PDF
Download PDF
Download page Forecasts.
Forecasts
A forecast is a time window associated with one or more forecast runs.
The following are the steps for creating a forecast:
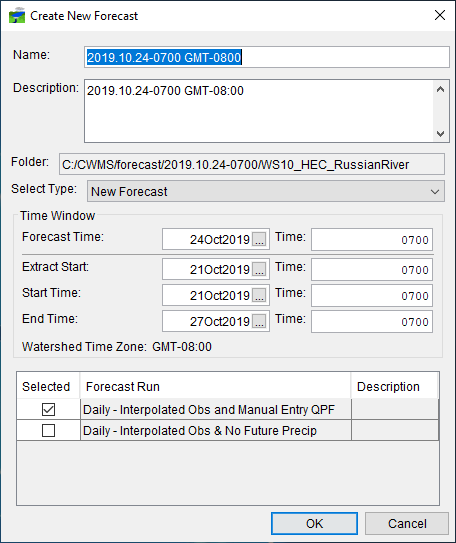
- From the CWMS CAVI main window, click the Modeling tab. From the Forecast menu, select New. The Create New Forecast dialog will open.

- By default, New Forecast is the default selection in the Select Type drop-down list. The options from the list are:
- New Forecast - the default option, allows you to create a new forecast
- From Existing Forecast - copies the Time Window settings and selected Forecast Run(s) from a forecast that has already been created
- From Archived Forecast - copies the Time Window settings and selected Forecast Run(s) from an archived forecast (for more information on archiving your forecast see Managing Forecast Data)
- From Imported Forecast - copies the Time Window settings and selected Forecast Run(s) from a forecast file stored to disk.
- Enter a forecast date and time in the Time Window box. The default Forecast Time is the current date and time. You should determined the forecast time in the Acquisition module, this would be the latest time a complete set of reliable data is available.
- Once you edit the Time Window settings, CWMS generates a forecast name and creates a folder based on the forecast date and time. The Folder box contains the generated pathname and file for the forecast.
- The selected Start Time and Extract Start dates should be far enough in the past to meet the following criteria:
- Allow enough time steps to pass between the Start Time date and the Forecast Time date to allow routing reaches in the reservoir model to show correct flows at the time of forecast.
- The Start Time and the Extract Start dates should be before the start of the event for calibration of loss rates for HEC-HMS. If this is not practical, then a time after the initial losses have been satisfied should be chosen. In most cases these dates and times are equal. However, from time to time, the forecaster may wish to extract data prior to the simulation window or may wish to update only the last few hours of data (for example when re-computing a forecast later in the day after more observed data are available).
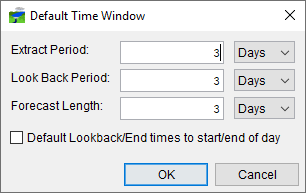
- The Extract Start, Start Time and End Time fields will default to dates based on the Default Time Window settings.

- From the Create New Forecast dialog, you can override the default time window by adjusting the dates and times as needed for your forecast.
- Select the pre-defined forecast run(s) you wish to include in the forecast from the list at the bottom of the dialog. Clicking the check box in the Selected column of the table will select the forecast run. You can select multiple forecast runs.

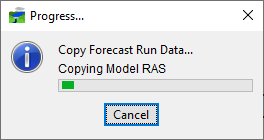
- Click OK, and the Create New Forecast dialog will close. A Progress window will open, which provides information on the creation of the forecast, its associated directory, and the copying of the appropriate files to that directory.

- In addition, CWMS extracts data from various data sources (CWMS Data API, Cumulus, HEC-DSS, WISKI, and the CWMS database) based on the time window. The data is copied to a HEC-DSS file (forecast.dss) for use by the models. Check the Extract Results log for any issues that might have occurred.
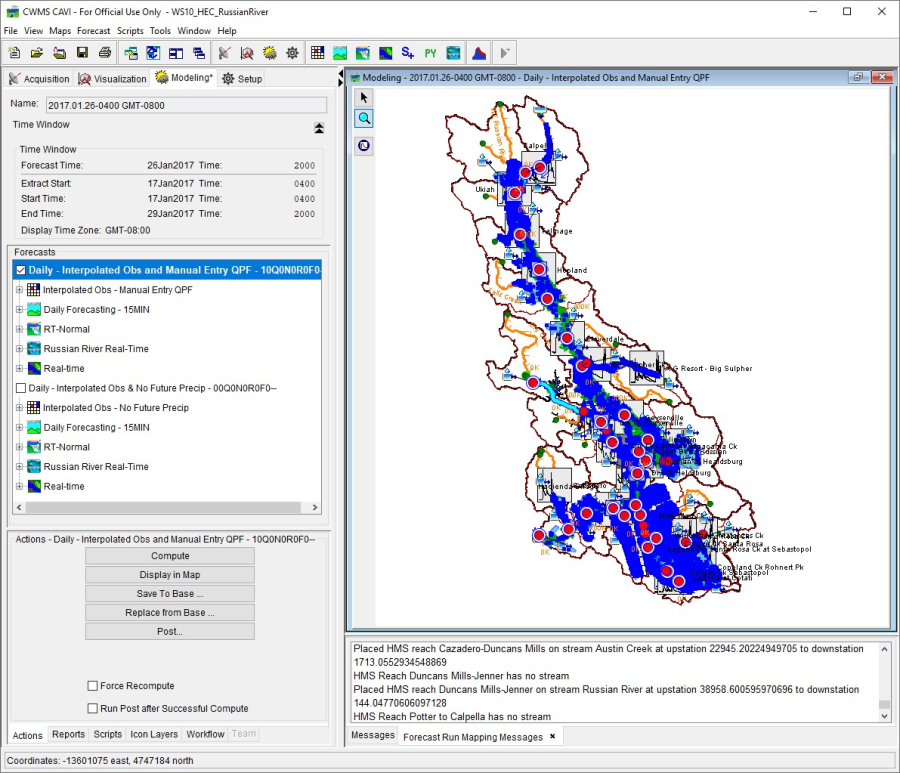
- The Modeling tab will display the created forecast (with a forecast run selected) in the Map Window. In addition, the name of the forecast; time window information about the forecast; and forecast run(s) information are displayed.
