PDF
Download PDF
Download page Managing Forecasts.
Managing Forecasts
This section provide details on how to manage forecasts from the Modeling module in the CAVI.
Opening a Forecast
To open a forecast:
- From the Forecast menu, click Open. The Open Forecast dialog will open.
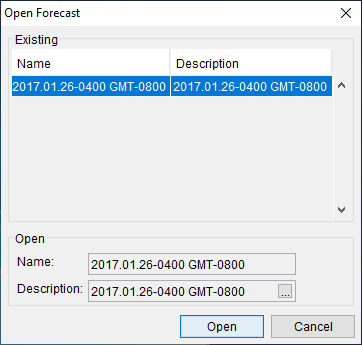
- From the Existing list of available forecasts for the watershed, select the forecast you wish to open.
- Click Open, the Open Forecast dialog closes. CWMS will load all of the information associated with the selected forecast. In the Modeling tab, the tree will display the name of the selected forecast and the forecast runs associated with the selected forecast. The Map Window will display the model representations of the active forecast run.
Deleting a Forecast
To delete a forecast:
- From the Forecast menu, click Delete. The Delete Forecast dialog will open.
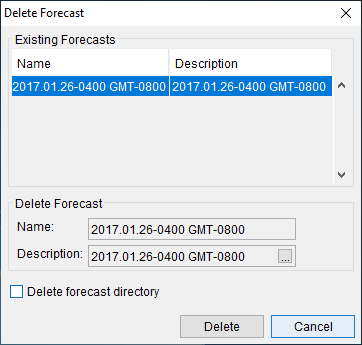
- The Existing Forecasts box contains a list of the forecasts that have been created for the watershed. Select a forecast from the list you want to delete.
- Click Delete. A Warning window will open, asking you if you really want to delete the forecast. Click Yes. The Warning window closes, and the forecast is removed from the watershed. This process does not physically delete any files; it only deletes the reference of the forecast from the watershed.
- If you wish to delete the associated directory of the selected forecast, check Delete forecast directory from the Delete Forecast dialog prior to clicking Delete. This option will delete the forecast directory (folder and all associated files located within).
Closing a Forecast
To close a forecast:
- From the Forecast menu, click Close. If you have made changes to the forecast, you will be given options on how to manage those changes. further details are provided in Managing Forecast Data.
- The CAVI will remove all of the information associated with the active forecast, and the Modeling module will be blank.
Editing the Time Window
To edit the time window of the active forecast:
- Select Edit Time Window from the Forecast menu. The Forecast Time Window dialog will open.
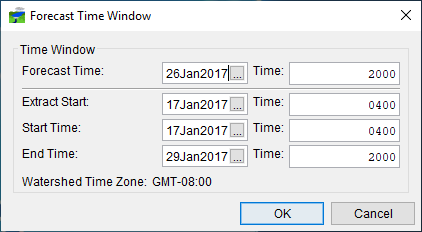
Enter the new information in the corresponding date and time fields. Click OK, and the Forecast Time Window dialog will close.
Running Extracts
To retrieve data from the CWMS database:
- From the Forecast menu, click Extract. The Run Extract dialog will open. In the table are displayed the extract groups that have been defined for the watershed.
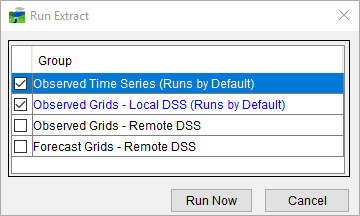
- The extract groups that have been defined for the watershed will appear in the table. See Extract Groups for more details.
- Select an extract group(s) the you wish to rerun, and un-select the extract group(s) that you do not want to run. Click Run Now, and the Run Extract dialog will close.
- Progress of the extract is displayed on the Extract tab in the Message Pane.
Adding or Removing Forecast Runs
To add or remove already defined forecast runs to the selected forecast:
- From the Forecast menu, click Run Selector. The Forecast Run Selector dialog opens.
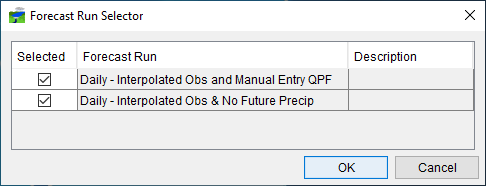
- In the Forecast Run Selector dialog, select the defined forecast runs you wish to add to the forecast by checking the boxes in the Selected column.
- Click OK, the Forecast Run Selector dialog closes, a Progress window will open displaying the progress of adding the forecast run to the active forecast.
To remove a forecast run from a forecast:
- From the Forecast Run Selector dialog, uncheck the box in the Selected column next to the name of the forecast run you wish to remove from the active forecast.
- Click OK, the Forecast Run Selector dialog closes. The forecast run is removed from the active forecast and no longer displays within the Modeling module.
Saving the Active Forecast
To save the active forecast:
- From the Forecast menu, click Save. CWMS will save all information for the active forecast.