Managing Projects
In HEC-FIA, the set of files associated with a particular water resources study is called a project. HEC-FIA creates a directory (folder) with the project name specified, and stores all the files associated with the project in that directory.
Commands available in the File menu allows the user to create a new project, open an existing project, close the current project, save the current project, save the current project as another project, and review project properties.
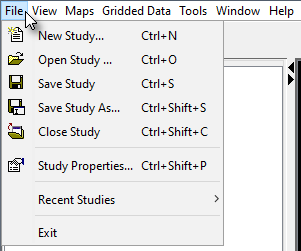
Figure: File Menu Commands
Creating a New Project
To create a new project:
- From the File menu, click New Study, the Create New Study dialog box opens.
From the Create New Study dialog box, enter a name (required) in the Study Name box, and in the Description box, enter a description (optional, but recommended) for the new project.
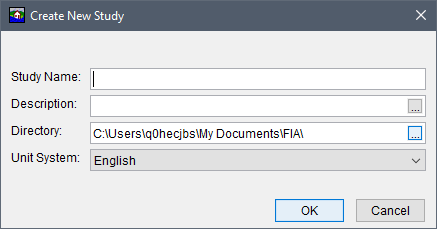
Figure: Create New Study Dialog Box
- In the Directory box, either enter the name of the directory where the HEC-FIA project is to be stored, or click
 , an Open Browser opens. The user can navigate to the directory where the HEC-FIA project is stored on the user's computer or network.
 The Unit System dropdown allows the user to select either English (default) or SI units for the project.
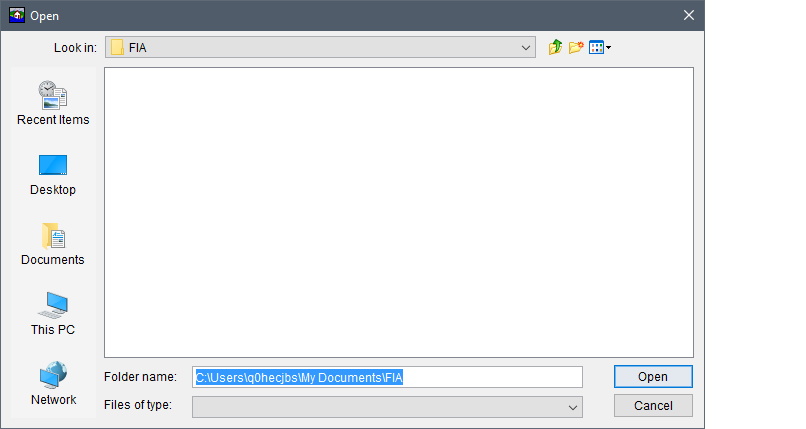
Figure: Open Browser Window
- Click OK, the Create New Study dialog box closes. The HEC-FIA main window now has the name of the project in the Title Bar.
- A map window opens in the Desktop Pane and in the Study Pane (see Tabs) displaying the project.
- A directory with the project name and associated files is created for the project. For further details on the project directory and files, see Project Directories and Files.
Opening an Existing Project
There are two ways to open existing projects in HEC-FIA. The first is to open the project by selecting it from the list of most-recently-opened projects. To do this, from the File menu, point to Recent Studies, and select the name of the project from the list of the previous five opened projects. HEC-FIA automatically loads the selected project. The second way to open an existing project is described below.
From the File menu, click Open Study, an Open Study Browser opens.
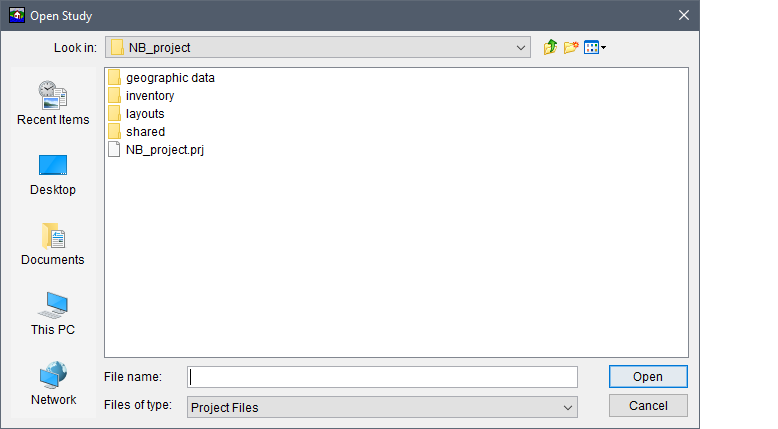
Figure: Open Study Browser Window
- From the Open Study Browser, browse to the location of the existing HEC-FIA project (e.g., NB_project.prj). Note, by default, HEC-FIA is looking for a file with the Project Files extension _*.prj.
Select the project name, click Open, the Open Study Browser closes, and the selected project opens in HEC-FIA.
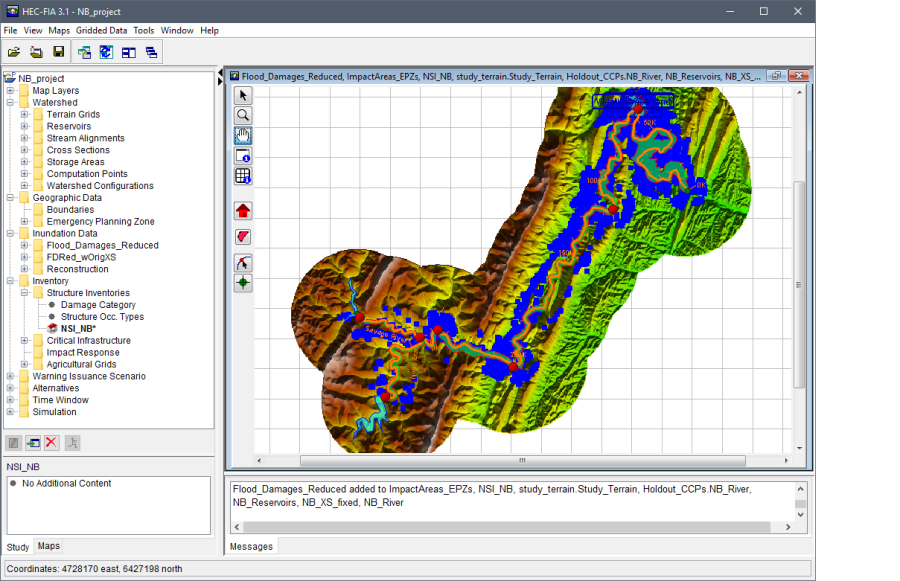
Figure: Example - Opened HEC-FIA Project
Close a Project
To close an active project, from the File menu, click Close Study and the project automatically closes. All changes that were made are automatically saved when exiting HEC-FIA.
Save a Project
To save a project, from the File menu, click Save Study, and HEC-FIA automatically saves the project. Saving a project saves all unsaved project elements. Project elements that are not saved are marked by an asterisk; for example the NSI_NB structure inventory displayed in the figure above.
Save a Project As
To save a project as a different project:
From the File menu, click Save Study As, the Save Study As dialog box opens.
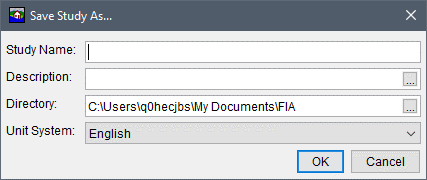
Figure: Save Study As Dialog Box
- From the Save Study As dialog box, enter a name (required) in the Study Name box, and in the Description box, enter a description (optional, but recommended) for the new project.
- In the Directory box, either enter the name of the directory where the HEC-FIA project is to be stored, or click , an Open Browser opens. The user can navigate to the directory where the HEC-FIA project is stored on the user's computer or network.
- The Unit System list allows the user to select either English (default) or SI units for the project.
- Click OK, the Save Study As dialog box closes. A progress window opens, providing information on the copying of the project. When that closes, the HEC-FIA main window now has the name of the project in the Title Bar.
- The new project is named in the Study Tree and all data associated with the original project is now available.
- A directory with the project name and associated files is created for the project. For further details on the project directory and files, see Project Directories and Files.
Project Properties
To view the properties for an active project, from the File menu, click Study Properties and the Study Properties dialog box opens. This dialog displays the name of the project, the project description (which the user can edit), location of the project file (*.prj), the selected unit system, coordinate system, the Windows User ID name of the team member that created the project, and the date and time the study was created.
Certain map window property options are provided in the Study Properties dialog box. For instance, the default property of synchronize map windows, the property to draw a grid, and the background color of the grid can all be set via this interface.
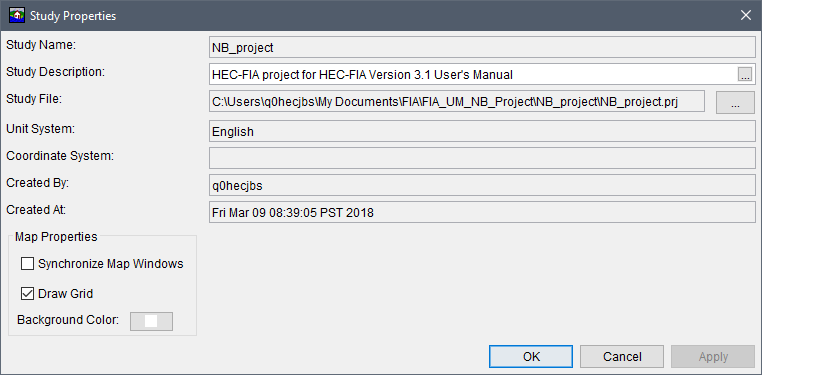
Figure: Study Properties Dialog Box