Polygon Shapefile Display Properties
Shapefiles store non-topological geometry and attribute information for the spatial features of a data set. There are three types of shapefiles: polygon, line, and point. Each of these has a different set of display options.
User-editable polygon shapefile display properties include Fill, Borders, and Labels.
To edit polygon shapefile fill properties:
- From the Content Pane with the Maps tab selected, right-click on the name of a polygon shapefile (*.shp).
From the shortcut menu, click Properties (see Figure D.1). The Edit Polygon Properties dialog box appears.

Figure: Edit Polygon Properties Dialog Box
- Under the Fill tab, check the Display Fill box to fill the selected shapefile.
- By default, HEC-FIA draws fill features using One Fill for the selected shapefile. To set fill properties for a single fill:
- From the Color list, select the fill color. In the example, dark red has been selected.
- From the Style list, select the fill style (e.g., solid color, diagonal lines, etc.).
- Use the Transparency slider to select the level of transparency fill.
- Users can also establish separate fill colors by shapefile attribute:
- From the Draw Features using list, select Attribute Values.
From the Field for values list, select the name of the shapefile attribute that represents the separate polygons. In the figure below, Name has been selected for the shapefile Counties.shp.
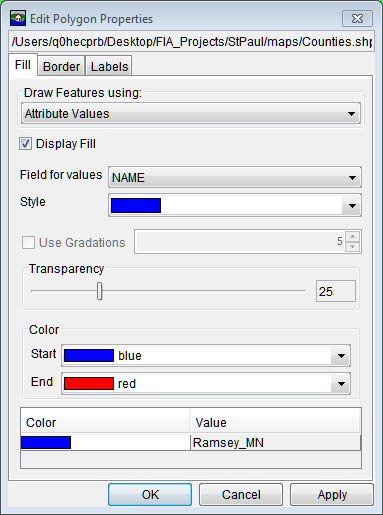
Figure: Fill Polygon by Shapefile Attribute
- From the Style list, select the desired fill style.
- Use the Transparency slider to select the level of transparency for the fill.
- From the Color box, select the start and end of the color range for the shapefile. HEC-FIA fills in the colors in between. In the figure below, the shapefile has been filled according to the properties entered.
Once fill properties have been edited, click Apply to apply the display properties to the layer. When finished editing, click OK.
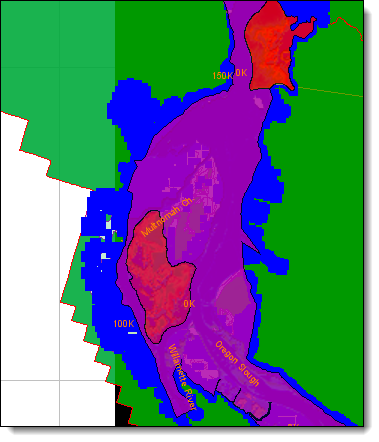
Figure: Shapefile Polygon Filled by Attribute
To edit shapefile border properties:
- From the Content Pane with the Maps tab selected, right-click on the name of a polygon shapefile (*.shp).
- From the shortcut menu, click Properties. The Edit Polygon Properties dialog box appears.
Click the Border tab and select Display Border to create a border.
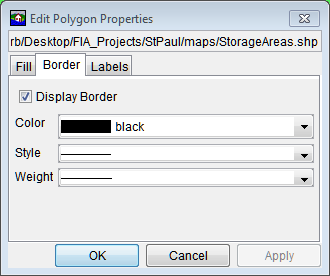
Figure: Edit Polygon Properties Dialog Box - Border Tab
- From the Color, Style, and Weight lists, edit the border color, style (e.g. solid, dashed, etc.), and weight as desired.
- Click Apply to display changes in the map window and continue editing.
- When finished editing, click OK to close the dialog.
To edit labels for shapefile attributes:
- From the Content Pane with the Maps tab selected, right-click on the name of a polygon shapefile (*.shp).
- From the shortcut menu, click Properties. The Edit Polygon Properties dialog box appears.
Select the Labels tab.
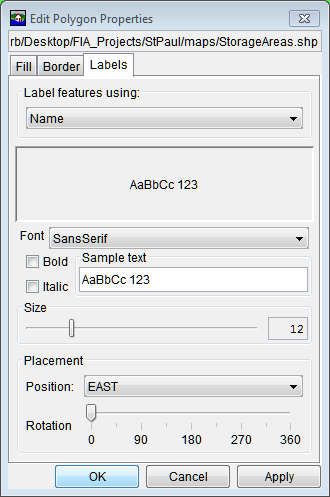
Figure: Edit Polygon Properties Dialog Box - Labels Tab
- From the Label features using list, select the name of the shapefile attribute that represents the labels for separate polygons. Name has been selected for the shapefile StorageAreas.shp.
- From the Font list select the desired font for labels, select whether to make the labels bold or italicized, and the Size slider adjusts the font size for labels. From the Placement box, the user can adjust the placement of labels and rotate labeled.
- Click Apply to display changes in the map window and keep editing.
- When finished editing, click OK to close the dialog.