From the HEC-RTS main window (Figure 5.1), click the Setup module, from the Map Window Toolbar, click the Time Series Icon Tool  . From the map window, right-click on the time series icon that is to be modified, from the shortcut menu click Edit. The Time Series Icon Editor will open (Figure 9.4), click the Scripts/HTML tab (Figure 9.9).
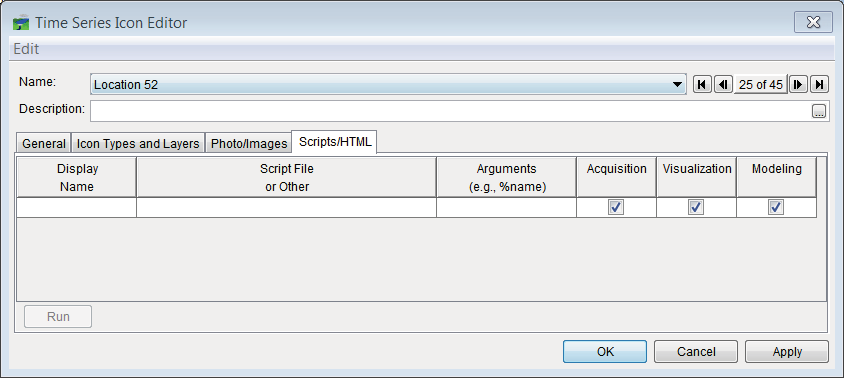
Figure 9.9 Time Series Icon Editor – Scripts/HTML Tab
From the Edit menu (Figure 9.9), click Script Editor/Selector, the Script Editor will open. From the Script Editor, highlight the script that will be assigned to the time series icon and click OK, the Script Editor will close, and the script file will appear in the table (Figure 9.9)
To assign a webpage, type in the URL of the website in the Script File or Other column (Figure 9.9), then enter the display name. The display name will be the text of the menu option in the time series icon's shortcut menu, which will trigger the image to display.
Place select from which module (i.e., Acquisition, Visualization, or Modeling) the script file will be available. When all the information is configured, click Run (Figure 9.9) to preview the file or script.
Additional time series icon functions are described in the HEC-RTS User's Manual.
