Configuring Images
From the HEC-RTS main window (Figure 5.1), click the Setup module, from the Map Window Toolbar, click the Time Series Icon Tool . From the map window, right-click on the time series icon that is to be modified, from the shortcut menu click Edit. The Time Series Icon Editor will open (Figure 9.7), click the Photo/Images tab (Figure 9.8).
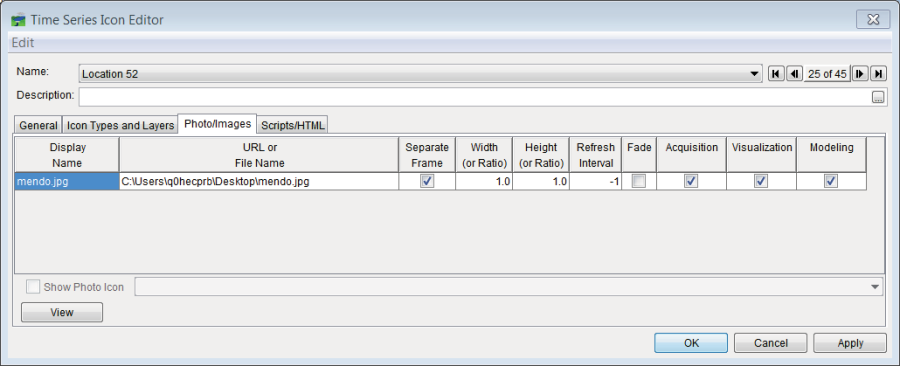
Figure 9.8 Time Series Icon Editor – Photo/Images Tab
From the Edit menu (Figure 9.8), click Browse, an Enter Image Browser will open. Browse to the correct image file, click Open, the Enter Image Browser will close, and the image location and filename will appear in the table on the Time Series Icon Editor (Figure 9.8).
Alternatively, image files can be stored and retrieved from DSS, form the Edit menu (Figure 9.8), click Browse DSS, a dialog box (Figure 9.6) will open, select the dataset that contains the image file, close the dialog box (Figure 9.6), and the image location and filename will appear in the table on the Time Series Icon Editor (Figure 9.8). Alternatively an image file may be available through a website, as in the case of a webcam. If so, type in the URL of the website in the URL or File Name column of the table on the Time Series Icon Editor (Figure 9.8).
To modify the display name of an image, double-click on a cell under the Display Name column that corresponds to the image file you want to modify, enter the new name. The Display Name will be the text of the menu option in the time series icon's shortcut menu, which will trigger the image to display.
Select Separate Frame (Figure 9.8) if the image needs to be displayed in a new window. Specify the Width (or Ratio) and Height (or Ratio) of the displayed image (Figure 9.8). By default the image will display in the original image size.
The Refresh Interval (Figure 9.8) is specific to webcam images. The webcam image is refreshed with a new webcam image the number of seconds specified, starting at zero, which refreshes without any pause. If the Refresh Rate is set to ten, the image will be retrieved every ten seconds. To load the image only once, set the Refresh Rate to -1.
The Fade option (Figure 9.8) is an on/off switch specific to webcam images. This option transitions each image into the next one by displaying ten percent or more of the next image every 0.05 seconds, until the full picture is shown. This gives a smooth motion display of an image.
To add another image to the table, from the Edit menu (Figure 9.8), click Add Row or Insert Row. To remove an image, select the image, from the Edit menu (Figure 9.8), click Delete
Row. To change the order of images, first select the image, from the Edit menu. (Figure 9.8), and click Move Row Up or Move Row Down.