Now that you've learned how to create a Plot Template, you will learn how to apply the templates in two ways.
Apply a Plot Template Manually
- Close the plot and reopen it from the time series icon.
- Select Apply Template from the File menu within the plot.
- Navigate to the C:\CWMS_Class\watershed\Workshop_HEC_RussianRiver\shared directory.
- Select the template you just created in the previous task and click the Open button.
Plot a few other time series icons and repeat steps 2 through 4 to apply the template manually.
Apply a Plot Template Automatically
It is easy to apply a plot template manually, but it could take a considerable amount of effort if there are a lot of plots that you want to apply the template too. You will now learn how to apply a plot template automatically within the CAVI.
- Close all open plots.
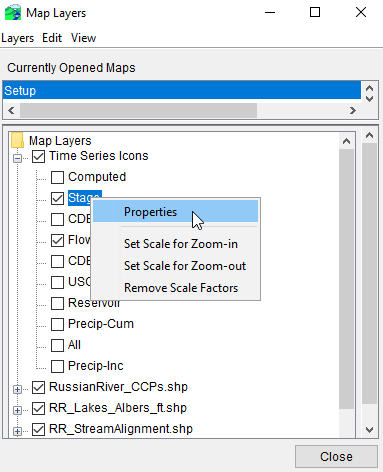
- From the Setup tab, select Map Layers from the Maps menu to open the Map Layers dialog.
- Expand the Time Series Icons layer, right-click on Stage, and select Properties.

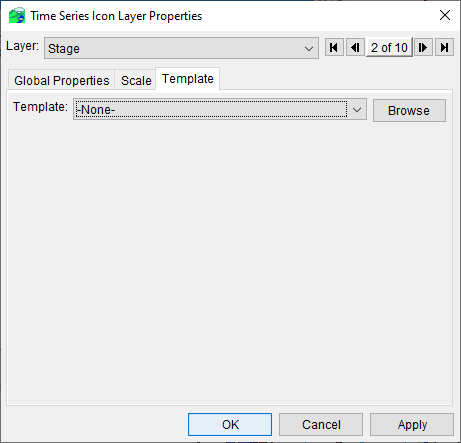
- Click the Template tab.

- the Browse button on the dialog, and select the template file.
- Choose Flow from the Layer drop-down menu at the top of the dialog and apply the template file.
- Click OK button on the dialog to close the Map Layers dialog.
- Save the watershed.
- Switch to the Visualization tab and select Plot from one of the time series icons. .
- Close all open plots.
Insert a plot into a Microsoft Word Document
- Open Microsoft Word and create a new blank document.
- Switch to the CAVI, and open the Calpella plot again.
- Save the plot as an image file by selecting Save As from the File menu.
- Enter the file name C:\CWMS_Class\plot and select .png as the file type.
Import the image file by selecting Insert → Picture from the ribbon control within Word (image file name C:\CWMS_Class\plot.png).