Importing Individual Models
The user can import models built externally into an HEC-WAT watershed. To ensure a seamless transition, the models must originally be developed with all data stored internally to the model itself. For instance, within HEC-HMS, data sources typically live in the data folder of the HMS project; if inputs such as tables or grids are stored externally to the HMS project directory, the import will likely lose connections to that data.
The plugins for the applications manage the import process and each plugin development team manages how data is imported. There are slight variations between the processes, but they largely follow the same workflow. In general, the user should follow these steps:
- Ensure all data is internally referenced (i.e. all stored within the individual model directory) prior to importing into HEC-WAT.
- Ensure the individual model compute runs externally to HEC-WAT prior to importing into HEC-WAT.
- Create a basic HEC-WAT study and import the model into HEC-WAT.
- From the HEC-WAT Edit menu, or the Programs toolbar, open the native model interface and open the imported model (should automatically open the saved model from the HEC-WAT project directory) and run the compute in the HEC-WAT project directory. Save the model and close the native model interface.
- From HEC-WAT, link the models and run as a system for a deterministic event and evaluate outputs for consistency.
Note
To complete Step 5, users must create an analysis period and a simulation before the models can be linked (from the Model Linking Editor) and computed.
Import an HEC-ResSim Model
There are two options when importing an HEC-ResSim model. The first option is to import the entire HEC-ResSim watershed. The second option is to import an HEC-ResSim alternative.
Note
When building an HEC-WAT watershed that includes an HEC-ResSim model, it is recommended that the user import the HEC-ResSim watershed before any of the other models such HEC-HMS or HEC-RAS. The HEC-ResSim model contains the basic building block elements for an HEC-WAT study - a stream alignment, common computation points (CCPs), and the reservoirs necessary to model the study area. HEC-ResSim models are very much tied to the stream alignment, and any slight changes to the stream alignment can cause incongruent behavior in HEC-ResSim.
Import an HEC-ResSim Watershed
To import an HEC-ResSim watershed:
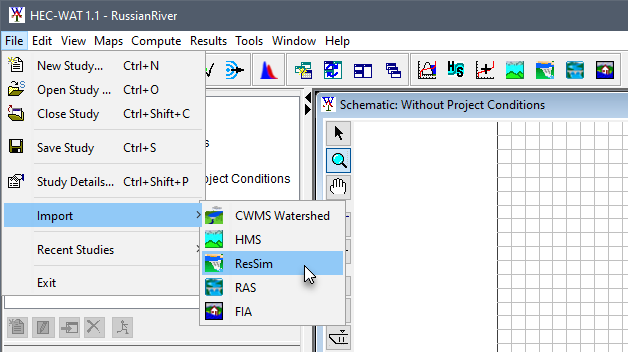
- Select Import from the File menu, and click ResSim.
- The Import Type message window opens.

- If the HEC-WAT study does not have any of the basic information (i.e., stream alignment, CCPs, etc.), select the Watershed option. This imports everything from the HEC-ResSim model. If the HEC-WAT study already has a stream alignment and common computation points, select import by Alternative.
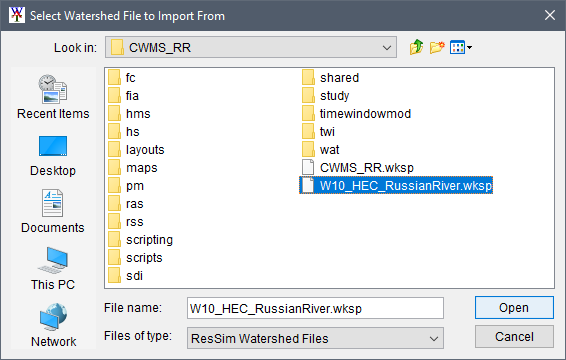
- Selecting Watershed elicits the Select Watershed File to Import From. Browse to the folder that contains the HEC-ResSim model and select the HEC-ResSim watershed file (.wksp). Click on the "wksp" file and click Open to import the watershed and close the Select Watershed File to Import From browser.
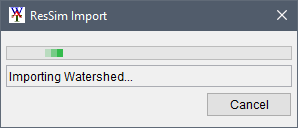
- The ResSim Import window shows the progress of the HEC-ResSim import.
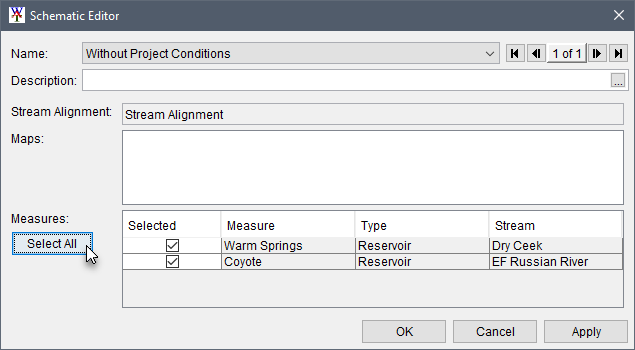
- When the import process is complete and the HEC-WAT Schematic Editor appears, click Select All in the Measures area of the Schematic Editor. All of the reservoirs listed in the table are now selected. Click OK to import all reservoirs and close the Schematic Editor.
- The imported stream alignment, common computation points, reservoirs, and any available map layers from the HEC-ResSim model display in the HEC-WAT Schematic Map Window. For all of the map layers to appear, close and re-open the Schematic Map Window. To re-open the Schematic Map Window, from the Study Tree, from an Alternative folder (i.e., Without Project Conditions), double-click on a schematic (i.e., Schematic:Without Project Conditions), and the Schematic Map Window will appear in the Desktop Area of the HEC-WAT main window. The importing of an HEC-ResSim model has completed.
Import an HEC-ResSim Model Alternative
The user can import an HEC-ResSim model alternative at any time in the WAT project setup. To import an HEC-ResSim model alternative:
From the HEC-WAT main window, point to Import from the File menu, and click ResSim.
The Import Type message window opens.
- If the HEC-WAT study does not have any of the basic information (i.e., stream alignment, CCPs, etc.), select the Alternative option. This imports only a specified HEC-ResSim model alternative. If the HEC-WAT study already has a stream alignment and common computation points, select import by Watershed.
- The Import Alternative Wizard - Step 1 of 7 opens.

- From the Watershed File box click
 and an Open File bowser window opens.
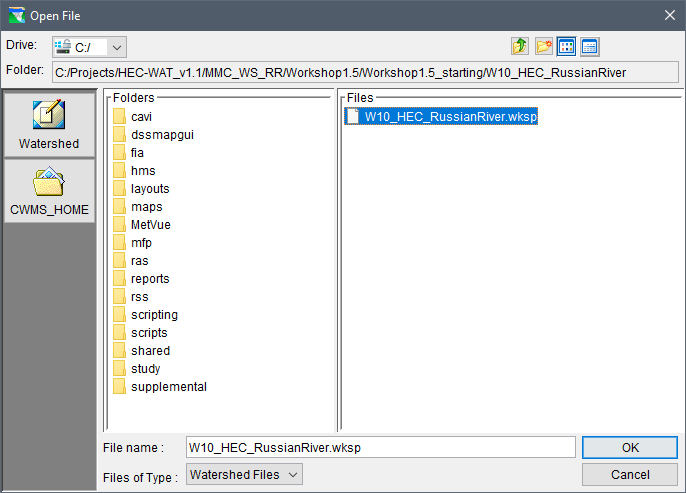
- Navigate to the folder containing the Watershed File (*.wksp) of interest, select the "wksp" file and click OK. The Open File browser window closes and the path to the selected file displays in the Watershed File box. Click Next.
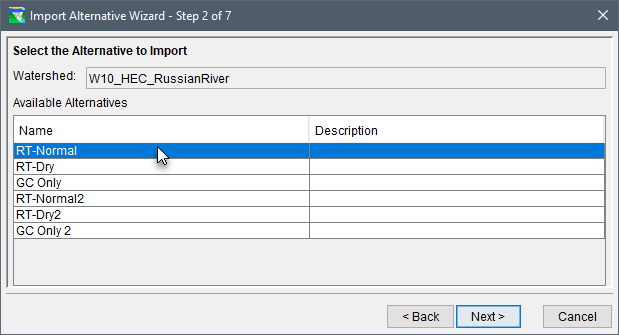
- From the Import Alternative Wizard - Step 2 of 7, from table of Available Alternatives, select the alternative name of interest (e.g., RT-Normal). Click Next.
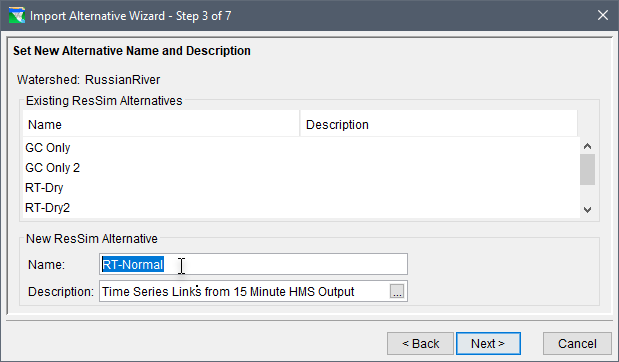
- From the Import Alternative Wizard - Step 3 of 7, the Existing ResSim Alternatives panel display the list of model alternatives currently in the WAT project. From the New ResSim Alternative panel, enter the name of the new alternative. Enter or modify the description. Click Next.
- Alternatively, keep the name of the new alternative if overwriting an existing alternative with the same name. In this case, click Next and a Duplicate Name message dialog opens. Click Yes to confirm and overwrite the existing HEC-ResSim model alternative.

- Alternatively, keep the name of the new alternative if overwriting an existing alternative with the same name. In this case, click Next and a Duplicate Name message dialog opens. Click Yes to confirm and overwrite the existing HEC-ResSim model alternative.
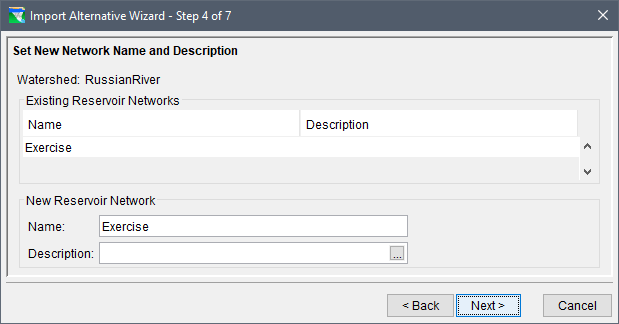
- From the Import Alternative Wizard - Step 4 of 7, the Existing Reservoir Networks panel display the list of reservoir networks currently in the WAT project. From the New Reservoir Network panel, enter the name of the new network. Enter or modify the description. Click Next.
- Alternatively, keep the name of the new network if overwriting an existing network with the same name. In this case, click Next and a Duplicate Name message dialog opens. Click Yes, to confirm and overwrite the existing reservoir network.
- The Import Alternative Wizard - Step 5 of 7, provides an table displaying all of the elements in the selected HEC-ResSim model alternative's reservoir network. Review the To Stream column to confirm or correct the automatically selected stream alignment names (e.g., Russian River stream is selected for Dry Creek Conf). In other words, the import wizard selects the stream name contained in the WAT project's stream alignment that is the closest match to the name of the stream in the model alternative's reservoir network.
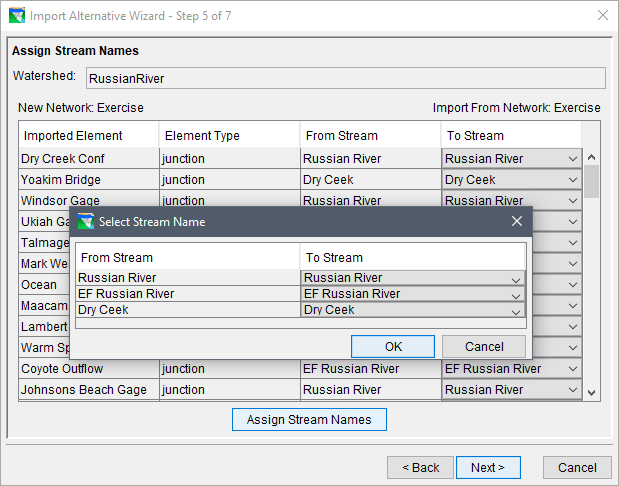
- Alternatively, click the Assign Stream Names to open the Select Stream Name dialog box. From the To Stream match the stream names in the model alternative's reservoir network with the stream names in the WAT project's stream alignment. Click OK to close the Select Stream Name dialog box and return to the import wizard.
- Click Next.
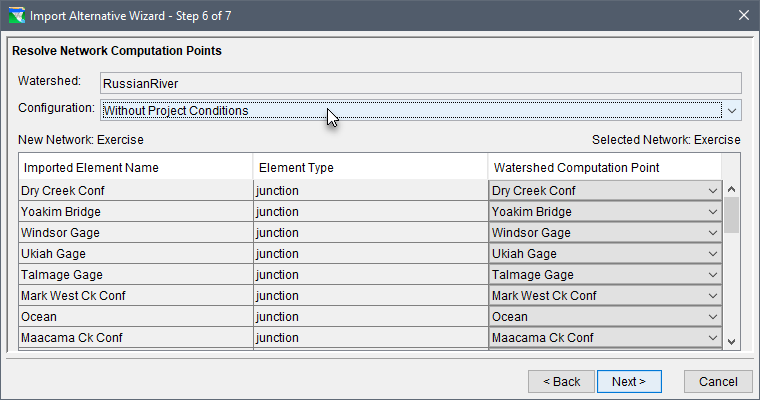
- From the Import Alternative Wizard - Step 6 of 7, select the appropriate network configuration from the Configuration list (e.g., Without Project Conditions). The provided table displays the elements in the selected HEC-ResSim model alternative's reservoir network to be identified as a watershed common computation point (CCP). Review the Watershed Computation Point column to confirm or correct the automatically selected CCP names (e.g., Dry Creek Conf CCP is selected for Dry Creek Conf). In other words, the import wizard selects the CCP name contained in the WAT project's schematic that is the closest match to the name of the element in the model alternative's reservoir network.
- Click Next. The Import Alternative Wizard - Step 7 of 7 displays a summary of the selections made for importing the HEC-ResSim alternative. The summary includes the stream alignment mapping summary, configuration mapping summary, and a list of elements and CCPs not mapped or assigned.
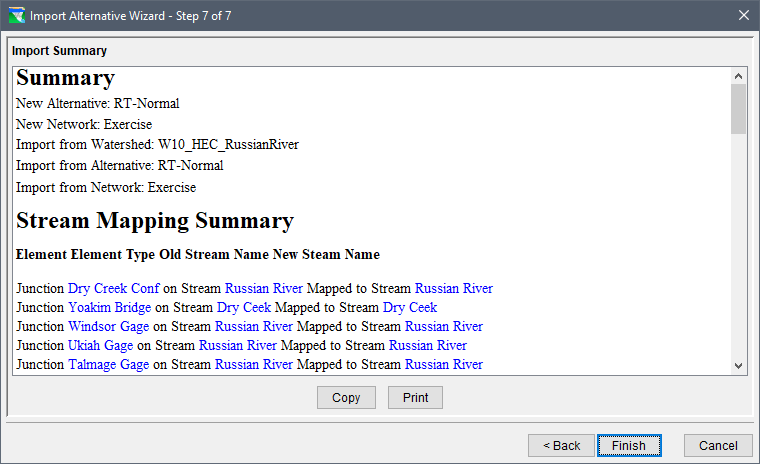
- Use the summary provided to double-check the mapping completed in Step 5 and 6 of the import wizard was completed correctly.
- To copy the text displayed in Step 7 of the import wizard, select all of the desired text to copy (e.g., CTRL+A) and click Copy. Copied text can be pasted into external software (e.g., Microsoft Word®).
- Click Print to print a copy of the summary.
- When ready to import the selected alternative, click Finish. A Continue with Import message dialog opens requesting confirmation to proceed with the import to create a new network and HEC-ResSim alternative. Click Yes to continue with the import. Save the HEC-WAT study.
Import an HEC-HMS Model
- From the HEC-WAT main window, from the File menu point to Import and click HMS from the sub-menu.
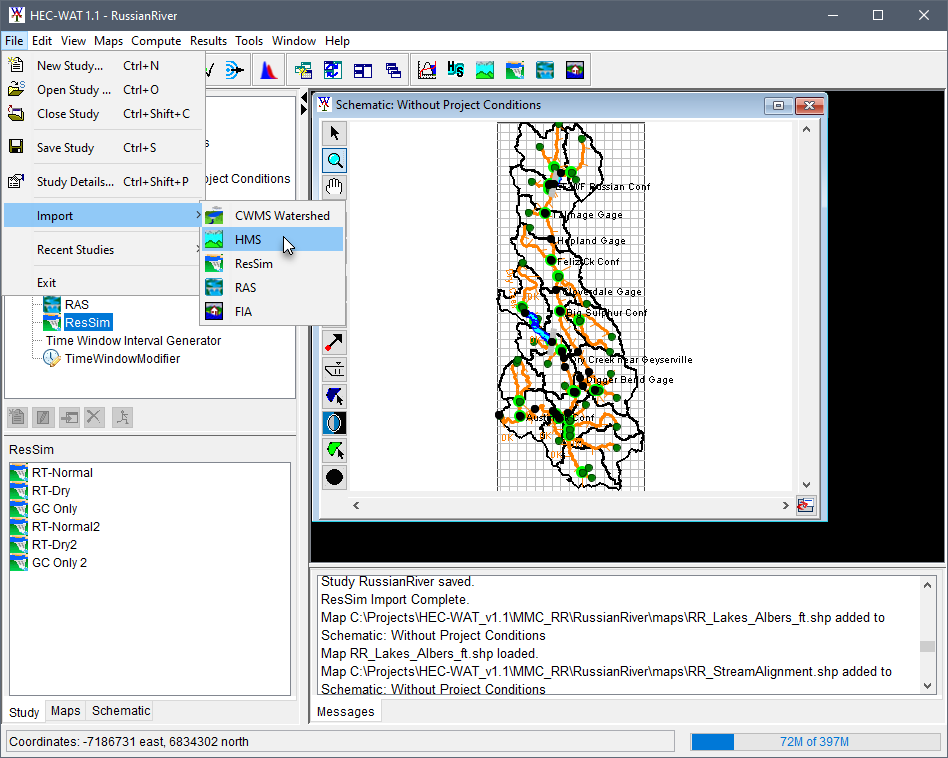
- The HEC-HMS plugin elicits the main HEC-HMS application and the Select Project File dialog.
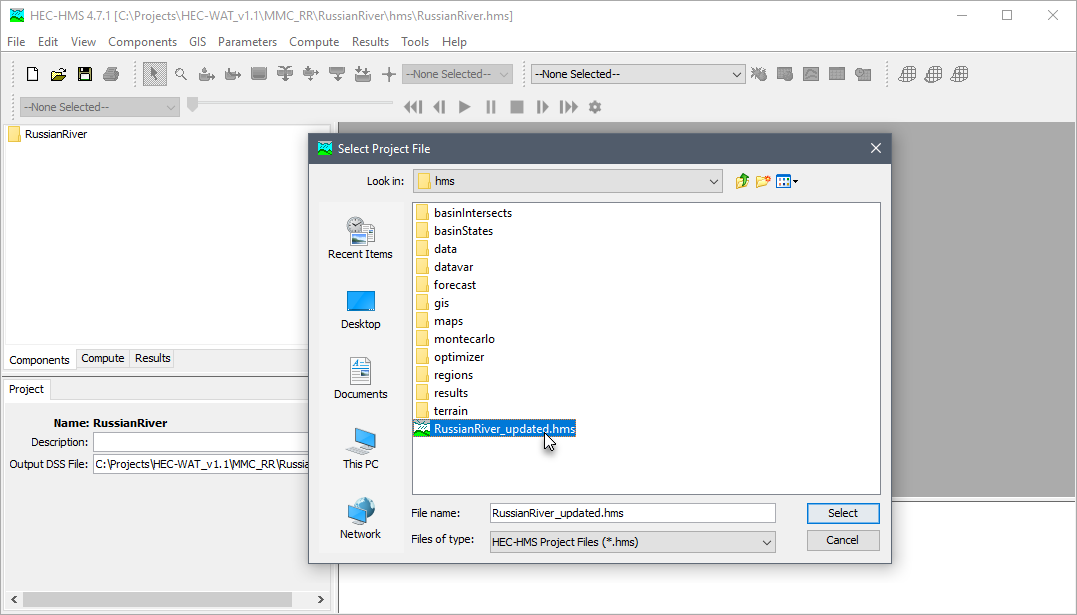
- Browse to the folder that contains the HEC-HMS model, select the HEC-HMS project file (*.hms). and the HEC-HMS project filename appears in the File name box. Click Select.
- By default, when an HEC-WAT study is created HEC-HMS project files are generated and saved in the created hms sub-folder. When the HMS watershed component import process finds that an HEC-HMS project already exists, then a Replace Existing HEC-HMS Project message dialog opens.

- If the imported HEC-HMS model was created using a previous version of HEC-HMS, a Convert HEC-HMS Project message dialog opens (sometimes this occurs behind the HEC-WAT main page, press Alt+Tab if the window does not appear in front of HEC-WAT). Click Convert Project, the Convert HEC-HMS Project message dialog closes, and the import of the HEC-HMS model continues.

- The import process begins (the import could take a few seconds and depends on the number of files being copied to the HEC-WAT project directory and the size of the files). The import is finished when the study tree pane in the HEC-HMS main window contains a study tree. Close HEC-HMS, and the HEC-HMS model import is completed.
If a HEC-HMS project was created in a later version of the HEC-HMS software than the version include in HEC-WAT, the HEC-HMS project cannot be opened without first updating the HEC-HMS software version in HEC-WAT.
Import an HEC-RAS Model
- Select Import from the File menu, and click RAS to elicit the Select RAS project to import from browser.
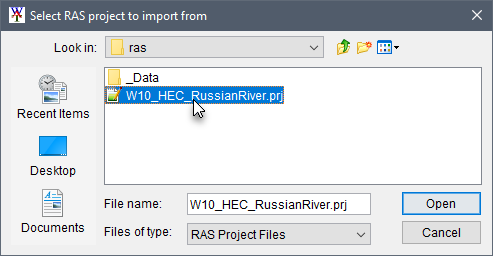
- Browse to the folder that contains the HEC-RAS model to be imported and select the HEC-RAS project file (.prj). The HEC-RAS project filename will appear in the File name box, click Open to begin import and close the browser.
The Importing window opens; when the HEC-RAS model import is complete this window closes. The HEC-RAS model import is completed.

Note
The HEC-RAS import does not include copying external files, such as terrain files and HEC-DSS files containing boundary conditions, to the "ras" folder within the HEC-WAT study directory. The user will need to determine how to manage these files, including whether to make them local to the HEC-WAT study directory in order to easily copy the study from one computer to another.
Import an HEC-FIA Model
- Select Import from the File menu and click FIA to elicit the Import Alternatives dialog box.
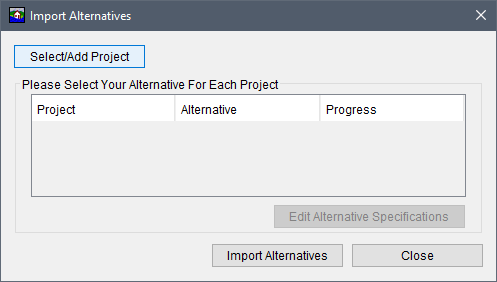
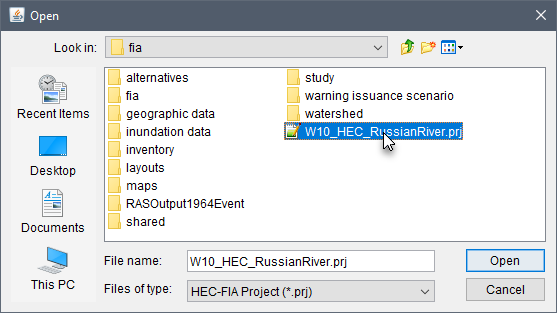
- Click Select/Add Project to elicit the Open browser. Browse to the folder that contains the HEC-FIA model and select the HEC-FIA project file (.prj). The HEC-FIA project filename will appear in the File name box (Figure 8.13), and click Open to begin the import process and close the browser.
- The Import Alternatives dialog box displays a table listing existing projects. From the Alternative column select the HEC-FIA alternative to import.
- Repeat Steps 2 and 3 to add additional projects to the table for importing additional model alternatives. In other words, if the HEC-FIA project contains two alternatives, then the project must be added twice to the table so that both alternatives can be selected.
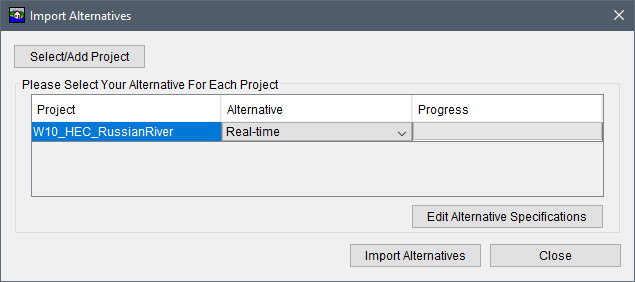
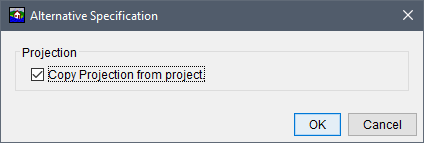
- From the Import Alternatives dialog box, click Edit Alternative Specifications, and the Alternative Specification dialog box opens. Copy Projection from project should by default be checked, click OK.
- Click Import Alternatives and the import will begin, progress is reported in the Progress column of the table. When the import is complete an Information window opens, click OK.
- From the Import Alternatives dialog box, click Close. The HEC-FIA model alternative has been imported.