Model Linking Editor
Opening the Model Linking Editor
Open the Model Linking Editor from the HEC-WAT main window by clicking the ![]() icon from the WAT Tools toolbar, the Edit menu, or from an individual simulation's Tools shortcut sub-menu. Alternatively, open the editor from the Alternative and Simulation Manager by clicking the
icon from the WAT Tools toolbar, the Edit menu, or from an individual simulation's Tools shortcut sub-menu. Alternatively, open the editor from the Alternative and Simulation Manager by clicking the ![]() icon from the toolbar or from the Edit menu.
icon from the toolbar or from the Edit menu.
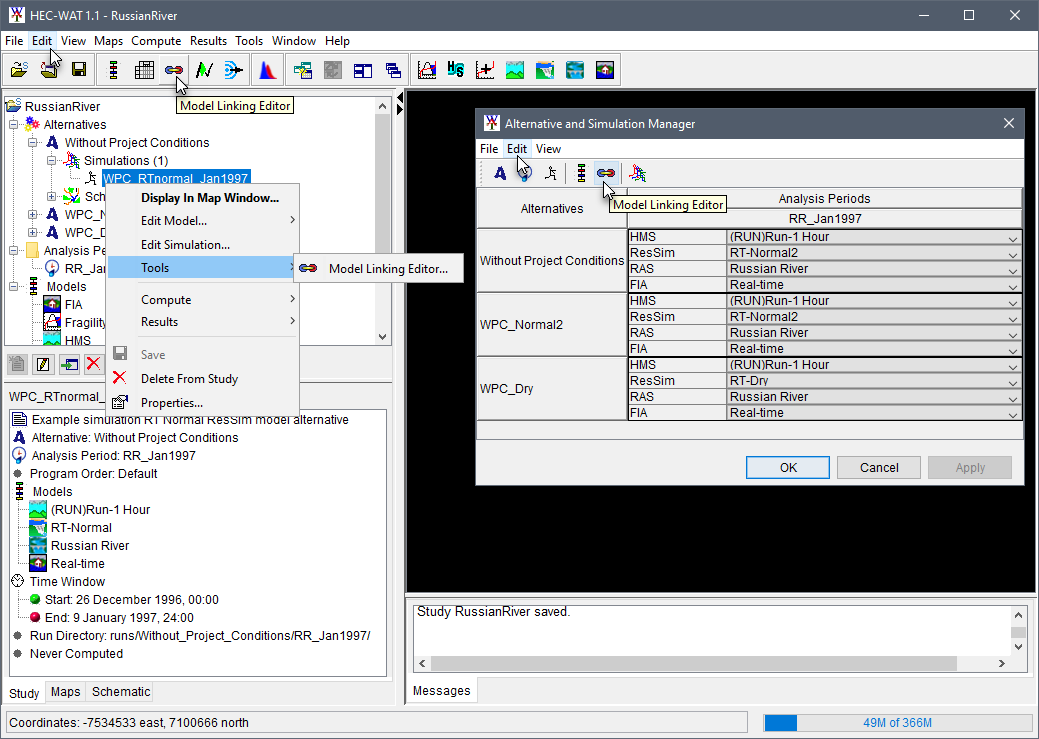
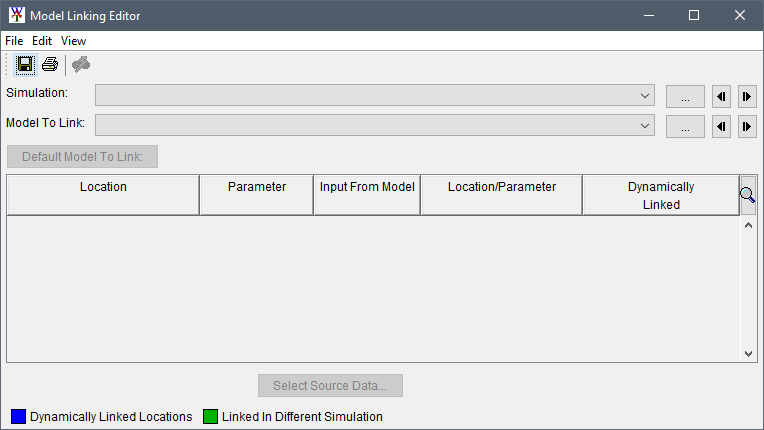
Unless the Model Linking Editor is opened from an individual simulation's Tools shortcut sub-menu or opened with a simulation open in the active map window, the Simulation list will be blank. Otherwise, the Simulation list displays the pre-selected simulation.
Basic Model Linking
The following steps illustrate how to use the Model Linking Editor.
- From the WAT Tools toolbar in the HEC-WAT main window, click
 to open the Model Linking Editor.
 - From the Model Linking Editor, select an HEC-WAT simulation from the Simulation list.

- Select a model alternative for linking. From the Model Linking Editor choose a model from the Model To Link list (e.g., RAS-Russian River).
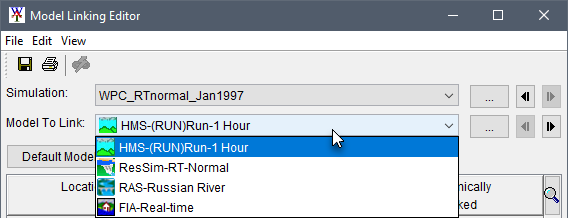
- The Model Linking Editor table updates to display all of the locations from the HEC-RAS model alternative that will require model input from other model alternatives in the HEC-WAT simulation. The initial linking displayed in the Model Linking Editor will be what is defined in the base HEC-ResSim model. For example, the image below, the HEC-ResSim model alternative is linked to a DSS File. It is typical that the linkages require updates from the user to reflect the desired flow of data in a WAT simulation.
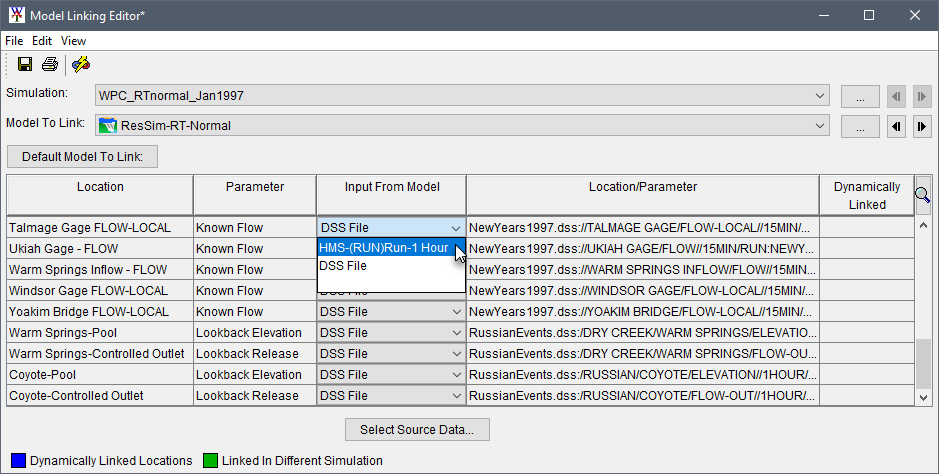
- The table allows each location to be managed individually; since most of the locations in the table will be linked to a single model alternative earlier in the program order, there is an option for the Default Model To Link. This option may be particularly helpful if there is a large number of locations that need to be linked.
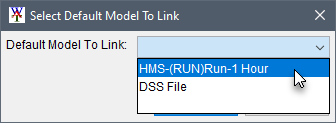
Default Model to Link - From the Model Linking Editor, click Default Model to Link, and the Select Default Model to Link dialog box opens.
- The choices in the Default Model to Link list are based on the program order that was selected for this simulation. In this example, the HEC-HMS software application was selected to compute before the HEC-ResSim software application. An additional option, "DSS File", allows the user to link locations to a DSS file. For this example, the user selects the HMS model alternative HMS-(RUN)Run-1 Hour. Click OK, and the Select Default Model to Link dialog box closes.
- A Confirm Input From Model changing to window appears, informing the user of the implications of their actions; click Yes. The Confirm Input From Model changing to window closes, and the Model Linking Editor now displays the proposed linking for the HEC-ResSim model alternative. These locations should be confirmed by the user.

- The Location/Parameter column on the right side of the table populates based on location name and location/parameter name matches. This activity is simple if names in the models agree; if they do not, carefully choose the appropriate links for each data location.
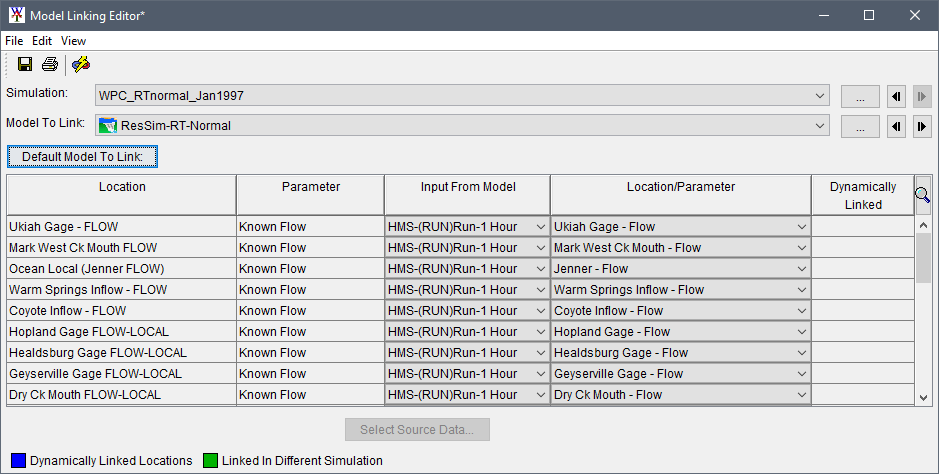
- If certain locations in the selected model to link require input from a different model then the default model, users need to select the appropriate model.
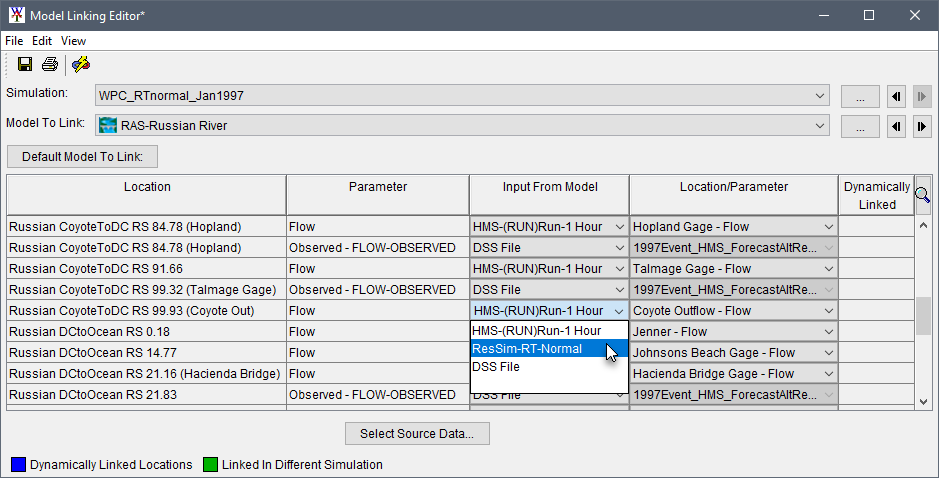
Define Linkages for Individual Locations - Some model alternatives require input from a variety of different sources, which in turn requires defining linkages for individual locations. For example, in the HEC-RAS example below, there are locations in the HEC-RAS model alternative linking that need to be linked to an HEC-ResSim model alternative and other locations that need to be linked to a DSS File. To link to the HEC-ResSim model alternative, from the Model Linking Editor table, locate one of the locations (Russian CoyoteToDC RS 99.93 (Coyote Out)). From the the Input Model column, then select the HEC-ResSim model alternative - ResSim-RT-Normal.
- Once the linking is finished for the HEC-RAS model alternative, from the Model Linking Editor use the save button
 to save the linking.
The examples for the HEC-ResSim model alternative and the HEC-RAS model alternative describe the basic steps necessary to be able to perform the linking for the model alternatives associated with the selected simulation.
Note
HEC-WAT attempts to choose the correct linking based on information from the individual model alternatives and locations that have been identified (i.e., element names, common computation points). The user should carefully review all linkages to make sure the right choices have been made.
Additional features of the Model Linking Editor are described in the following sections: